Need an accelerometer, a gyroscope, or a magnetic field sensor for your project? The built-in LSM9DS1 IMU has them all!
You might have read about the new Arduino Nano 33 series and its real-time and multithreading capabilities. However, there are more useful features to that board!
One such feature is the built-in LSM9DS1 IMU that contains an accelerometer, a gyroscope, and a magnetic field sensor.
In this article, I’ll show you how you can use the IMU without any additional hardware.
Installing the LSM9DS1 IMU Library
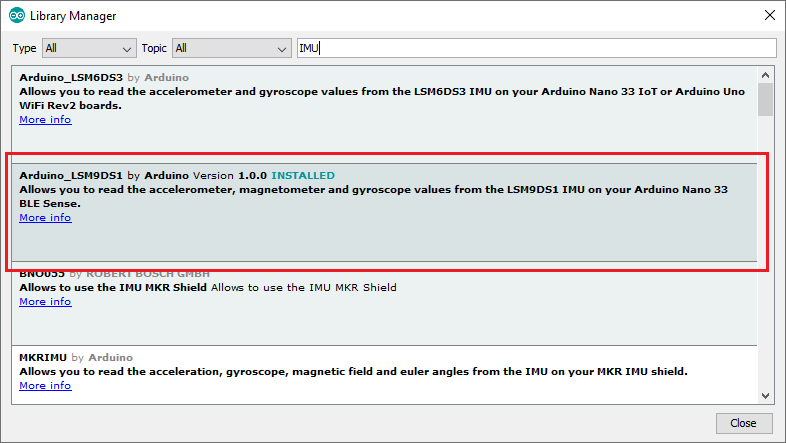
But before you can begin, you need to install the official Arduino library for the built-in sensor. For that purpose, open the library manager in the Arduino IDE by navigating to “Sketch”, then click on “include library”, and choose “manage libraries”. A new window will pop up. In that window, search for IMU and install the highlighted package:
Next, include the installed package in your Arduino sketch if you want to use the IMU:
#include <Arduino_LSM9DS1.h>
Using the Accelerometer
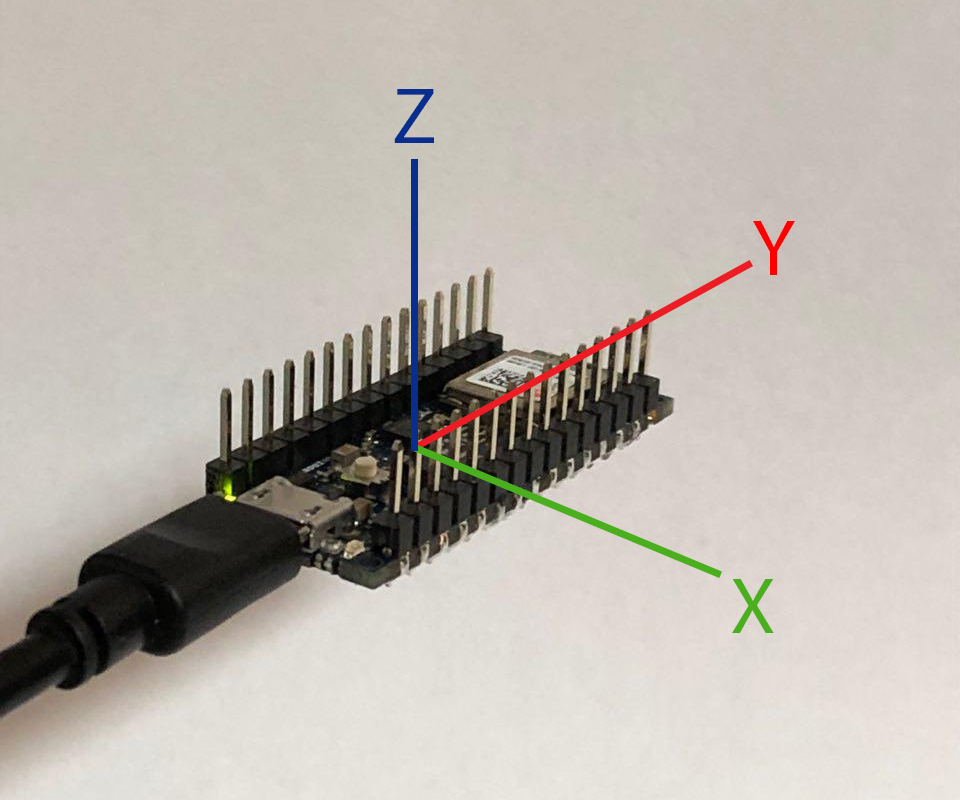
The accelerometer of the IMU can be used to measure the device’s orientation. The following image illustrates what movement of the Arduino corresponds to which measured axis of the accelerometer.
How the movement of the Arduino corresponds with the X-, Y-, and Z-axis of the accelerometer
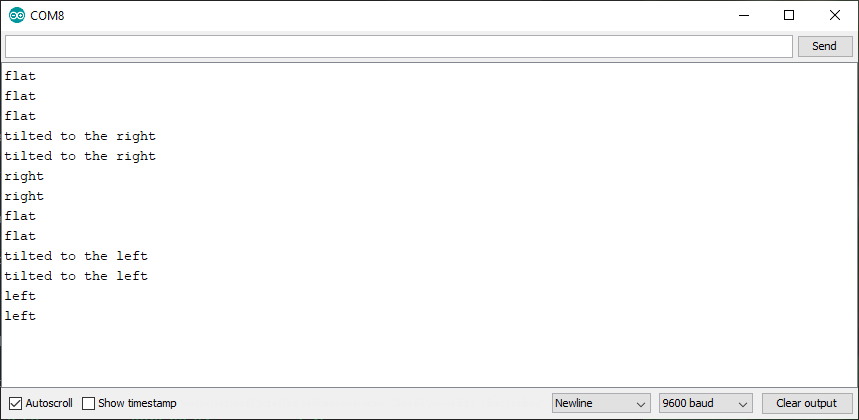
To test the accelerometer, I wrote a small test script that can detect whether the Arduino is placed on a flat surface or if it’s tilted to either side. As you can see, that script will have to read the Y-axis of the accelerometer to determine the rotation.
When the device is placed on a flat surface, the measured value is zero. That also holds true when the Arduino is upside down. The following code snippet shows what’s inside the loop method. The complete example can be downloaded at the end of this article.
float x, y, z, delta = 0.05;

  if (IMU.accelerationAvailable())
  {
    IMU.readAcceleration(x, y, z);

    if(y <= delta && y >= -delta)
          Serial.println("flat");
    else if(y > delta && y < 1 - delta)
          Serial.println("tilted to the left");
    else if(y >= 1 - delta)
          Serial.println("left");
    else if(y < -delta && y > delta - 1)
          Serial.println("tilted to the right");
    else
          Serial.println("right");
}
As you can see, I didn’t have to interface any external hardware. All the calls to the IMU are short, which helps to keep your code clean.
I used a delta value to accommodate for eventual inaccuracies that could occur while reading the sensor’s value. You can tweak that value to make the Arduino react to changes in its orientation earlier.
The output of this sketch looks like this:
Using the Gyroscope
As you saw with the accelerometer, interfacing the IMU’s accelerometer is a simple process on the Nano 33 BLE boards. Luckily, it’s equally as easy to read other sensor values. The gyroscope, for example, can be used to implement gesture detection:
float x, y, z, delta = 400;

  if (IMU.gyroscopeAvailable())
  {
    IMU.readGyroscope(x, y, z);

    if(y < -delta)
          Serial.println("Flicked down");
    else if(y > delta)
          Serial.println("Flicked up");
  }
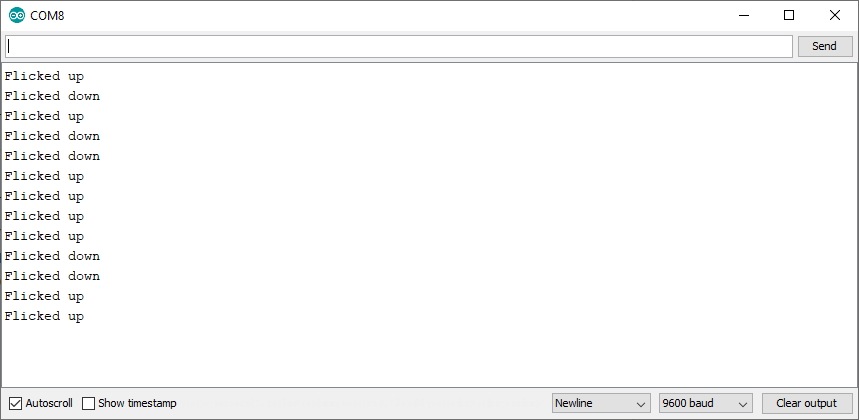
This example script detects when you quickly move the Arduino up or down and reacts accordingly. The smaller you make the delta value in that example, the earlier the Arduino will react to a movement.
The output of this program looks like this:
Detecting a Magnetic Field
The LSM9DS1 can also detect magnetic fields. The library you downloaded earlier contains a function for that purpose. You can get the magnetic field, measured in micro Tesla, by calling the readMagneticField function. Calling this function allows you to generate a chart that displays the measured values.
A chart displaying the measured values from the readMagneticField function
The Built-in IMU is an Easy Setup
The built-in LSM9DS1 IMU features a lot of different useful sensors and it’s easy to interface them. The only thing you’ll have to do is to install the official library to utilize the sensor’s features. I was not only impressed by the various sensors this IMU features but also by their accuracy. The gyroscope and accelerometer precise detect even the slightest movement.