Learn how you can connect a proximity sensor to an Arduino UNO for mobile applications and various controls.
This article discusses how to connect and use a VCNL4010 proximity/light sensor with your Arduino Uno. The use of proximity/light sensors is important in a variety of applications, including mobile devices and industrial controls.
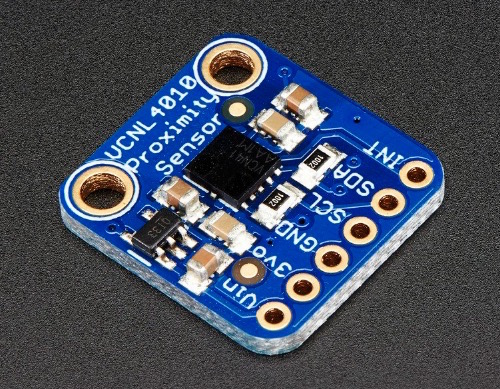
The VCNL4010 sensor is a fully integrated proximity and ambient light sensor. It is designed for short distance detection — no more than 200 mm — and works best at a distance of about 10 - 150 mm. It is easy to use with any microcontroller that has I2C capability. It is 5V compliant, so you can use it with 3.3V or 5V with no risk of damage.
The VCNL4010 proximity sensor. Image courtesy of Adafruit.
Choosing the Right Sensor
In order to decide the right sensor for your application, there are at least three things you should consider:
- First is accuracy. It is important to get a sensor that can measure how close the reading is to the true distance.
- Second, the smallest reading or change in readings that can be reported, or what we call the resolution.
- Lastly, the level of precision or the smallest reading that can be taken repeatedly and reliably.
Now all these three wouldn't be enough if you wouldn't match it properly to the application you're planning to use it for. If the sensor would be used in an application that would only determine level of liquid, object detection, or distance measurement, perhaps, an Ultrasonic sensor would be a better choice. But if the application involves, light detection or measurement of heat emission, an infrared or proximity sensor should work well.
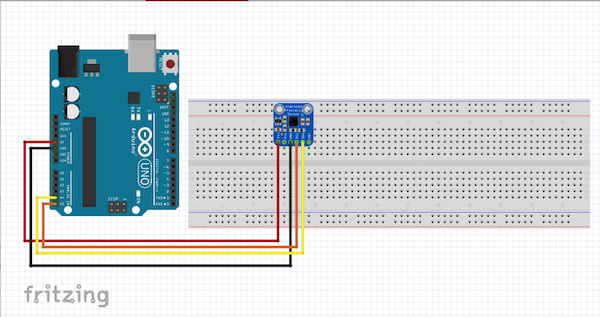
Circuit Diagram
Make the following connections between the sensor and the Arduino Uno:
- Arduino Board 5V to Sensor Vin
- Arduino ground / GND to sensor ground / GND
- A5(SCL) to sensor SCL
- A4(SDA) to sensor SDA
VCNL4010 Power Pins
The VCNL4010 has three power pins:
- Vin
- 3Vo
- GND
Vin is the power pin. The VCNL4010 uses 3 VDC for logic, so a voltage regulator is included on the board to take 3-5 VDC and safely convert it down. Power the board with the same power as the logic level of your microcontroller. 3Vo is the 3.3V output from the voltage regulator. GND is the common ground.
Data Pins Explanation
The VCNL4010 also has three data pins:
- SCL
- SDA
- INT
SCL is the I2C clock pin and it connects to the microcontrollers I2C clock line. SDA is the I2C data pin and it connects to your microcontrollers I2C data line and it an use 3V or 5V logic. INT is the interrupt output used to give you an alert when the sensor detects something.
Installing the Library
To start using the sensor, you will need to download the VCNL4010 library. The library can also be downloaded using the Arduino Library Manager.
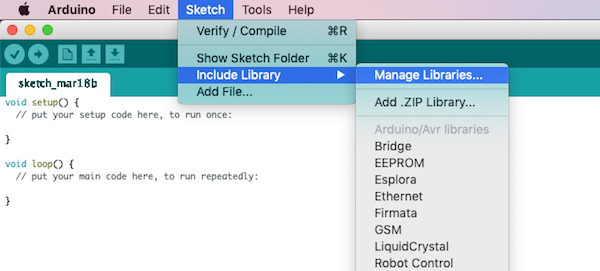
From the Arduino IDE, click Sketch > Include Library > Manage Libraries.
Navigate to "Manage Libraries" in Arduino IDE.
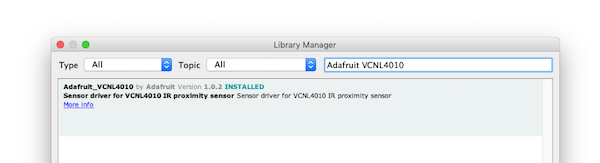
Type "Adafruit VCNL4010" and click Install.
Add the Adafruit VCNL4010 Arduino library.
Trying the Demo
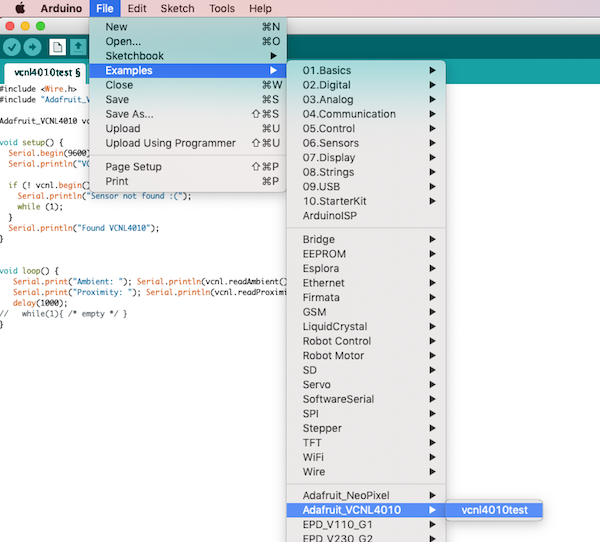
We are ready to test out our setup. Go to File > Examples > Adafruit_VCNL4010 > vcnl4010test and upload this to your Arduino.
Access the library to run the demo.
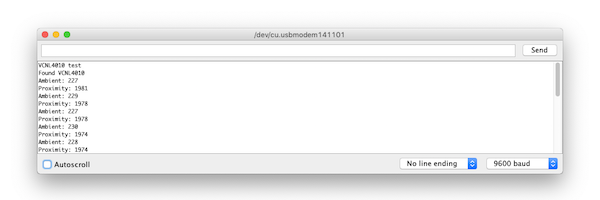
Open up the serial monitor at 9600 baud. You should see ambient light and proximity data printed out, showing that you have successfully connected your proximity sensor to your Arduino Uno.
This screen shows up with a successful connection.
NOTE: The values printed out are unitless. The numbers are higher the closer you are.
Similar Tutorials