Learn how to set up a servo-based pan-tilt camera stand with an Arduino Uno and a simple Joystick Module.
In this article, I will show you how to control dual servo SG90 motors in a pan-tilt camera stand with an Arduino Uno and a simple joystick module.
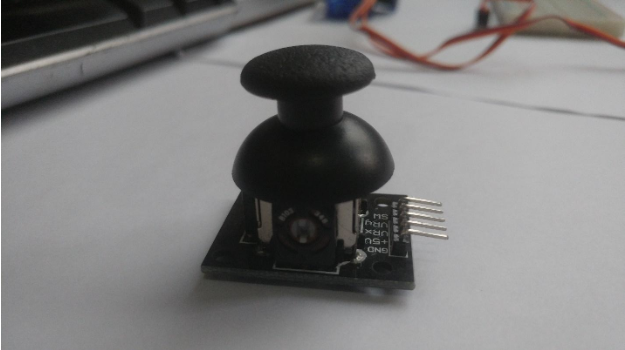
The Joystick Module
A joystick is one of the easiest ways to control a servo motor. While some tutorials require a motor shield or other extra things, this tutorial only requires basic peripherals. The joystick aka 'the thumbstick' is a cool control interface for a project, especially for robotics. The X and Y axes are two ~10k potentiometers that can control 2D movement by generating analog signals. There is also a push button that could be used for controlling other commands or movements.
The HC-SR04
In this tutorial, I am setting up the servo-controlled pan-tilt stand with an HC-SR04 ultrasonic sensor as an example. However, keep in mind that the stand can be used for sensors, cameras, and more!
Let’s Get Started
Collect Hardware
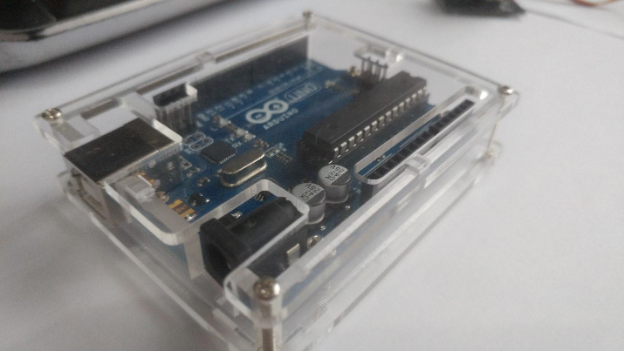
- Arduino UNO
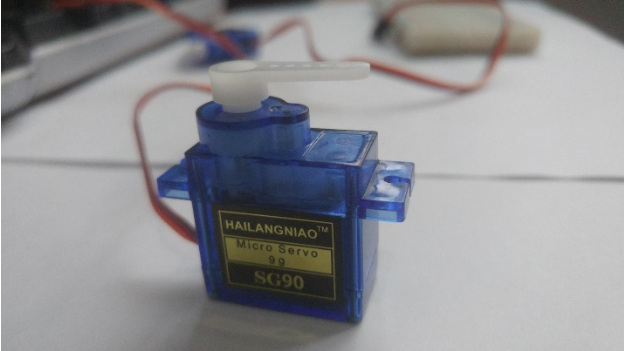
- 2 Servo Motors SG90
- Joystick Module
- Dual Servo Stand
- Some Jumper Wires
- HC-SR04
Assemble the dual servo stand first. I am using the pan/tilt bracket kit from Sparkfun.
Connecting the Hardware
Let’s start with the 2 servos. I am using a breadboard to make the connections easy.
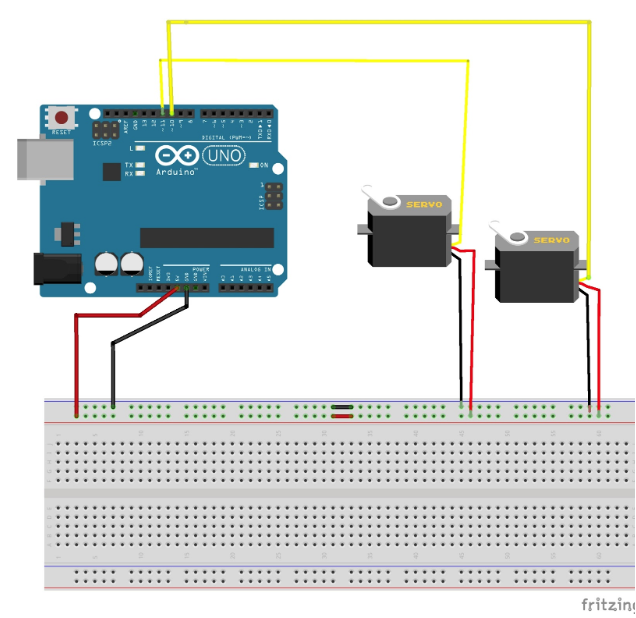
Connections for the servo motors and the Arduino Uno.
Up/Down Servo | Arduino | Right/Left Servo | Arduino |
|---|
Red Cable | 5V | Red Cable | 5V |
Black Cable | GND | Black Cable | GND |
Yellow or White Cable | PWM(4) | Yellow or White Cable | PWM(10) |
Follow the connection diagrams above and below to complete the connections.
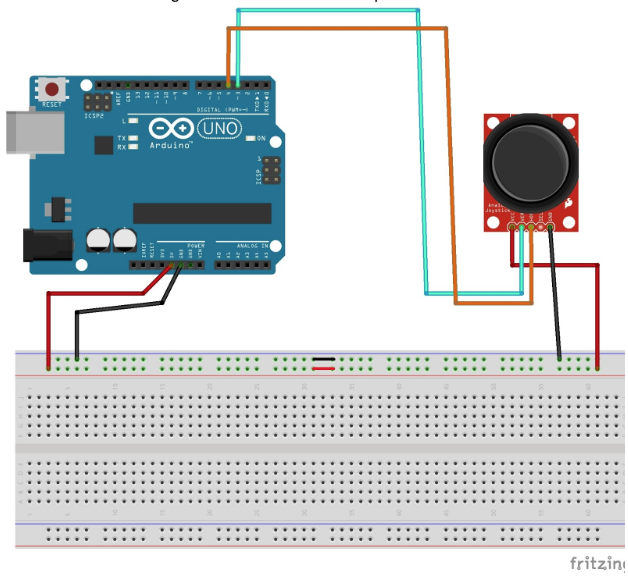
The connections for the joystick module and the Arduino Uno.
Joystick | Arduino |
|---|
5V | 5V |
GND | GND |
U/D U/D | Analog 4 |
L/R L/R | Analog 3 |
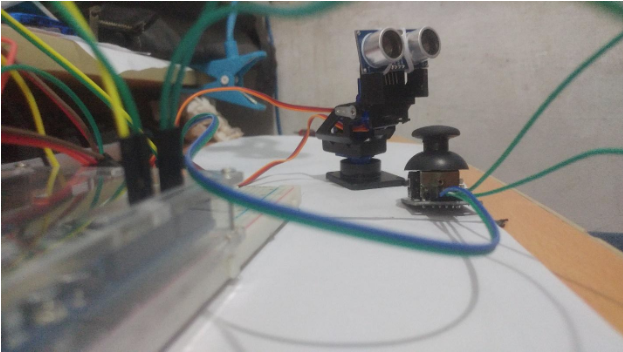
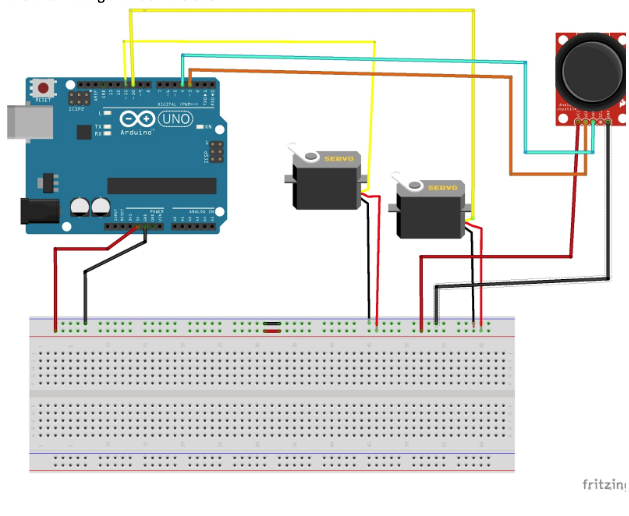
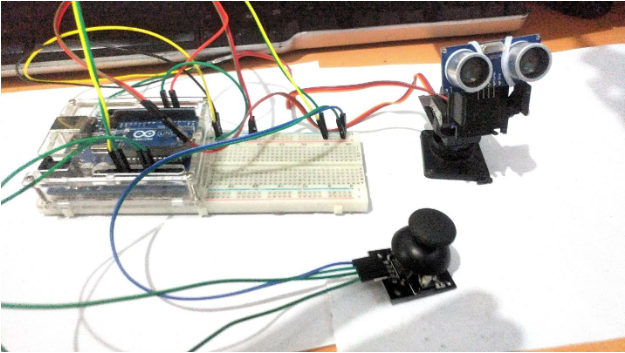
The final wiring will look like this:
The final project schematic.
Once everything is connected it will look like this!
Source Code
Copy and paste the following code to the Arduino software. Always test (compile) the code before uploading it to your Arduino board.
When you upload the code to the Arduino, the servos should not move until you use the joystick.
#include <Servo.h>

const int servo1 = 11;       // first servo
const int servo2 = 10;       // second servo
const int joyH = 3;        // L/R Parallax Thumbstick
const int joyV = 4;        // U/D Parallax Thumbstick

int servoVal;           // variable to read the value from the analog pin

Servo myservo1;  // create servo object to control a servo
Servo myservo2;  // create servo object to control a servo


void setup() {

  // Servo
  myservo1.attach(servo1);  // attaches the servo
  myservo2.attach(servo2);  // attaches the servo

  // Inizialize Serial
  Serial.begin(9600);
}


void loop(){

    // Display Joystick values using the serial monitor
    outputJoystick();

    // Read the horizontal joystick value  (value between 0 and 1023)
    servoVal = analogRead(joyH);
    servoVal = map(servoVal, 0, 1023, 0, 180);     // scale it to use it with the servo (result  between 0 and 180)

    myservo2.write(servoVal);                         // sets the servo position according to the scaled value

    // Read the horizontal joystick value  (value between 0 and 1023)
    servoVal = analogRead(joyV);
    servoVal = map(servoVal, 0, 1023, 70, 180);     // scale it to use it with the servo (result between 70 and 180)

    myservo1.write(servoVal);                           // sets the servo position according to the scaled value

    delay(15);                                       // waits for the servo to get there

}


/**
* Display joystick values
*/
void outputJoystick(){

    Serial.print(analogRead(joyH));
    Serial.print ("---");
    Serial.print(analogRead(joyV));
    Serial.println ("----------------");
}