In this tutorial, we introduce BlocklyDuino and show you how to get started by programming an Arduino!
STEAM education is gaining momentum around the world as a way to help students increase their critical thinking capability, learn through hands-on activities, and apply their knowledge in a comprehensive way.
This article belongs to the STEAM learners, young and old, who want to make cool Arduino projects but are unsure where to start, as they have no prior knowledge of C programming. There is a fun and easy way to grow that knowledge: by using BlocklyDuino to program an Arduino.
What is BlocklyDuino?
BlocklyDuino is a web-based programming editor for Arduino developed by Google and MIT. It uses graphical blocks to represent sets of code, including variables, loops, functions and more.
The key to BlocklyDuino’s success is that it allows users to apply programming concepts without having to worry about syntax or curly braces. For this reason, it is known as a helpful tool for introducing programming concepts to students.
How to Access BlocklyDuino
Users can work on BlocklyDuino directly online or by downloading the program to their desktop.
Let’s go through the steps for downloading and installing BlocklyDuino’s software onto a desktop.
Desktop Installation Steps
Start by navigating to BlocklyDuino’s GitHub and downloading the zip file. If you already have GitHub desktop installed, the software can be directly cloned by clicking Open in Desktop.
Download the ZIP file from BlocklyDuino’s GitHub.
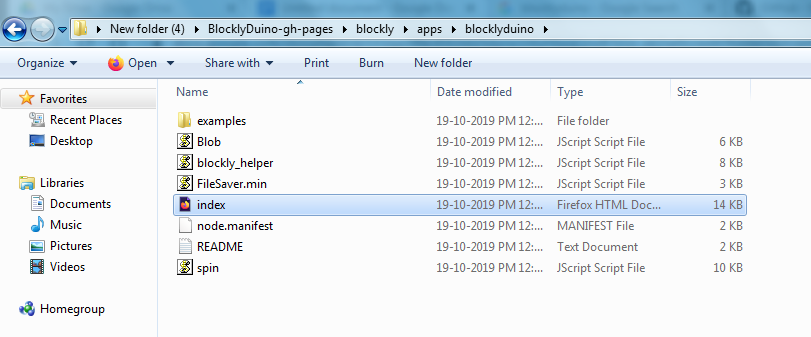
Extract the ZIP file in a folder, open it, and navigate to BlocklyDuino-gh-pages\blockly\apps\blocklyduino. Open the Index file in your browser (Google Chrome is recommended).
Extract the ZIP and open the Index file.
That’s it! You can now write and edit programs in BlocklyDuino. Now, let's dive into using the program.
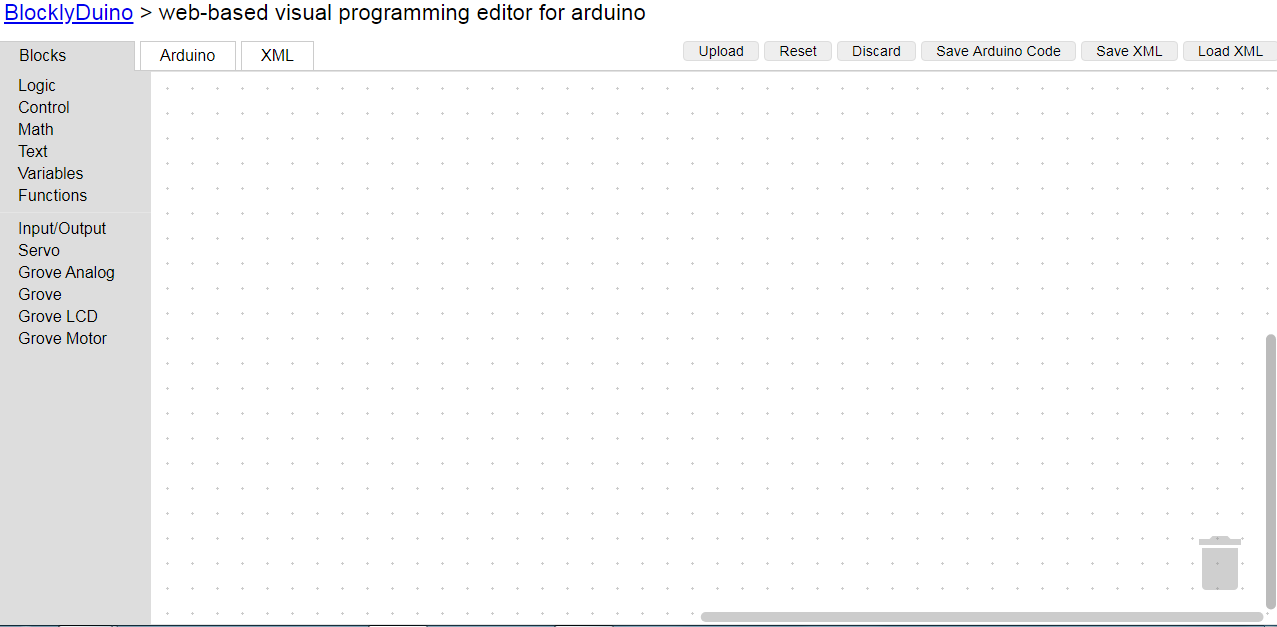
Using the BlocklyDuino Editor
The BlocklyDuino has three screens:
- Blocks
- Arduino
- XML
In the Blocks screen, you can write programs with the help of pre-made blocks. Meanwhile, the equivalent Arduino and XML code generates in their respective screens. Knowing how the three screens work, let’s start programming.
Test Program: LED Blinking
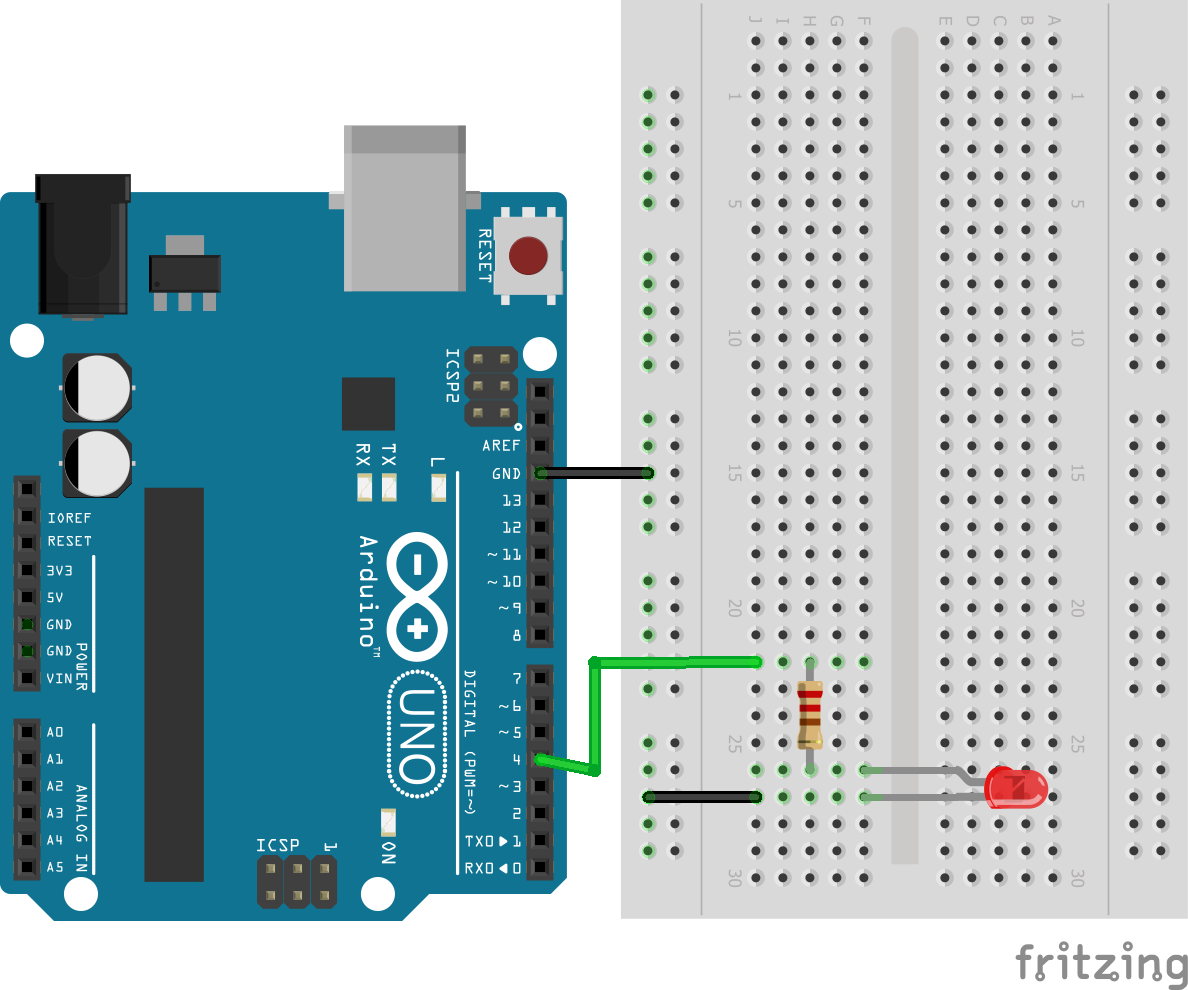
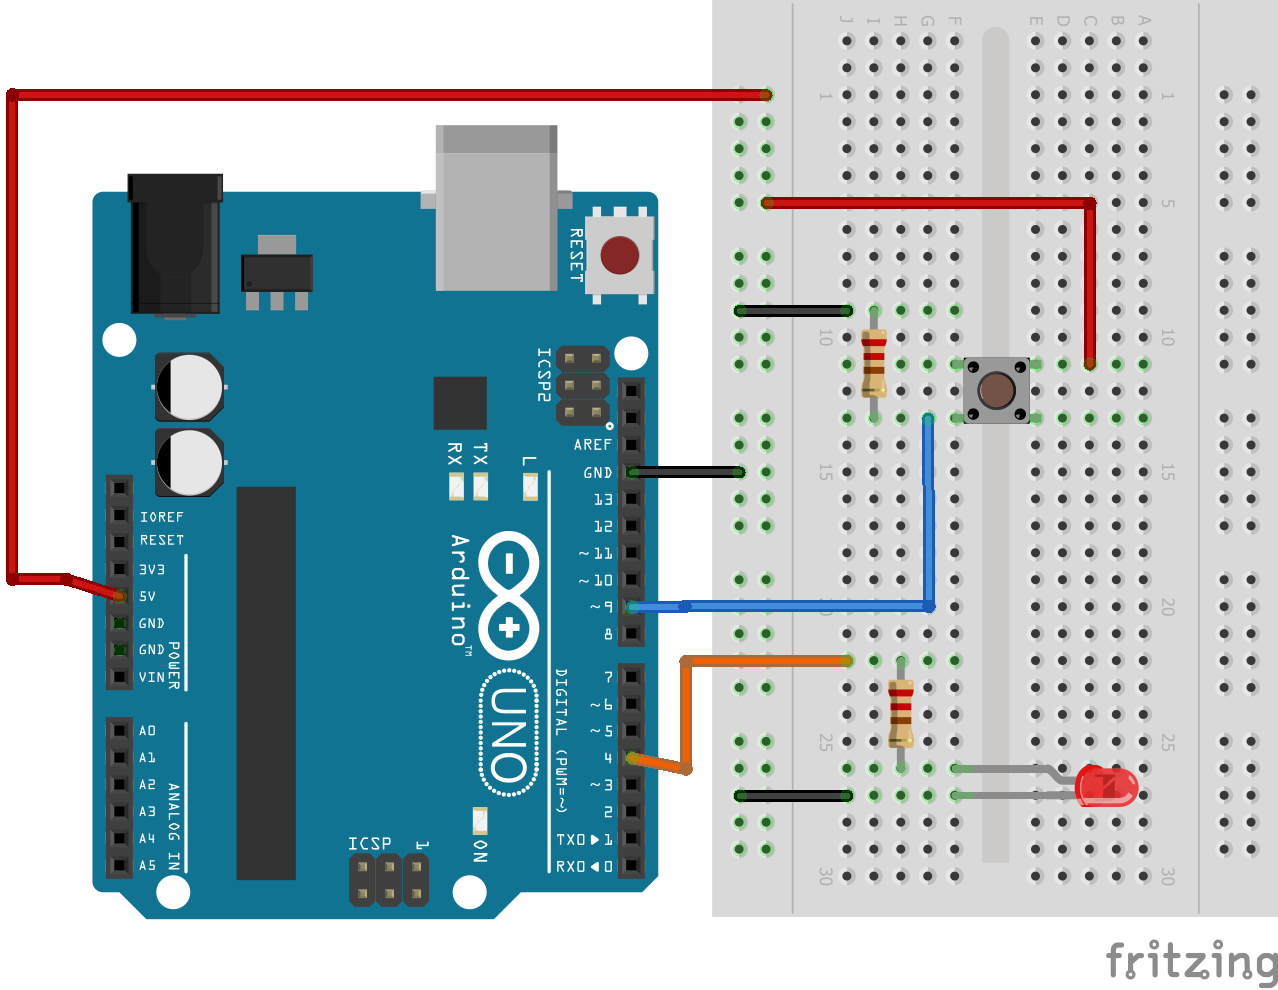
Start by connecting an LED and a 220Ω current limiting resistor to the Arduino as shown in the diagram below.
Connecting the LED to the Arduino.
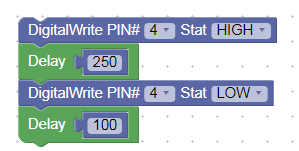
This task involves turning LED ON for some time and then turning it OFF. Repeating this procedure will make the LED blink. LED ON and OFF time is decided by the programmer.
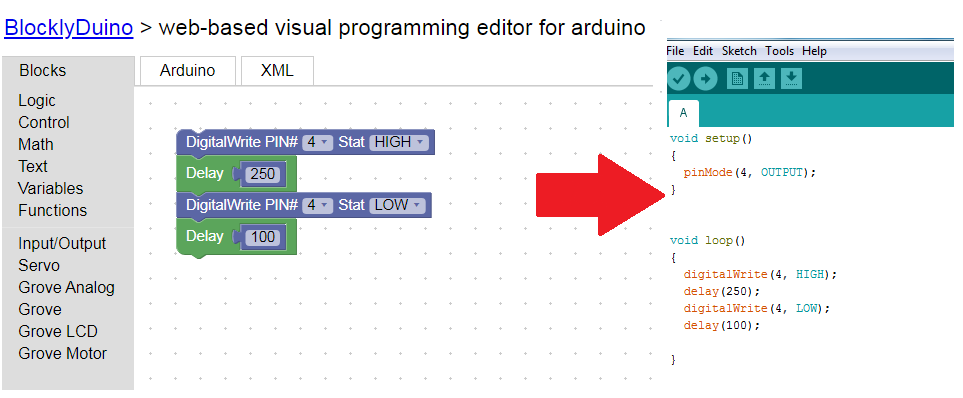
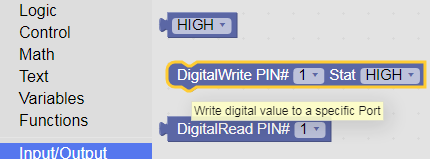
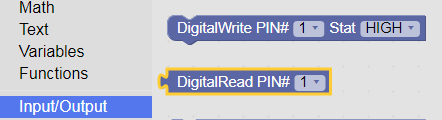
The Arduino powers the LED, so output 0(OFF) or 1(ON) should be connected to pin 4. We will use the digitalWrite block from the Input/Output tab for this purpose. It accepts two arguments: the connected pin number and the state of the pin. Selecting HIGH turns the LED ON and LOW turns the LED OFF.
Use the digitalWrite block to set ON/OFF states.
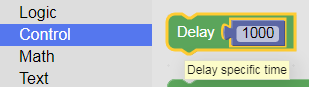
To set ON/OFF time, we use the delay block from the Control tab. It accepts time in milliseconds. (1sec= 1000msecs).
Set ON/OFF time using the Delay block.
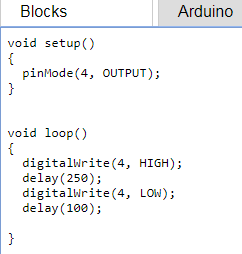
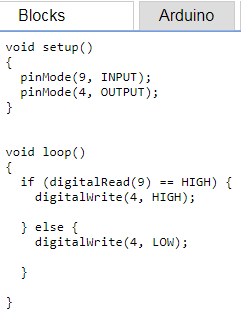
After setting the correct pin and placing blocks in the proper order, copy the auto-generated code from the Arduino screen into Arduino IDE.
As we work in the Blocks screen, the Arduino screen auto-generates code.
Compile the code and download it onto your Arduino board. Once the programming is done, check whether your LED blinks or not.
If it does, let’s take it a step further and turn the LED ON and OFF with a pushbutton.
Turning the LED ON/OFF Using a Pushbutton
This task involves turning an LED ON/OFF as related to the pushbutton’s state. Connect a pushbutton and a 10K pulldown resistor to the circuit, as seen in the diagram below.
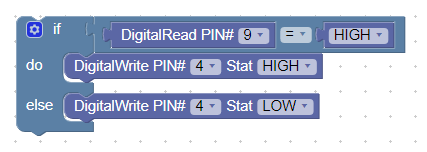
Arduino must continuously read the state of pin 9. To accomplish this, we will use a digitalRead block from the Input/Output tab. This block returns a value, either HIGH or LOW depending on the button press.
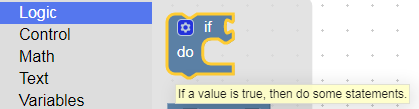
We then check whether the received value from the DigitalRead block is HIGH or LOW. If the received value is HIGH the LED turns ON. Otherwise, it is OFF. For this, we can use an If block and a Comparator Operator block.
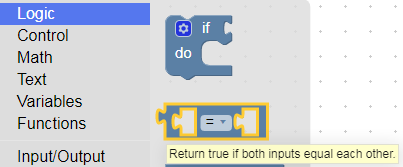
Find the If block in the Logic section.
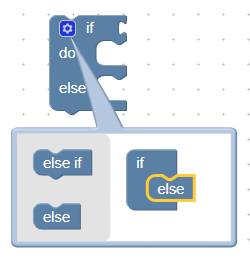
Looking at the If block, notice that, by default, there is no Else block connected. To add an Else block, click Settings and drag the Else block into place.
Add an Else block to the If block.
Next up is a Comparator Operator block, which returns a HIGH or LOW value depending on our input parameters. The ‘=’ operator compares the two inputs and returns HIGH if both are the same and vice versa. Here we compare the received value from the DigitalRead block with a HIGH input.
Set up the Comparator Operator block.
After setting up the correct pin and placing our blocks in proper order, copy the auto-generated code from the Arduino screen into Arduino IDE.
Copy the auto-generated Arduino code into Arduino IDE.
Compile the code and download it onto your Arduino board. Once the programming is done, see whether your LED turns ON or not when the pushbutton is pressed.
Once the code is in Arduino IDE, the LED should turn ON when the pushbutton is pressed.
A Brief Summary of What We Covered
In this tutorial, we learned what BlocklyDuino is and how to convert Blockly code to Arduino-compatible code. We interfaced an LED to an Arduino and made it blink. Then, we interfaced a pushbutton and checked whether the LED turns ON when the button is pressed.
I hope you enjoyed learning about BlocklyDuino and feel ready to explore the program further. If you face any difficulty while using Blockly, feel free to post in the comment section below!