A Spirometer is a tool used to measure inspired and expired air by our lungs! Learn to make one with an Arduino Nano!
In this project, I will build a very simple Spirometer by using Arduino and a pressure sensor. Although this DIY project won’t give you the most accurate values for spirometry, you will learn how a spirometry machine works.
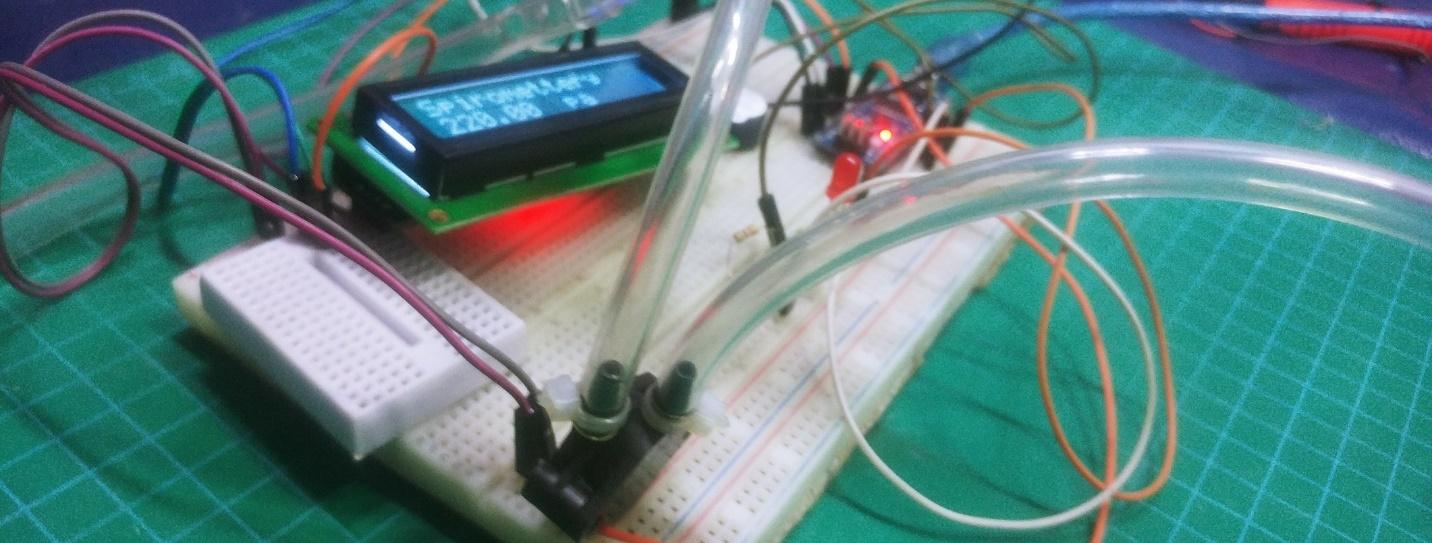
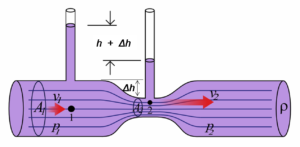
We are using an MPX5010DP air pressure sensor with an Arduino Nano. Whenever we blow air into the pipe, the sensor will collect the data and send it to the Arduino Nano. Sufficient calibration is needed after the initial set up to get accurate results.
Note: Arduino Recently came out with new Arduino Nano Boards, the BLE and BLE Sense, which are set to ship mid-August 2019.
What is Spirometry?
Basically, spirometry is a physiological test that assesses the strength of your lungs by using a sensor to measure the maximum amount of air that you can inhale and exhale. In order to be truly medically acceptable, spirometry testing needs to be conducted three times by a reproducible method for determining forced vital capacity (FVC).
Why is Spirometry Important?
Your doctor may advise spirometry if you have shortness of breath, a cough, or you snore. It can help diagnose problems like cystic fibrosis, COPD, and asthma or can check lung function before surgery.
A doctor or nurse will use spirometry to check a person's progress as part of treatment for a chronic lung condition. It will help to determine the impact of medications, including how they are controlling the condition according to your disease.
Performing a Spirometry Test
To help ensure accurate test results, wear loose clothing and don’t eat a meal immediately before. Also, avoid the following activities:
- Smoking within 24 hours of testing
- Strenuous exercise
- Consuming alcohol
The test follows these steps:
- A clip is placed on the nose to close the nostrils.
- Inhale as much air as possible to fill your lungs.
- Seal your lips tightly around the mouth of the tube.
- Breathe directly into the tube as quickly and forcefully as possible for a few seconds. Our project will have you breathe into the tube for five seconds.
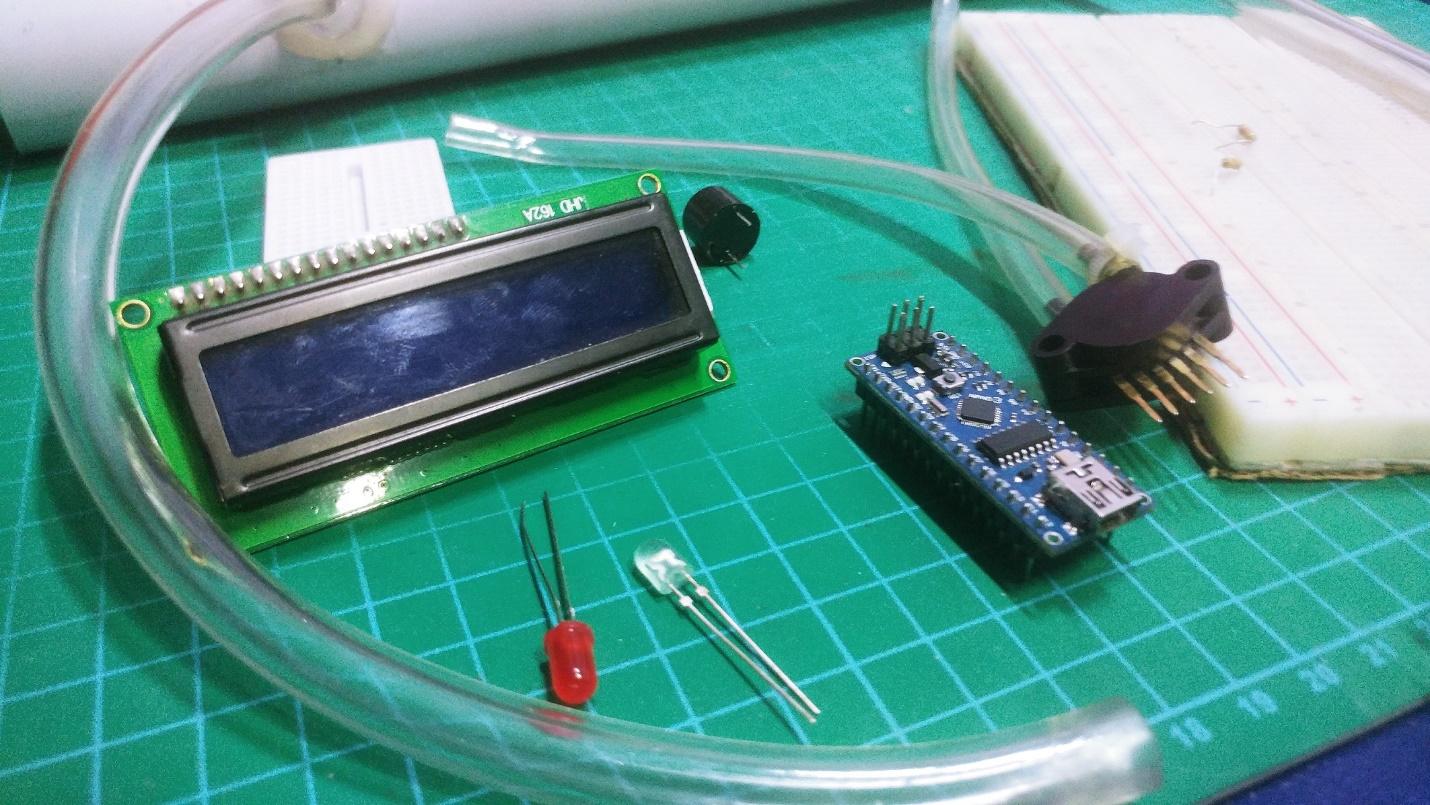
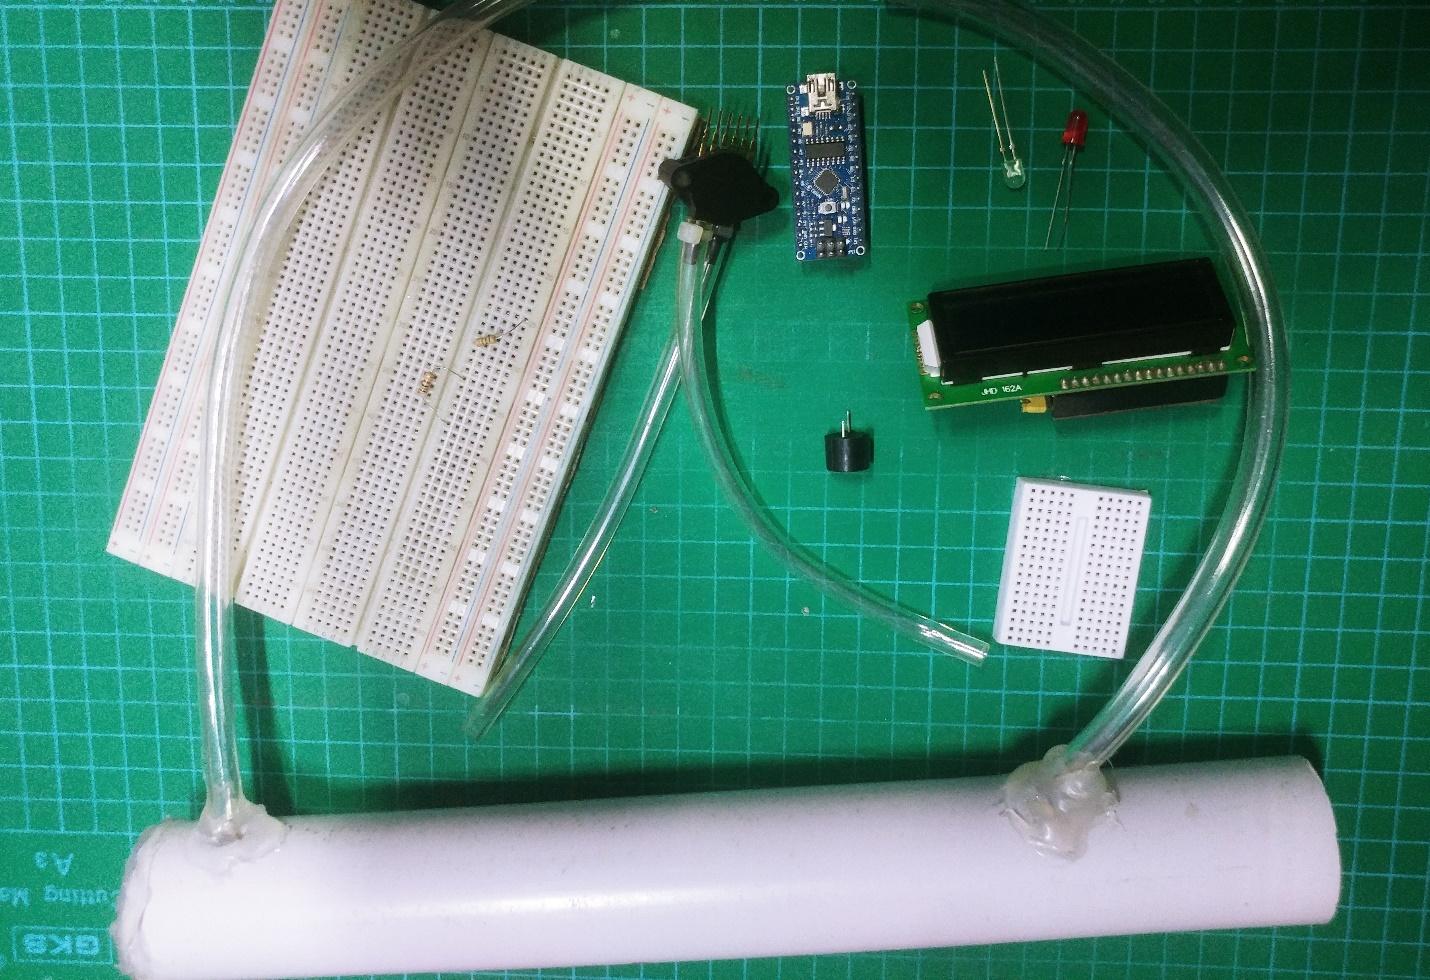
Collect the Hardware
- Arduino Nano
- MPX5010DP pressure sensor
- Character LCD 16X2 I2c
- BreadBoard
- Jumper Cables
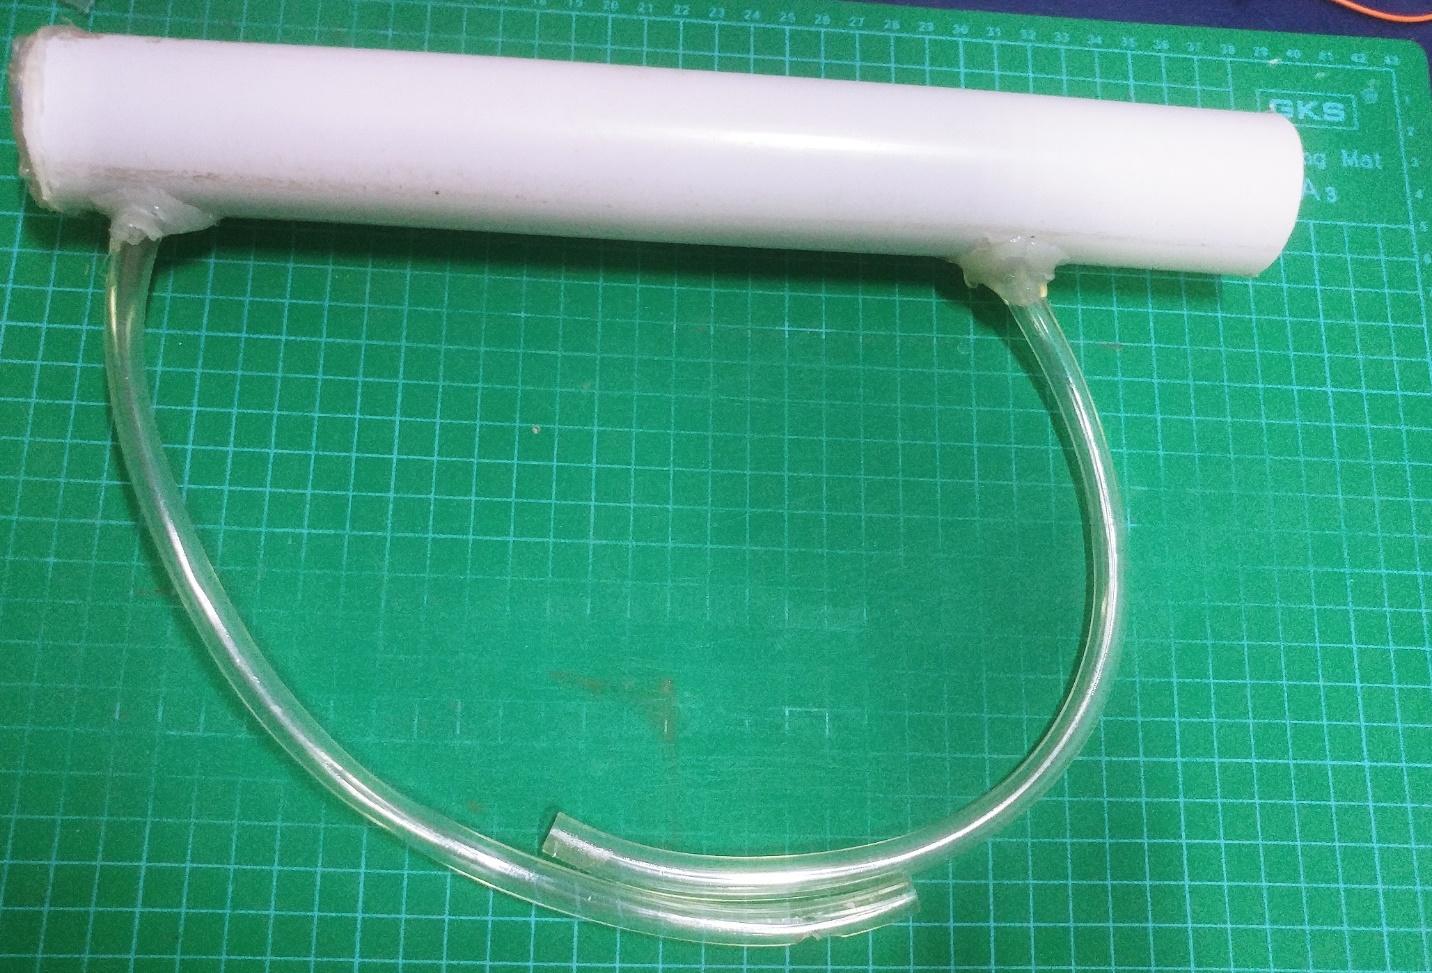
- PVC Pipe 1 ft, 1.5inch”
- Flexible pipe tube for sensor
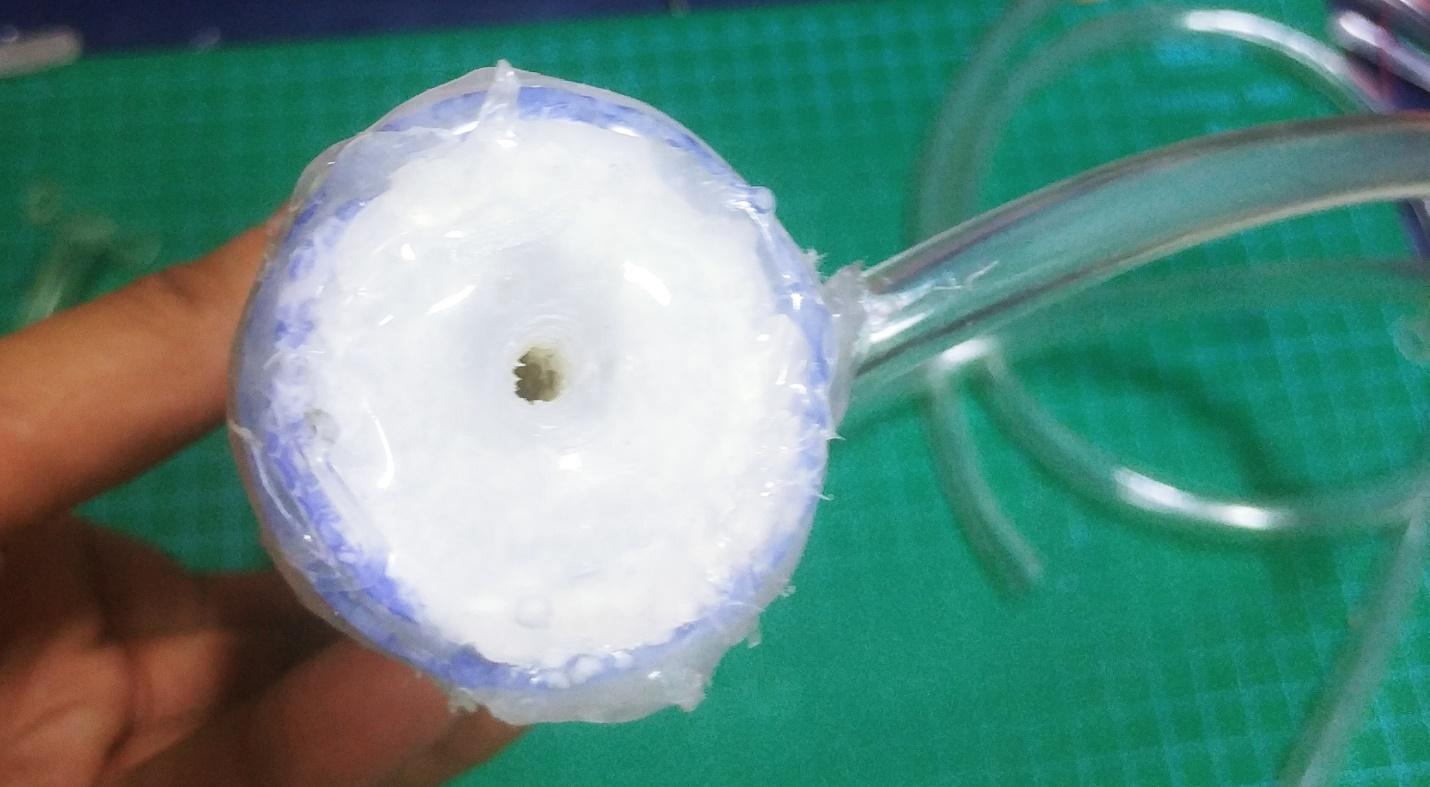
- Foam Circle (For pipe)
- Hot Glue Gun
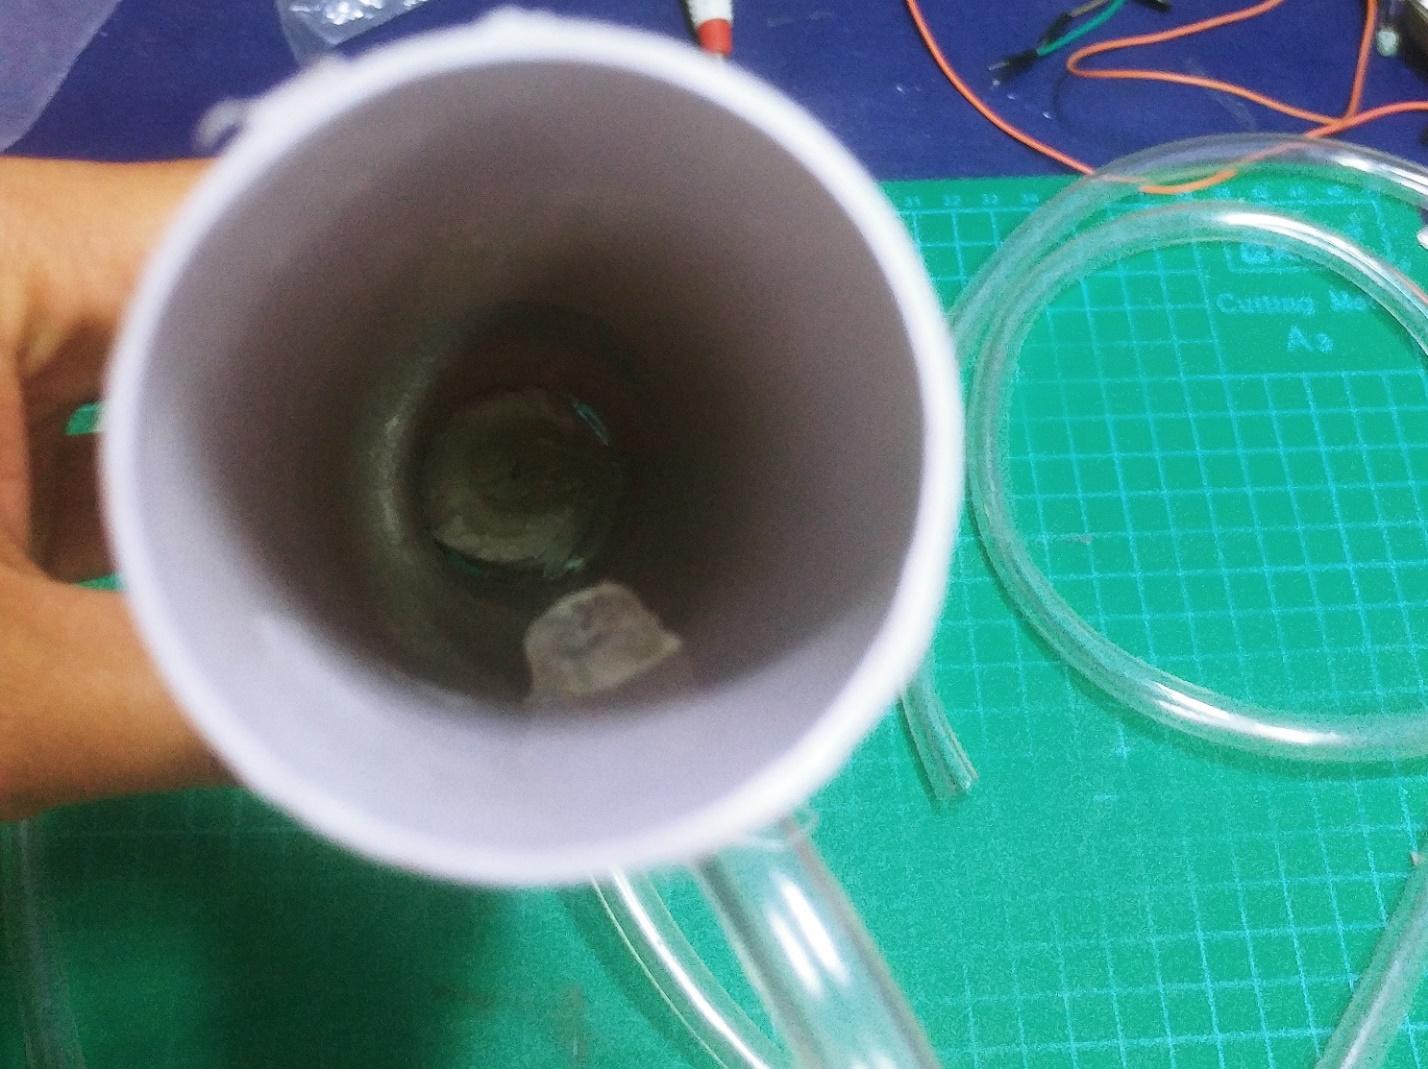
Building the Spirometer Tube
First, make two holes in a 1.5” PVC pipe. Place the first hile at the start of the pipe, and the other one 1-2 inches from the end. These holes are for inserting the rubber/plastic transparent tubes into the PVC pipe as shown here.
Next, using a small piece of foam, cut out a circular shape that can fit inside one end of the tube. You can seal it to the pipe using hot glue. Create a small hole in the center for letting excess air out, like the image below.
Now, insert the two tubes into the pressure sensor. You can use zip ties for a tight seal.
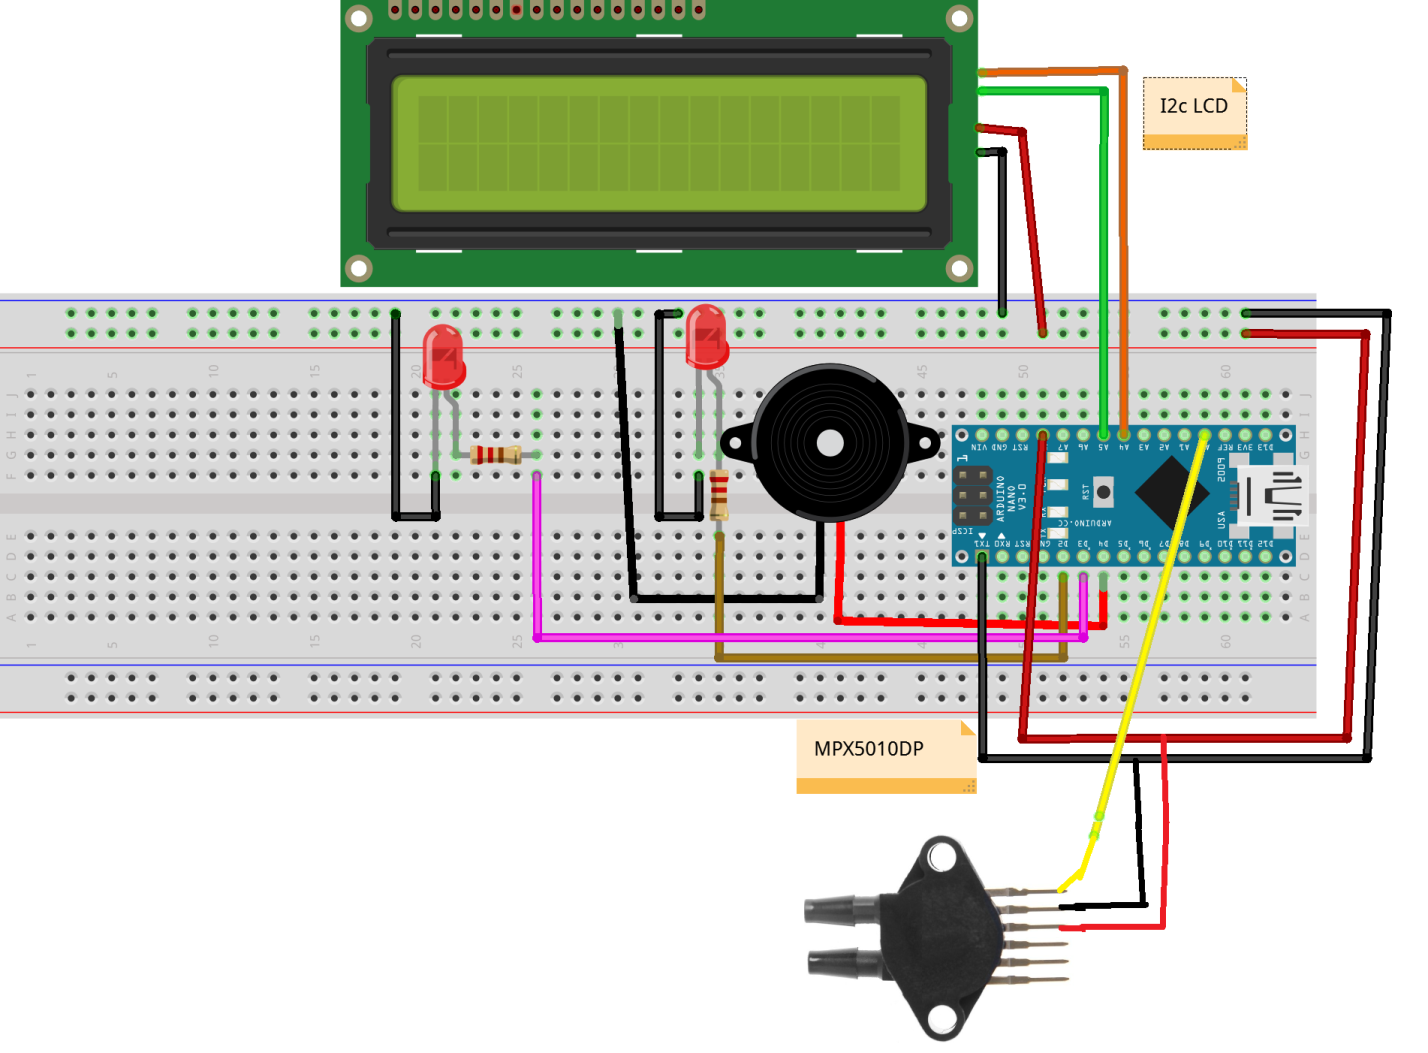
Wiring the MPX5010DP and Arduino Nano
The air pressure sensor is connected to the A0 pin of the Arduino Nano and the I2C LCD data lines are connected to pins A4 and A5. Additionally, you can connect a buzzer and LEDs to give feedback when the test is over.
To use the spirometer, upload the code and blow the air into the tube for five seconds. You can then check the result of spirometer on the LCD screen. Once test is complete then you can press the "reset" button to reset the device for a new test.