Learn how you can build a simple FM radio with an Arduino, a Sparkfun FM Tuner, and a few other components!
FM radio is a technology most of us likely take for granted — perhaps because it’s an older technology, having been in use since 1933. FM radios used for entertainment are everywhere. Every single car on the road has a built-in radio receiver. Although they are not as common now as they once were, you probably still have an FM radio somewhere in your home. It’s still relatively common to hear an FM radio playing at many stores you visit.
However, as common and old as FM broadcasting technology is, the technology is still developing. Recently, broadcasters have started embedding digital information in FM broadcasts, allowing receivers to obtain information about the song and artist current playing, the score of a sports broadcast, the station name, and other useful information.
In this article, we’ll take a look a the SparkFun breakout board, along with an Arduino Uno, and a powered speaker which, when put together, creates a simple FM radio. This article will set you up for the actual build which can be found in the accompanying project.
Hardware Overview
There are four main pieces of hardware needed for this tutorial:
- A SparkFun Si4703 FM Tuner Basic Breakout,
- An Arduino Uno,
- A 3.5mm audio plug,
- A powered speaker with a 3.5mm input.
The Si4703 can be connected directly to the Arduino Uno, so although it is not required, it will be useful to have a solderless breadboard for wiring the project. Before we start building the project, it will be useful to have an overview of the hardware involved.
SparkFun Si4703 FM Tuner Basic Breakout
The Si4703 is a radio-receiver module from Silicon Laboratories. It is not only capable of receiving FM radio signals, but also detecting and processing Radio Data Service (RDS) and Radio Broadcast Data Service (RBDS) information. These latter two services provide a standard for embedding metadata into radio broadcasts, including the name of the song currently being broadcast, the artist performing the song, the current score of sports broadcasts, the name of the radio station (rather than simply the station’s FM frequency), the genre of music being played, and much more.
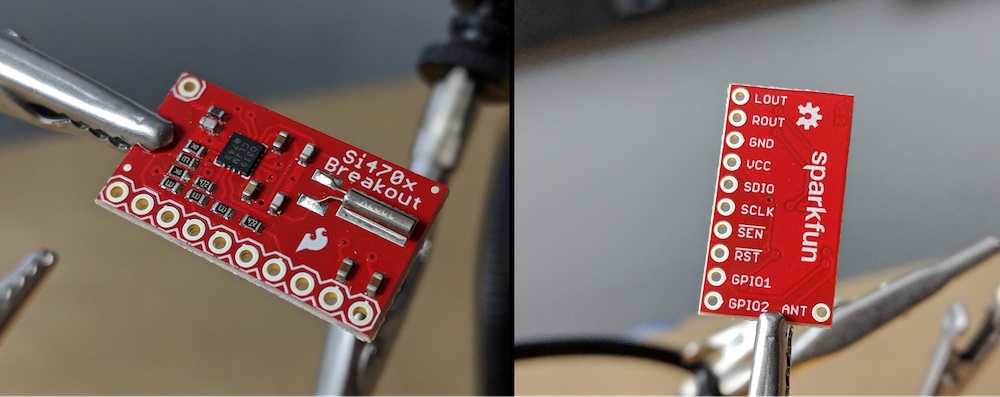
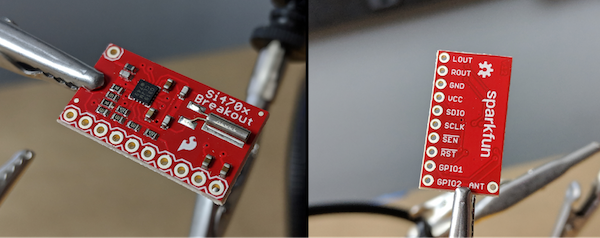
The SparkFun FM Tuner Basic Breakout provides a platform for easily incorporating the Si4703 into your projects. The board breaks out all of the major pins necessary to interface the board with an Arduino Uno, or just about any other microcontroller.
Sparkfun FM Tuner basic breakout
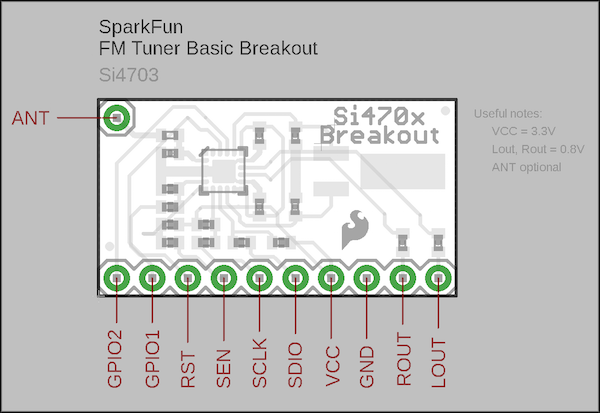
Schematic for the Sparkfun FM tuner basic breakout
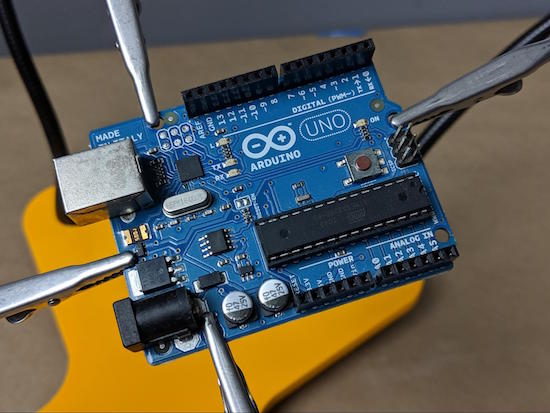
Arduino Uno
The Arduino Uno is, of course, ubiquitous in the Maker community and has been for many years. The Arduino Uno is the go-to platform for beginner electronics and coding projects.
The board itself is robust and easy to work with, but the real strength of the Arduino platform is the community that surrounds the Arduino Uno and other Arduino boards. The web is full of tutorials and troubleshooting help on just about any topic related to getting your Arduino-powered project up and running or about basic electronics and coding.
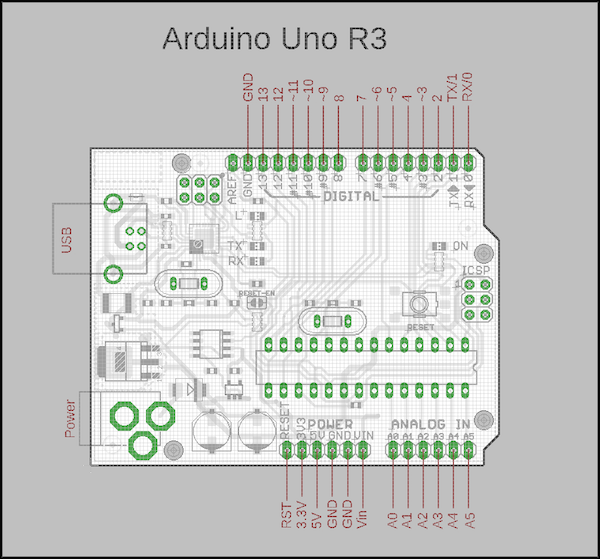
The schematic for the Arduino Uno R3.
3.5mm Audio Plug and Powered Speaker
The Si4703 breakout board does have outputs for left and right audio, however, the board does not have audio amplification circuitry. Therefore, the output of the left and right audio from the Si4703 are at line level voltage, around 0.8V. This voltage is not high enough to drive a speaker directly. Therefore, for this project, we will use a powered speaker capable of receiving line level voltage and playing it at an audible level.
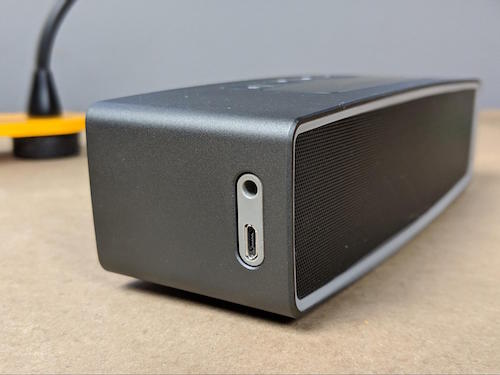
You can use any powered speaker for this project, whether it plugs into a wall for power or runs off a battery. I am using a Bose Soundlink Mini II, which is a battery-powered speaker with a 3.5mm input on the side.
This is a Bose Soundlink Mini II, which is a battery-powered speaker with a 3.5mm input.
To actually connect the Si4703 to the powered speaker, we will need to use a 3.5mm audio plug. These plugs are available without wires attached allowing us to build simple pigtail wires from the connector to the breadboard or directly to the Si4703 breakout board. By connecting a pair of male header pins to the 3.5mm plug, it can be connected to the pins on the Si4703 breakout board.
Once you have your hardware assembled, the radio build can begin!
Other Radio Projects