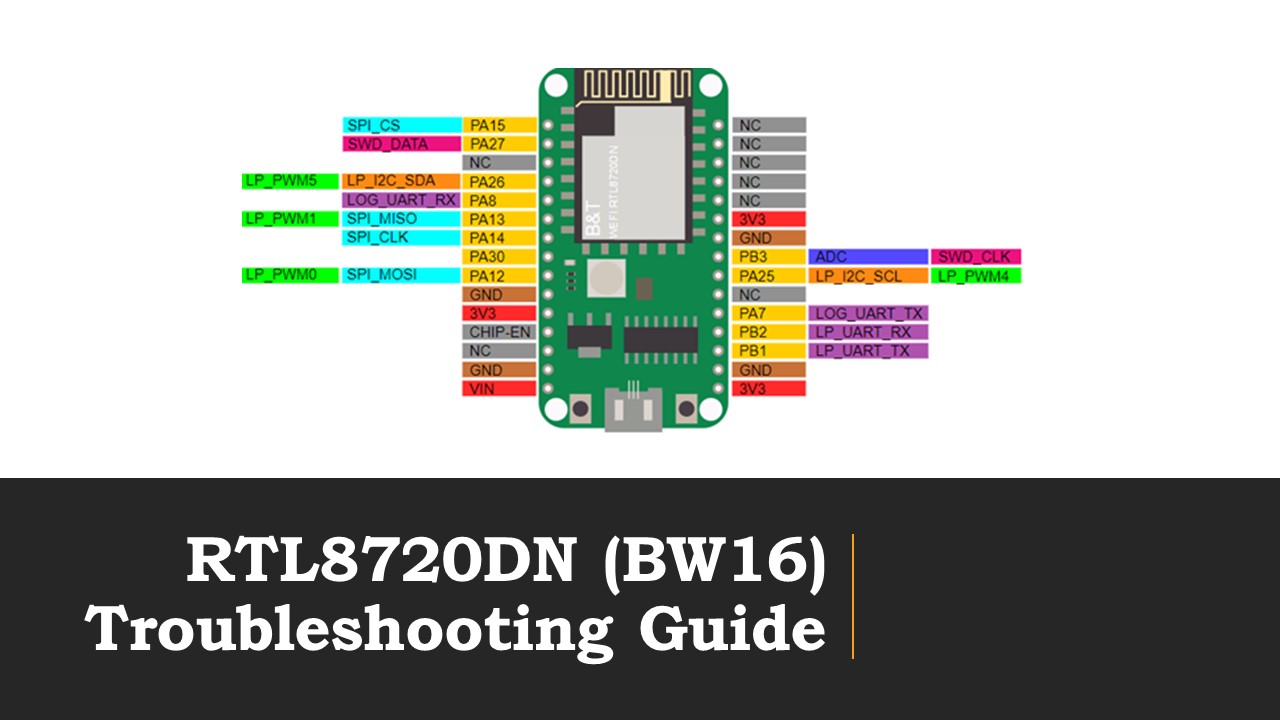
Here is a troubleshooting guide contains 3 methods for solving various issues while using RTL8720DN (BW16)
Here is a troubleshooting guide organized by me, there are 3 methods for solving various issues met by our community while using the RTL8720DN (BW16) based development board. Please provide any feedback via commenting under this article to make it better. The final version of this article can be found on Amebad Read The Doc official website.
How to upload firmware into BW16
Required Components
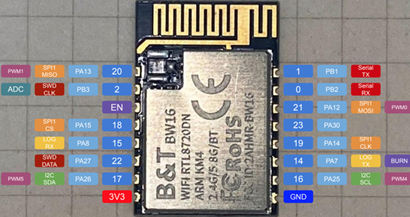
- USB Serial Adapter
- BW16 RTL8720DN Module
Trigger Module Reset
Connect EN Pin to GND (pulling low) will trigger a module reset.
How to enter Download Mode
- Connect LOG_TX (PA7) to GND.
- Connect EN to GND (pulling low), then to 3V3 (pulling high) to trigger a module reset.
- Disconnect LOG_TX (PA7) from GND.
- Now BW16 is entered into the download mode and ready for the program to upload.
Problem Encountered
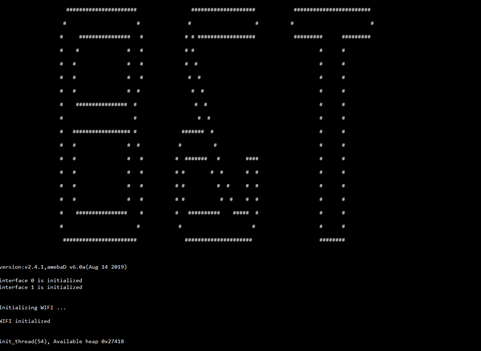
Depending on the batch of manufacturing, some BW16 modules on the development board might have built-in the default B&T firmware, the firmware information is shown in the image below.
This will cause Arduino Image to not be able to flash into the module. Although information of “All images are sent successfully! Image tool closed! Upload Image did.” is showing in the Image Tool, however, the factory image is not being erased, while pressing the onboard RST button, the factory image will remain in the flash.
Uploading Solution
Method 1: OTA (Over The Air)
The B&T default factory image can be washed through the OTA method provided by Realtek’s Image Tool that allows users to update the firmware through the Ardunio UART process without fail. The detailed description of the OTA method and definition of common AT Commands are described in B&T “RTL8720D AT Command User Manual” Appendix 6.1, which can be found in the Reference section below.
Step 1 - Download and prepare the Image Tool.
Download ambd_sdk from the link of ambiot GitHub 8. The Realtek’s Image Tool can be found under the following file path:
“ambd_sdk\tools\AmbaD\Image_tool\image_tool.exe”
Step 2 – Use the AP command to connect the RTL8720DN Module to the Internet
Open any terminal communication program, Tera Term, etc.
Connect to AP via the AT Command:
“#ATPN=your-SSID,your-password”
and wait until ATPN responds
“#ATPN OK”
(For more details, please refer to B&T “RTL8720D AT Command User Manual” Section 3.2).
Note that the Wi-Fi connection of both the PC and RTL8720DN Module should connect to the same SSID address.
Step 3 – Generate the OTA.bin file
Use Ameba Image Tools from the link in the ambd_sdk downloaded in Step 1 to generate an OTA.bin that could be uploaded to the board wirelessly:
“ambd_sdk\tools\AmbaD\Image_tool\image_tool.exe”
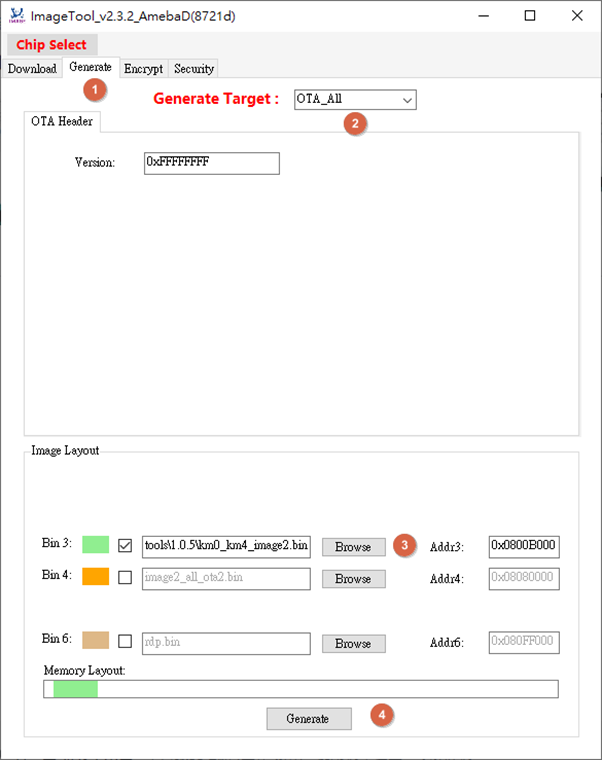
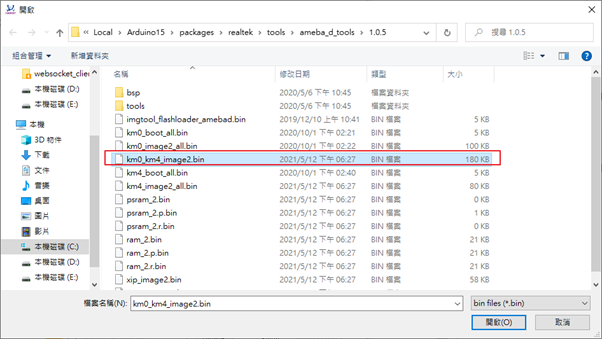
Click the Generate tab, in the Generate Target Section select OTA_All. Then, tick the checkbox on the right side of Bin 3, and the Ardunio binary file can be found in the file path below:
“C:%USER%\AppData\Local\Arduino15\packages\realtek\tools\ameba_d_tools\1.0.5\km0_km4_image2.bin”
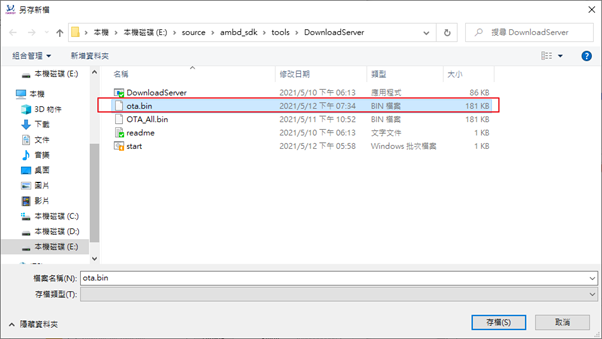
Then click Generate, save the generated OTA.bin file under the following file path:
“ambd_sdk\tools\DownloadServer”
Step 4 – Start the OTA process
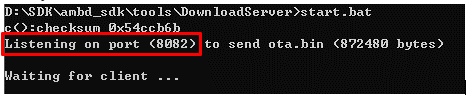
- Open Windows Command Prompt, change the root directory to: “ambd_sdk\tools\DownloadServer”.
- Runs start.bat and waits for the port number displayed, the port number used by my PC is “ 8082 ”.
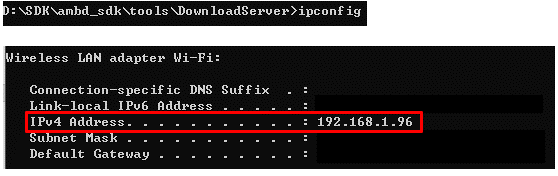
- Then, key in the ipconfig command in the Command Prompt to obtain your IPv4 address:
- Upon obtaining the ip address and port number, start the server program using the command in Windows Shell:
.\DownlaoadServer.exe YOUR-PORT-NUMBER ota.bin
The following information will be shown in the Shell terminal after the OTA server is set up correctly:
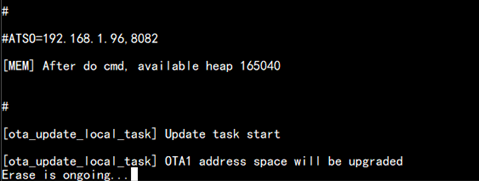
- Since previously we have already connected the BW16 module (OTA client) to the same SSID as the PC (OTA server) in step 2. Now, we will use another AT Command “#ATSO=IP-address,port-number” to connect to the OTA server (please refer to B&T “RTL8720D AT Command User Manual” Section 2.9 for more information).
Upon key in the command, the information of ”Erase is ongoing……” will appear.
You can see that the terminal shows OTA status, wait until the whole uploading process finishes. When OTA finish, press the reset button again.
Step 5 - Download Arduino program via UART
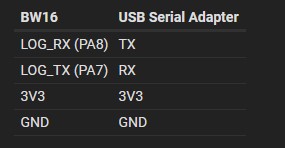
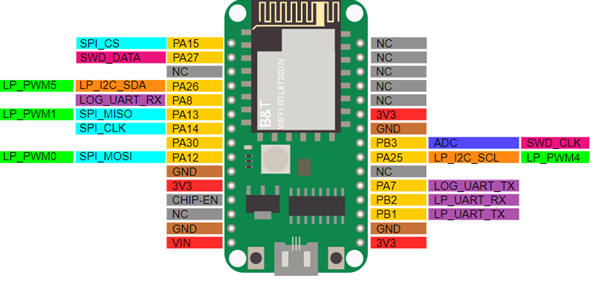
Now we can download the program via UART in Ardunio, but since the RTLDuino USB chip is connected to LP_UART instead of LOG_UART. The pins LOG_UART_TX (GPIOA_7) and LOG_UART_RX (GPIOA_8) are used for program upload. However, the onboard USB-to-UART module is connected to LP_UART_TX (GPIOB_1) and LP_UART_RX (GPIOB_2) and thus cannot be used directly for program upload.
You can choose to either use an external USB-to-UART module connected to GPIOA_7 and GPIOA_8, or you could short these pins together to use the on-board USB for program upload:
If entries UART download process, first hold the burn button and reset button and then release the reset button and burn button.
Method 2: Use AmebaD Image Tool to erase flash
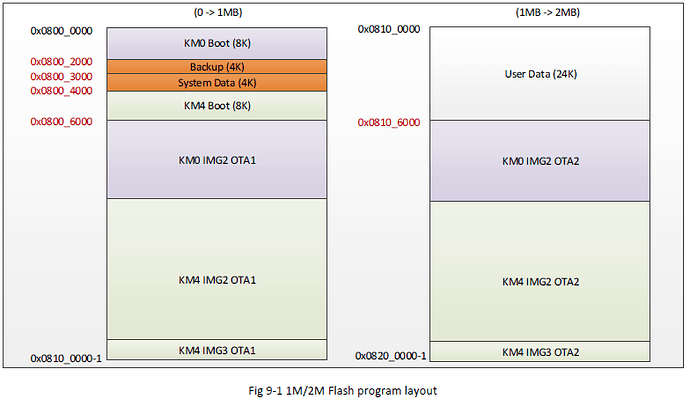
Alternatively, without using OTA that only allows the module upload program after connecting to Wi-Fi. Another way is using Image Tool to erase the flash image memory starting from memory address: 0x8000_0000 till the end of 2MB memory location, later on, we need to upload Realtek’s image back to the module again using Arduino IDE.
Follow Method 1 Step 1 to download ambd_sdk and do the necessary setup preparation before moving on to using this method.
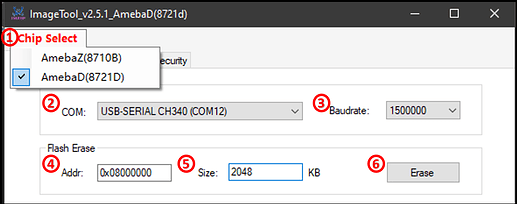
Step 1 - Open Image Tool
Set the Baudrate to “115200”, then select the Flash Erase range from Memory Address of 0x0800 0000, with a specific address of 2MB (2048 KB). Set the module or development board to “Download mode”, then click the Erase button.
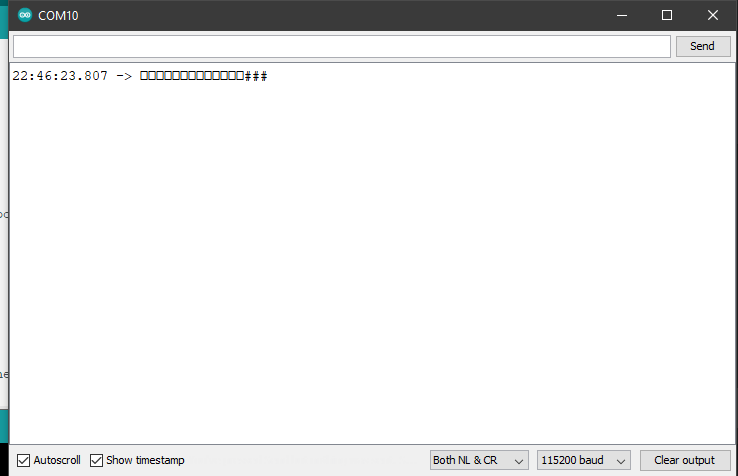
Upon finishing the above image erase, and press the reset button, we could find that the #calibration will no longer pop out, only # will appear.
Step 2 - Download Image using Arduino IDE
Download the Arduino program following the instruction in Method 1 Step 5, the image will be installed back again.
Method 3: Use the command to erase flash.
Since Realtek’s Amebad Image Tool is designated for Windows Systems. For users using other Operating Systems, please refer to @Alphi_Jiang 's method provided in this link: https://www.facebook.com/groups/accomdemy/permalink/1671250719731393/ which is a simplified version of Method 2. He suggested using the command to execute the erase and upload of an image instead of executing the “amebad_image_tool.exe”.
I haven’t tested out for this method, anyone who has tried this method could share his/her experience in the comment below.
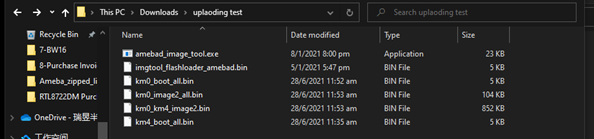
Step1 - Create a folder that contains the following files
Step2 - Generate a 2M file size of km0_km4_image2.bin
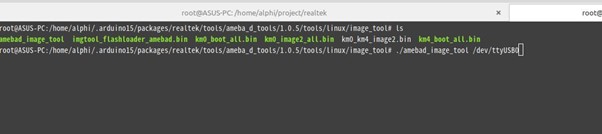
You have to generate a 2M file size of km0_km4_image2.bin to replace the original file. and then use ambad_image_tool. For example:
$ambed_image_tools /dev/ttyUSB0
@Alphi_Jiang has attached a python script to generate the 2M file for reference:
================ gen_bin.py ======================
# -*- coding: UTF-8 -*-
import sys
import os
def main():
    if len(sys.argv) < 4 :
        print('gen.py <file> <size> <pat>')
        print('example: gen.py km0_km4_image2.bin 200000 ff')
        sys.exit(1)
    else:
        target_name = sys.argv[1]
        target_size = int(sys.argv[2],base=16)
        target_pat  = int(sys.argv[3],base=16)

        print('name: {0} size: {1} pat: {2}'.format(target_name,target_size,target_pat))
        with open(sys.argv[1],"wb") as file:
            buff = [target_pat]*target_size
            target_context = bytearray(buff)
            file.write(target_context)
            file.close()

if __name__ == '__main__':
    main()
Step 3 – Execute Command “amebad_image_tool.exe COM_PORT_NUM”
References