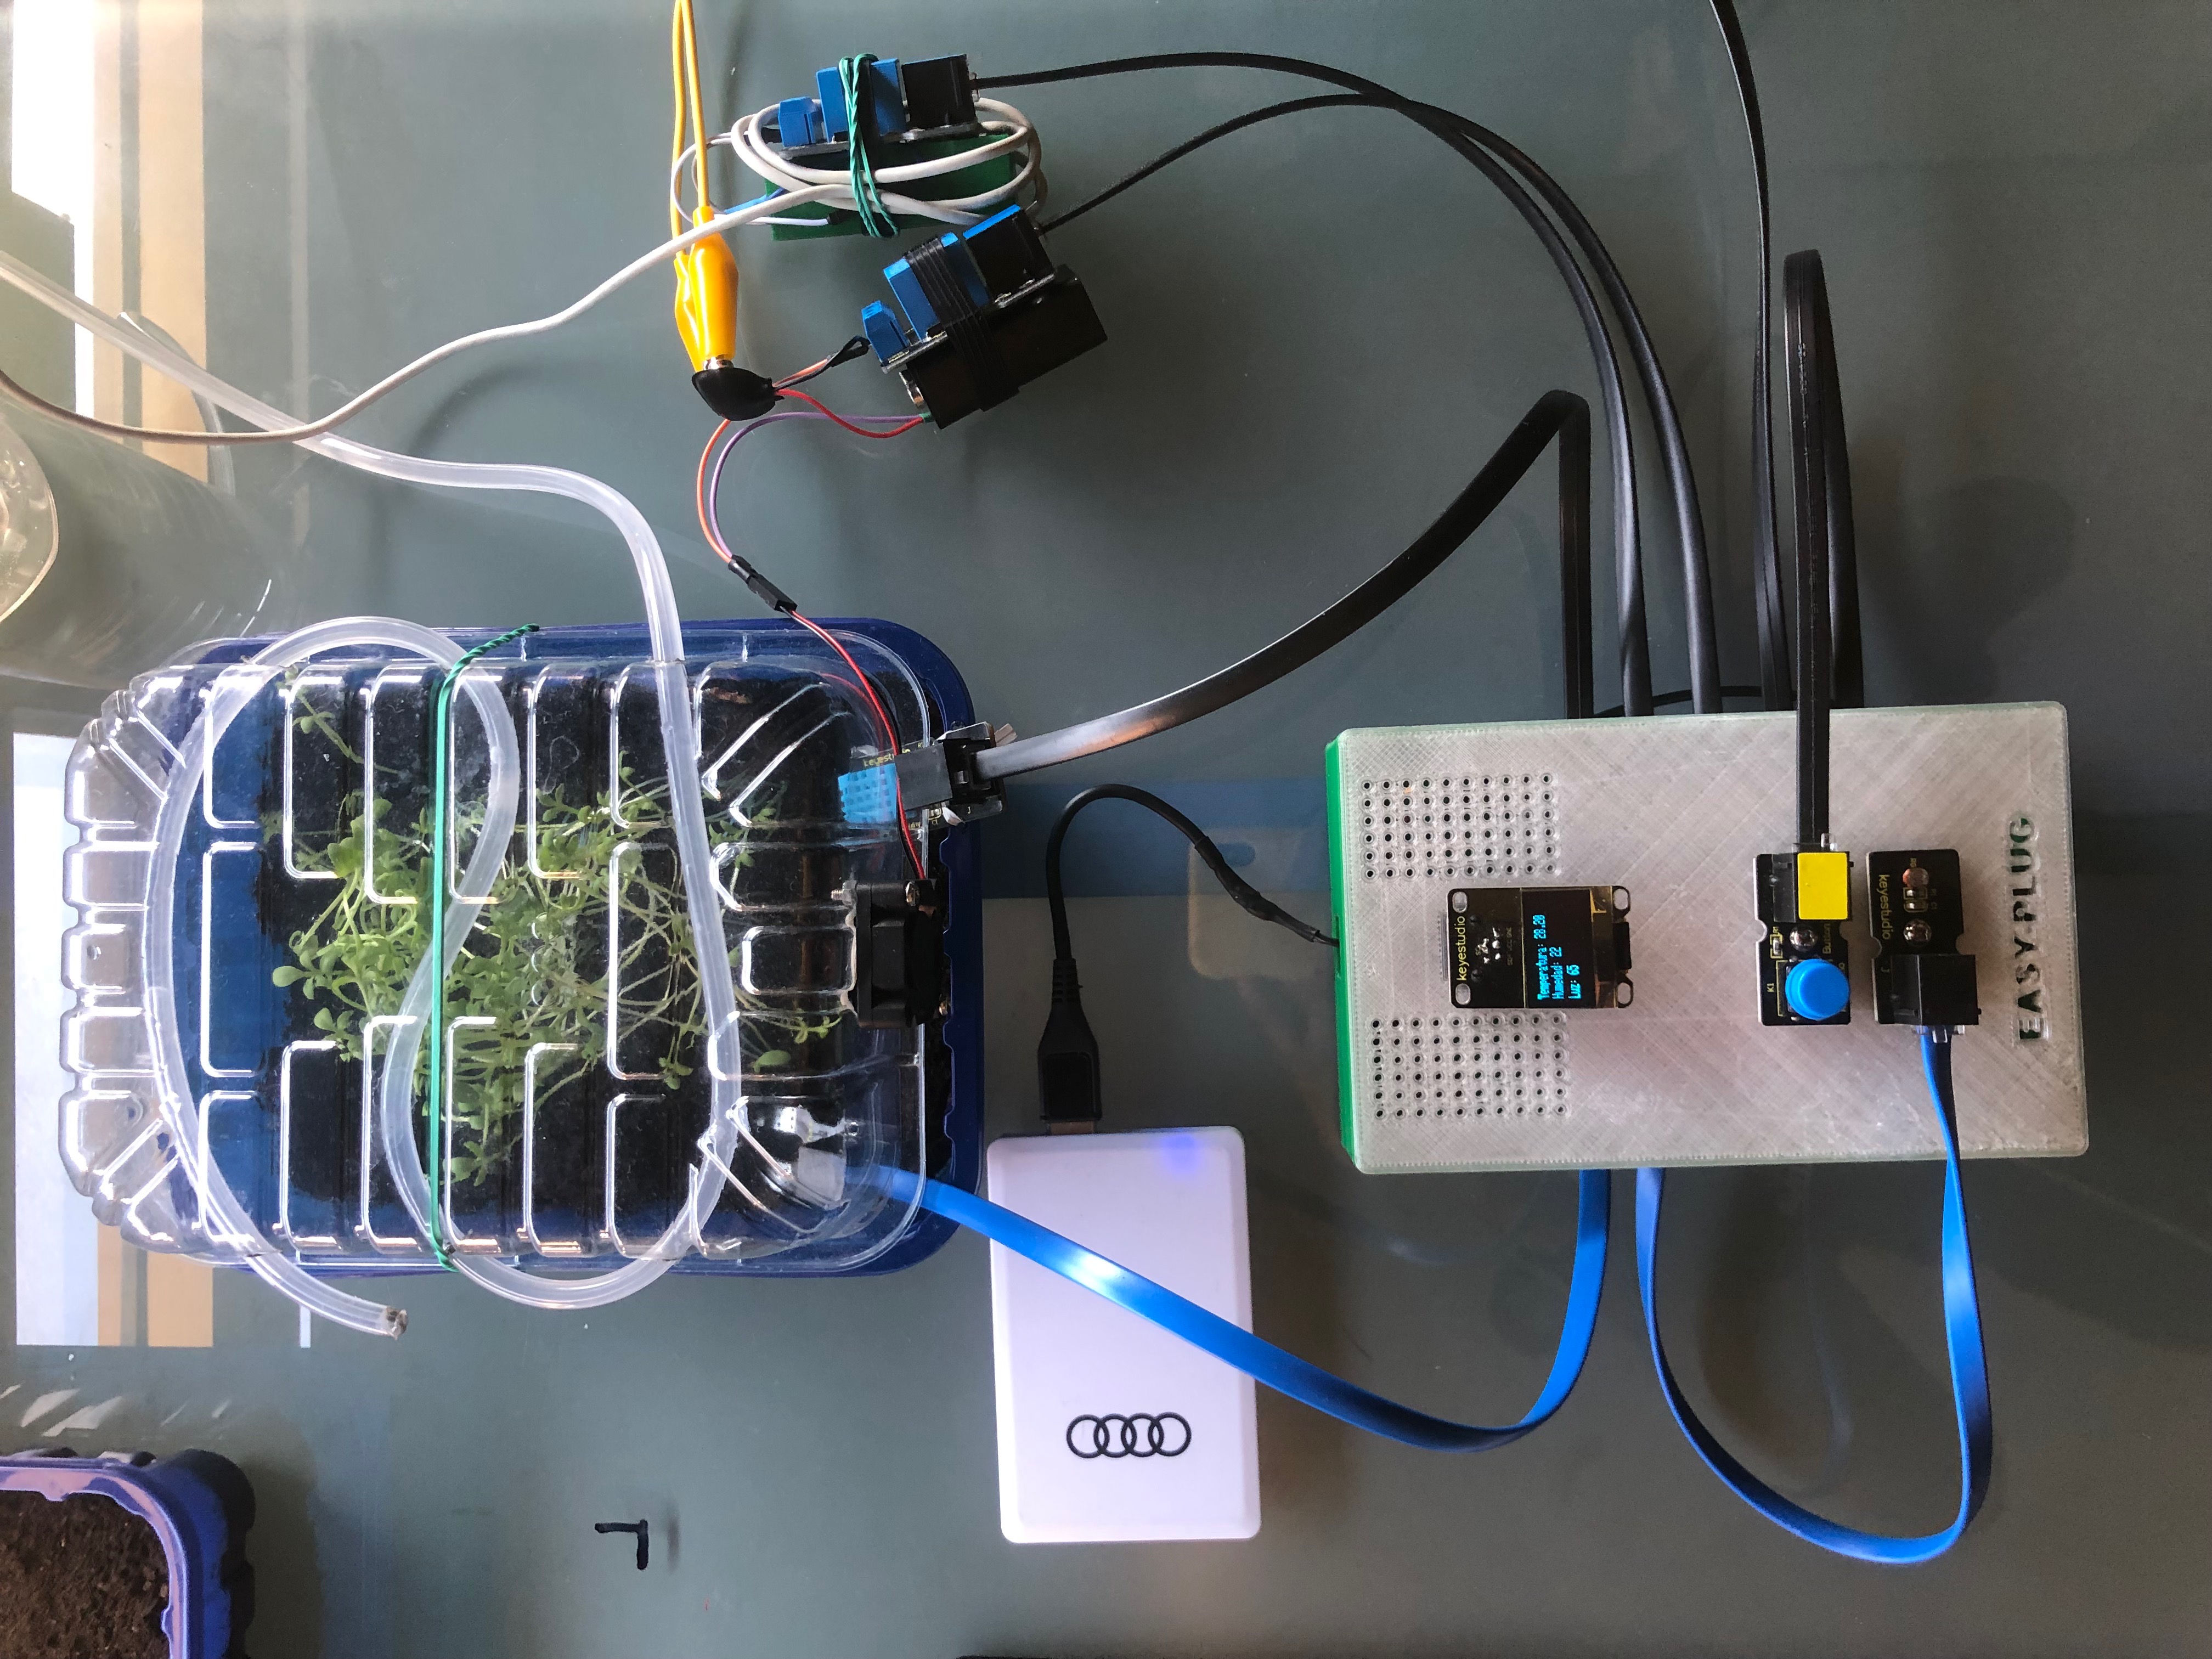
Mini automated Greenhouse will let you take care of your greens with Easy-Plug microcontroller and block programming.
Connection
The connections of this project are very easy. This thing allows the project to be developed in Primary Education by 10-12 years old students.
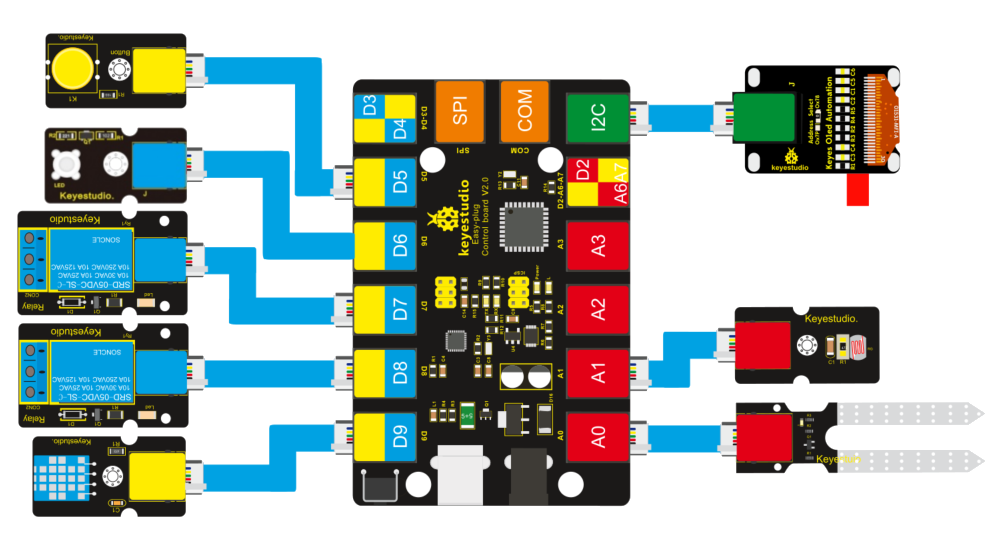
Main-Board Connection Schematic
The first step is to create the connections between the Easy-Plug Main Board and all the Modules that will control the GreenHouse.
We have chosen the brand KeyStudio for this project because of his Easy-Plug connection Modules and MainBoard so all the materials are from this shop.
Full connection Schematic
Here is a table with the Module and the Pin of the main Board that must be connected to.
PIN | MODULE | PIN | MODULE |
|---|
D5 | PushButton Module | I2C | OLED Screen |
D6 | Led Module | A1 | Photoresistor module |
D7 | FAN Relay Module | A0 | Soil hummidity Module |
D8 | WATER PUMP Relay Module | | |
D9 | DHT11 Module | | |
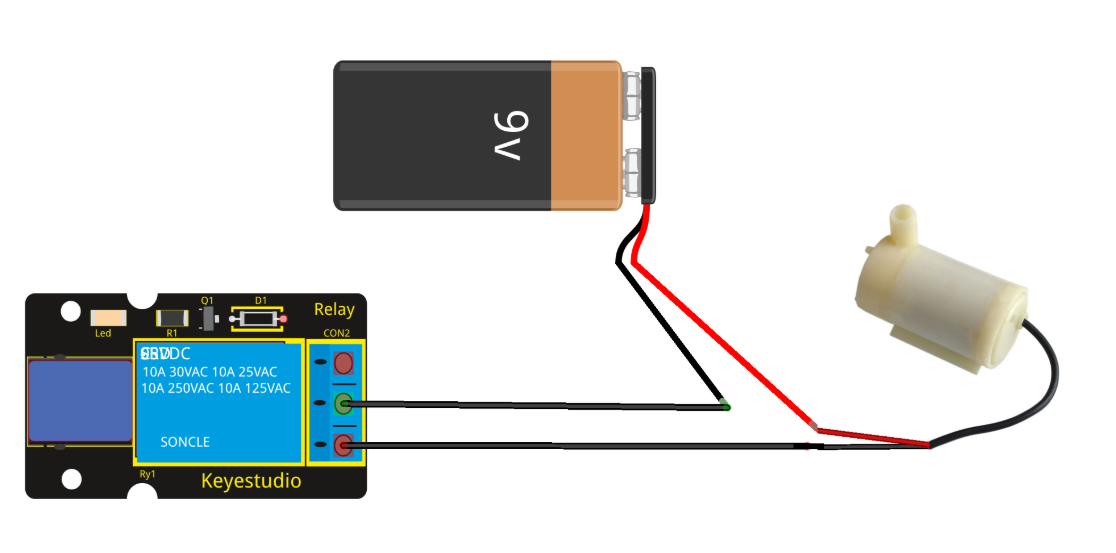
Water Pump Relay Connection
The next step is connect the relay to the Water Pump and the Power.
Water Pump connection to Easy-plug Relay
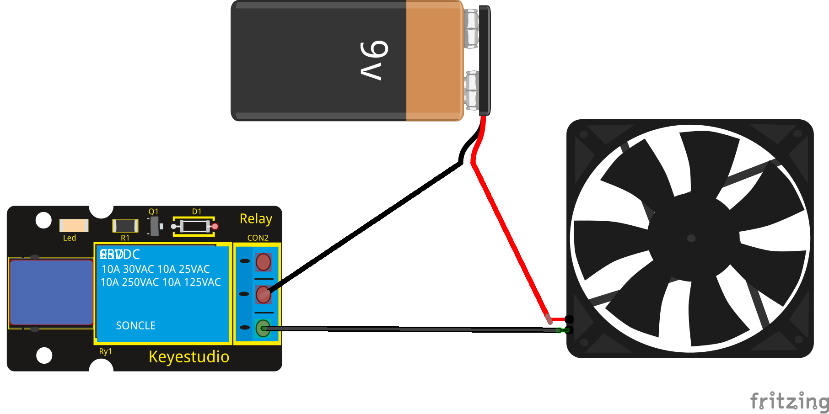
Fan Relay connection
The next step is connect the relay to the Fan and the Power.
Fan connection to Easy-Plug Relay
Programming
Now is the time to programm all the control of the automated green House. For it, we will use Facilino Junior Software that contains all the blocks that we need to program the microcontroler.
Part 1
Now we are going to programm the OLED instructions to show the levels of ambient variables.
- Soil hummidity: We select the soil hummidity Block and we choose the A0 pin.
- Light Level: We select the photoresistor Block and we choose the A1 Pin.
- Temperature: We select the DHT11 Block and we choose the D9 Pin.
We take the OLED block from Screen Category and the Soil humidity, Light and Temperature Blocks from Ambient Category.
Oled blocks to show the ambient levels
Part 2
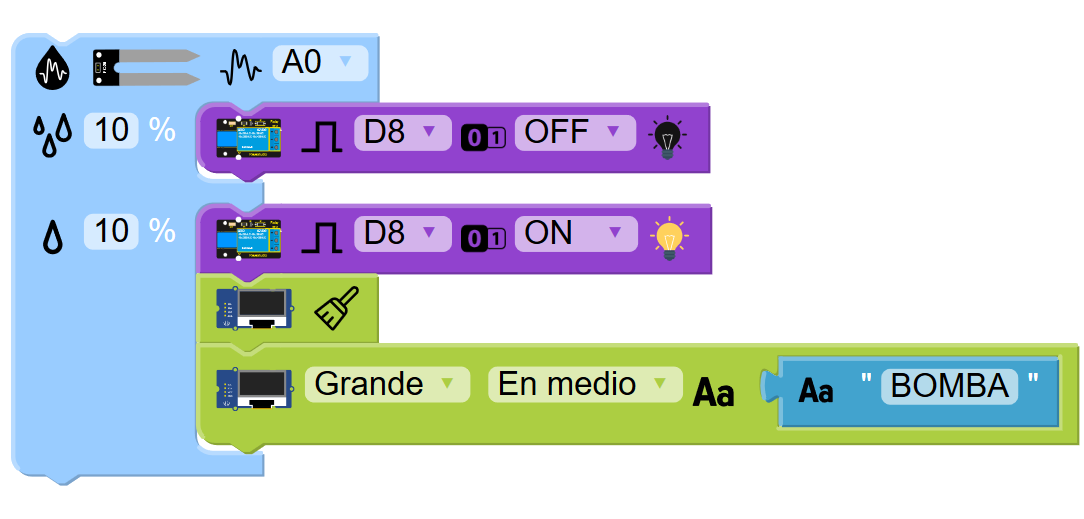
Soil humidity blocks program.
We have to choose the Soil humidity alarm block from the Ambient Category and select the A0 Pin.
He writes the min and max humidity level.
If the soil humidity sensor detect less than 10% of soil humidity, the D8 Relay will turn ON and the water pump will start working until the humidity will be more than the max humidity soil level.
- Minimum Humidity-->10%
-Maximum Humidity-->10%
Soil hummidity Block combination
Part 3
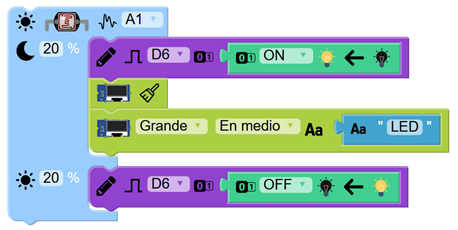
Light level blocks program.
We have to choose the Photoresistor alarm block from the Ambient Category, and select the A1 Pin.
He write the min and max light level.
If the light level sensor detect less than 20% of soil hummidity, the D6 pin will turn ON and the led strip will start working until the light level will be more than the max light level.
- Minimum Light-->20%
-Maximum Light-->20%
Photoresistor Block combination
Part 4
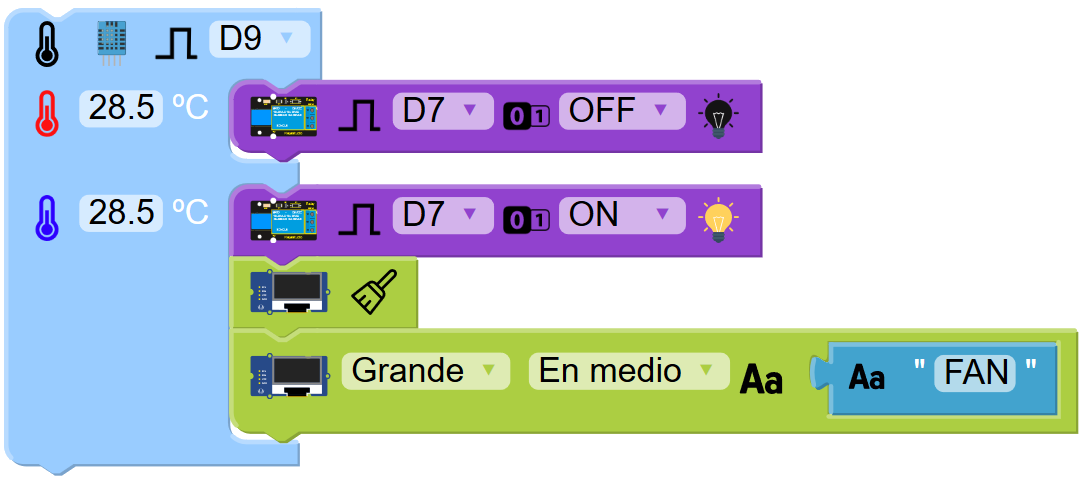
Temperature blocks program.
We have to choose the DHT11 alarm block from the Ambient Category, and select the D9 Pin.
He write the min and max Temperature level.
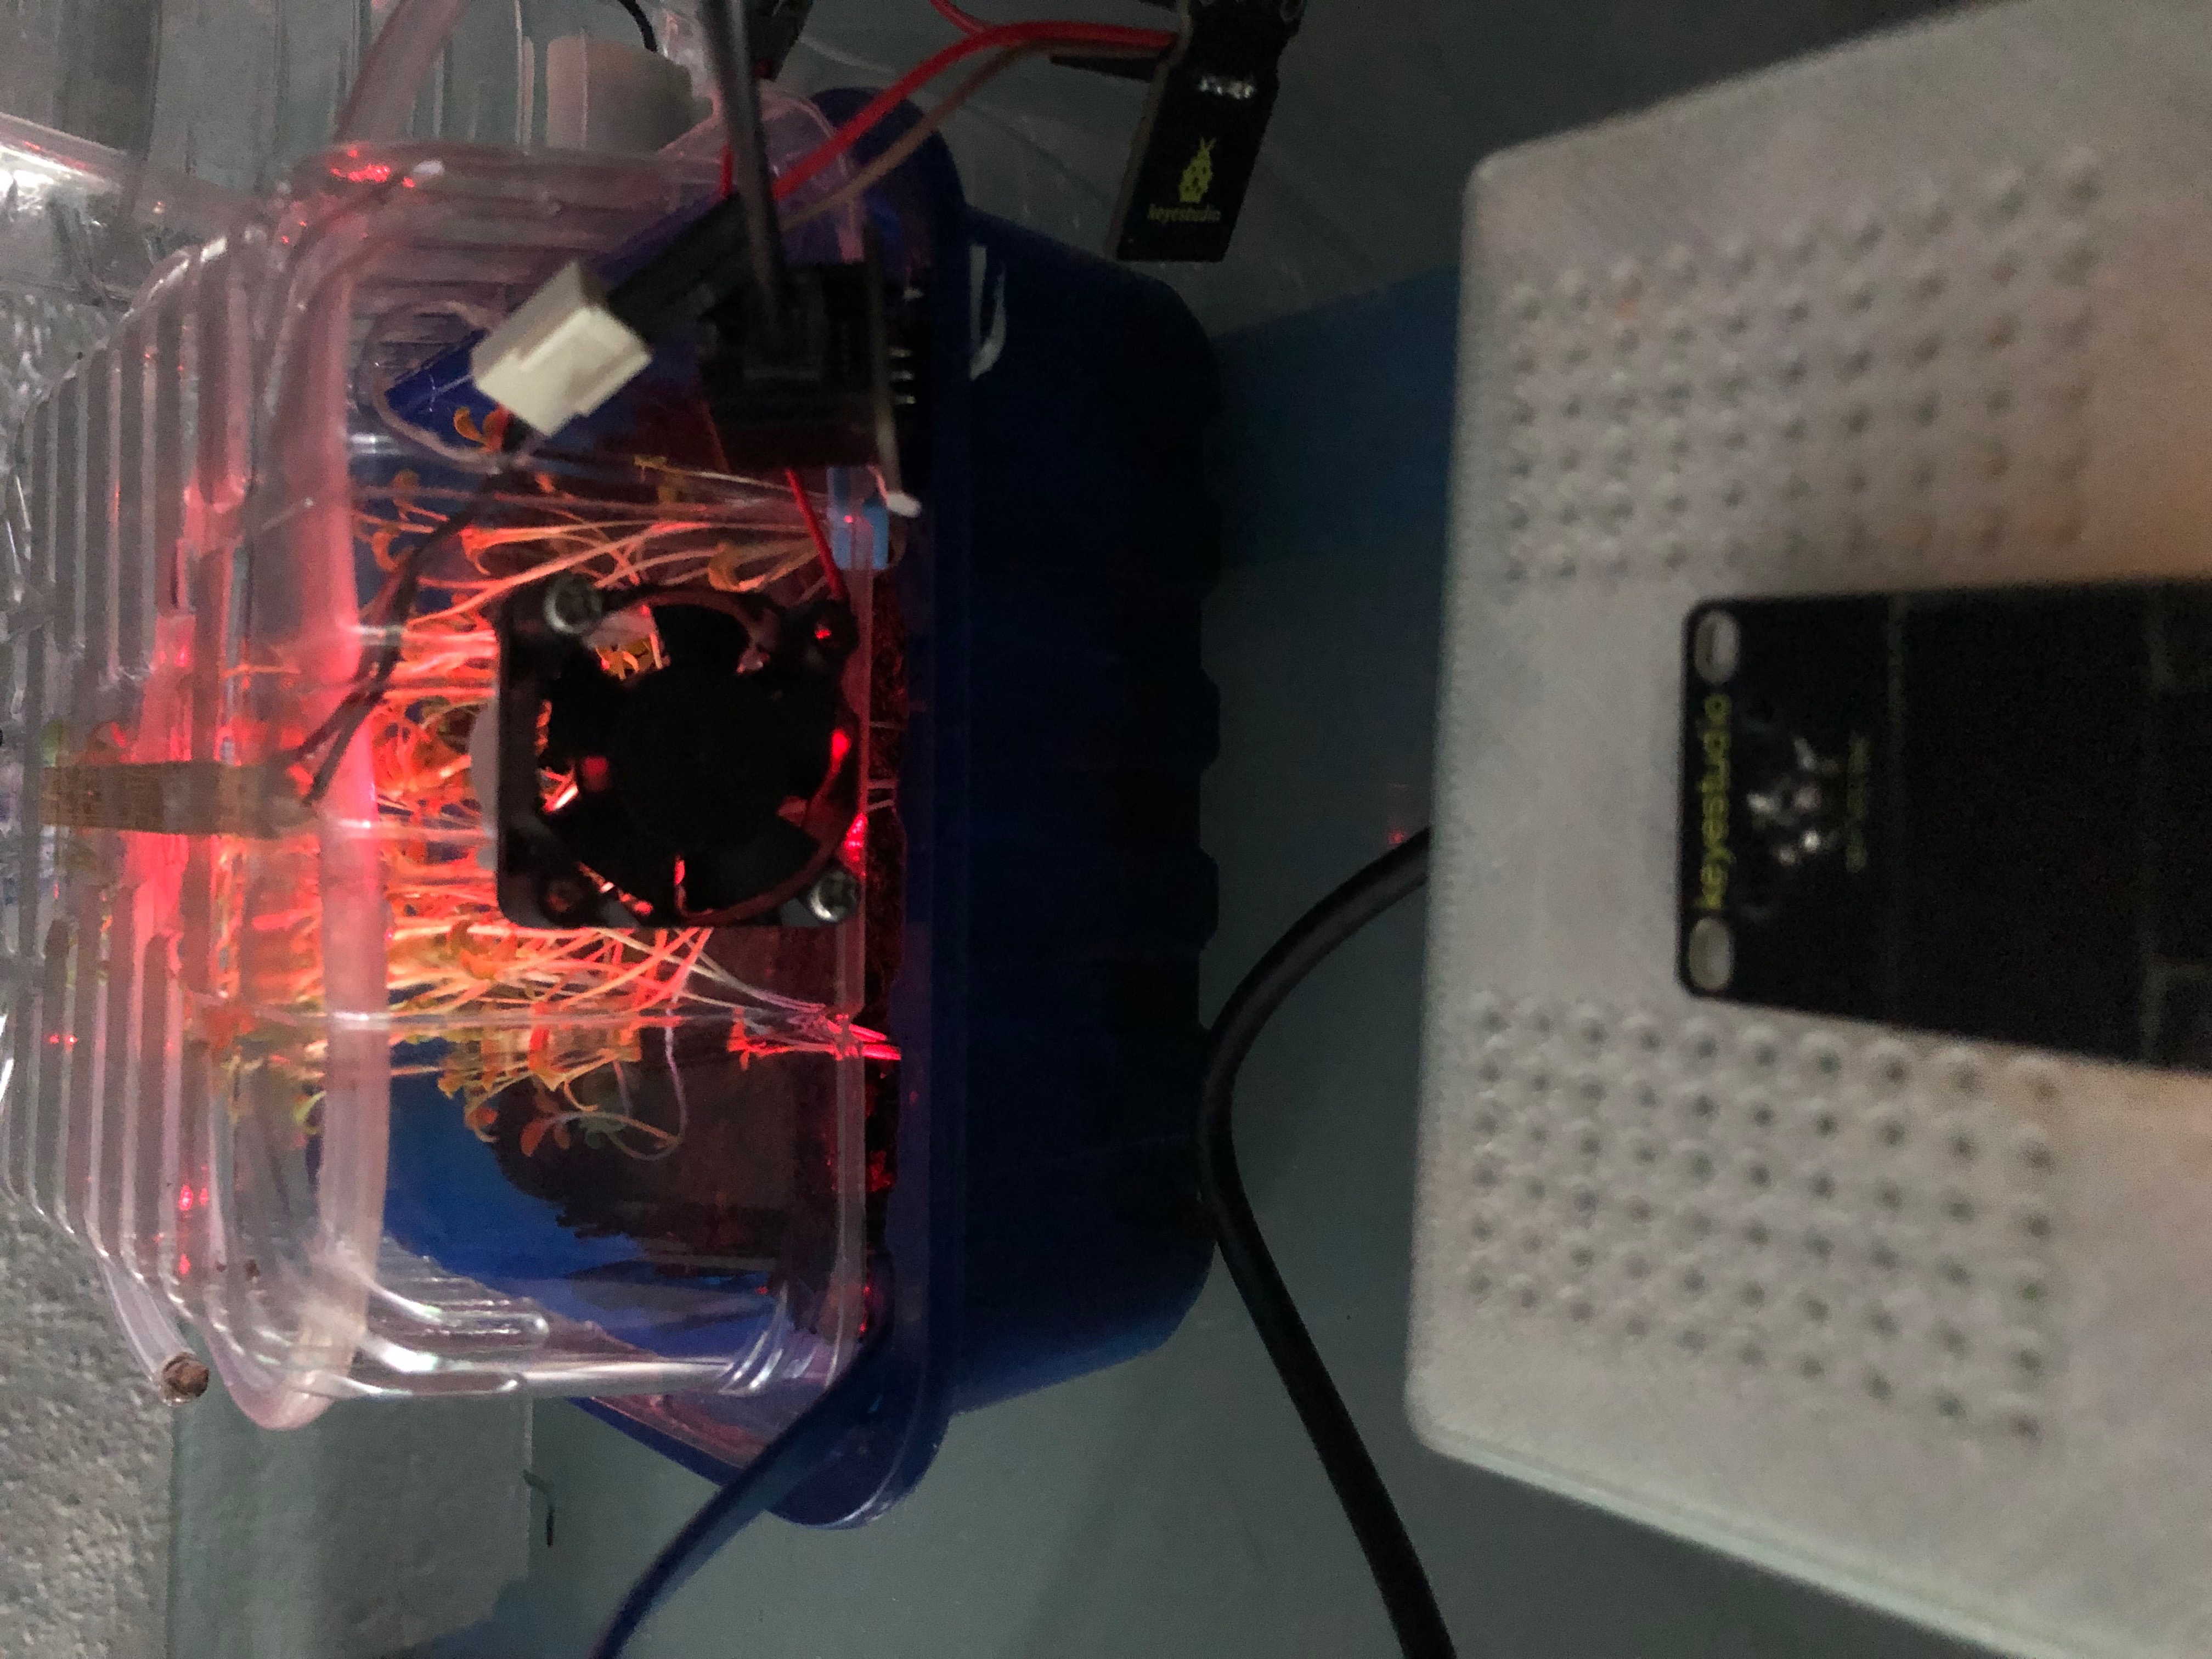
If the Temperature sensor detect more than 28.5 ºC , the D7 Relay pin will turn ON and the Fan will start working until the Temperature will be less than the min Temperature.
- Minimum Temperature-->28.5 ºC
-Maximum Temperature-->28.5 ºC
Temperature Block combination
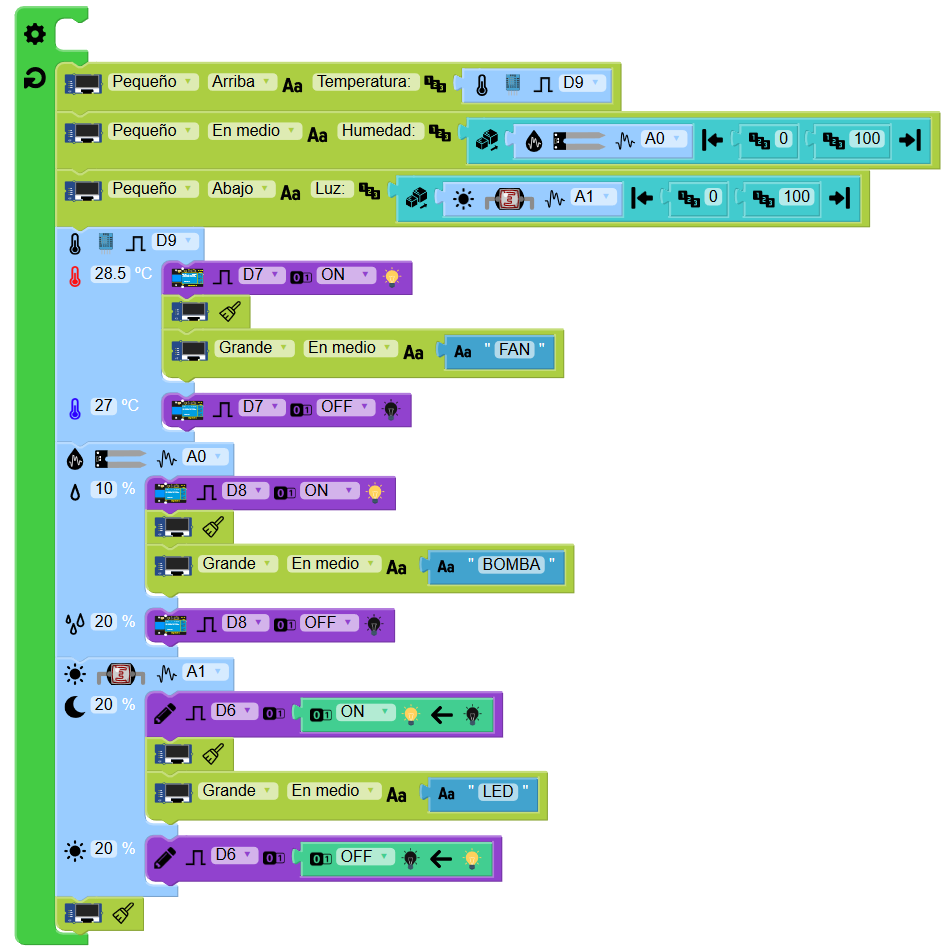
Full Block Combination
Finally, the result of the combbination of all the blocks are in the next image.
Final combination of Facilino Junior Blocks
Arduino Code Instructions
And the combination of this blocks in Facilino Junior, generates this code instruction in Arduino language.
#include <DHT.h>
#include <Adafruit_SSD1306.h>
#include <splash.h>
#include <Adafruit_GFX.h>
#include <Adafruit_SPITFT.h>
#include <Adafruit_SPITFT_Macros.h>
#include <gfxfont.h>
#include <Wire.h>
#include <SPI.h>
/*** Global variables ***/
DHT sensorDHT11_9(9,DHT11);
/*** Function declaration ***/
#define OLED_RESET 4
Adafruit_SSD1306 display(OLED_RESET);
/*** Tasks declaration ***/
/*** ISR function declaration ***/
void setup()
{
Serial.begin(9600);
display.begin(SSD1306_SWITCHCAPVCC, 0x3C);
display.clearDisplay();
delay(250);
pinMode(A0,INPUT);
pinMode(A1,INPUT);
pinMode(7,OUTPUT);
pinMode(5,INPUT);
sensorDHT11_9.begin();
pinMode(8,OUTPUT);
pinMode(6,OUTPUT);
}
void loop()
{
display.setTextSize(1);
display.setTextColor(WHITE);
display.setCursor(1,1);
display.print("Temperatura: ");
display.println(sensorDHT11_9.readTemperature());
display.setTextSize(1);
display.setTextColor(WHITE);
display.setCursor(1,10);
display.print("Humedad: ");
display.println(map(analogRead(A0),0,1023,0,100));
display.setTextSize(1);
display.setTextColor(WHITE);
display.setCursor(1,20);
display.print("Luz: ");
display.println(map(analogRead(A1),0,1023,0,100));
if(sensorDHT11_9.readTemperature() >29.5){
while(sensorDHT11_9.readTemperature() >28.2){
digitalWrite(7,HIGH);
display.display();
display.clearDisplay();
delay(250);
display.setTextSize(3);
display.setTextColor(WHITE);
display.setCursor(1,10);
display.print("FAN");
display.display();
display.clearDisplay();
delay(250);
}
}else{
digitalWrite(7,LOW);
}
if((analogRead(A0)<102.3) || (digitalRead(5)==LOW)){
while((analogRead(A0)<204.6) ||(digitalRead(5)==LOW)){
digitalWrite(8,HIGH);
display.display();
display.clearDisplay();
delay(250);
display.setTextSize(3);
display.setTextColor(WHITE);
display.setCursor(1,10);
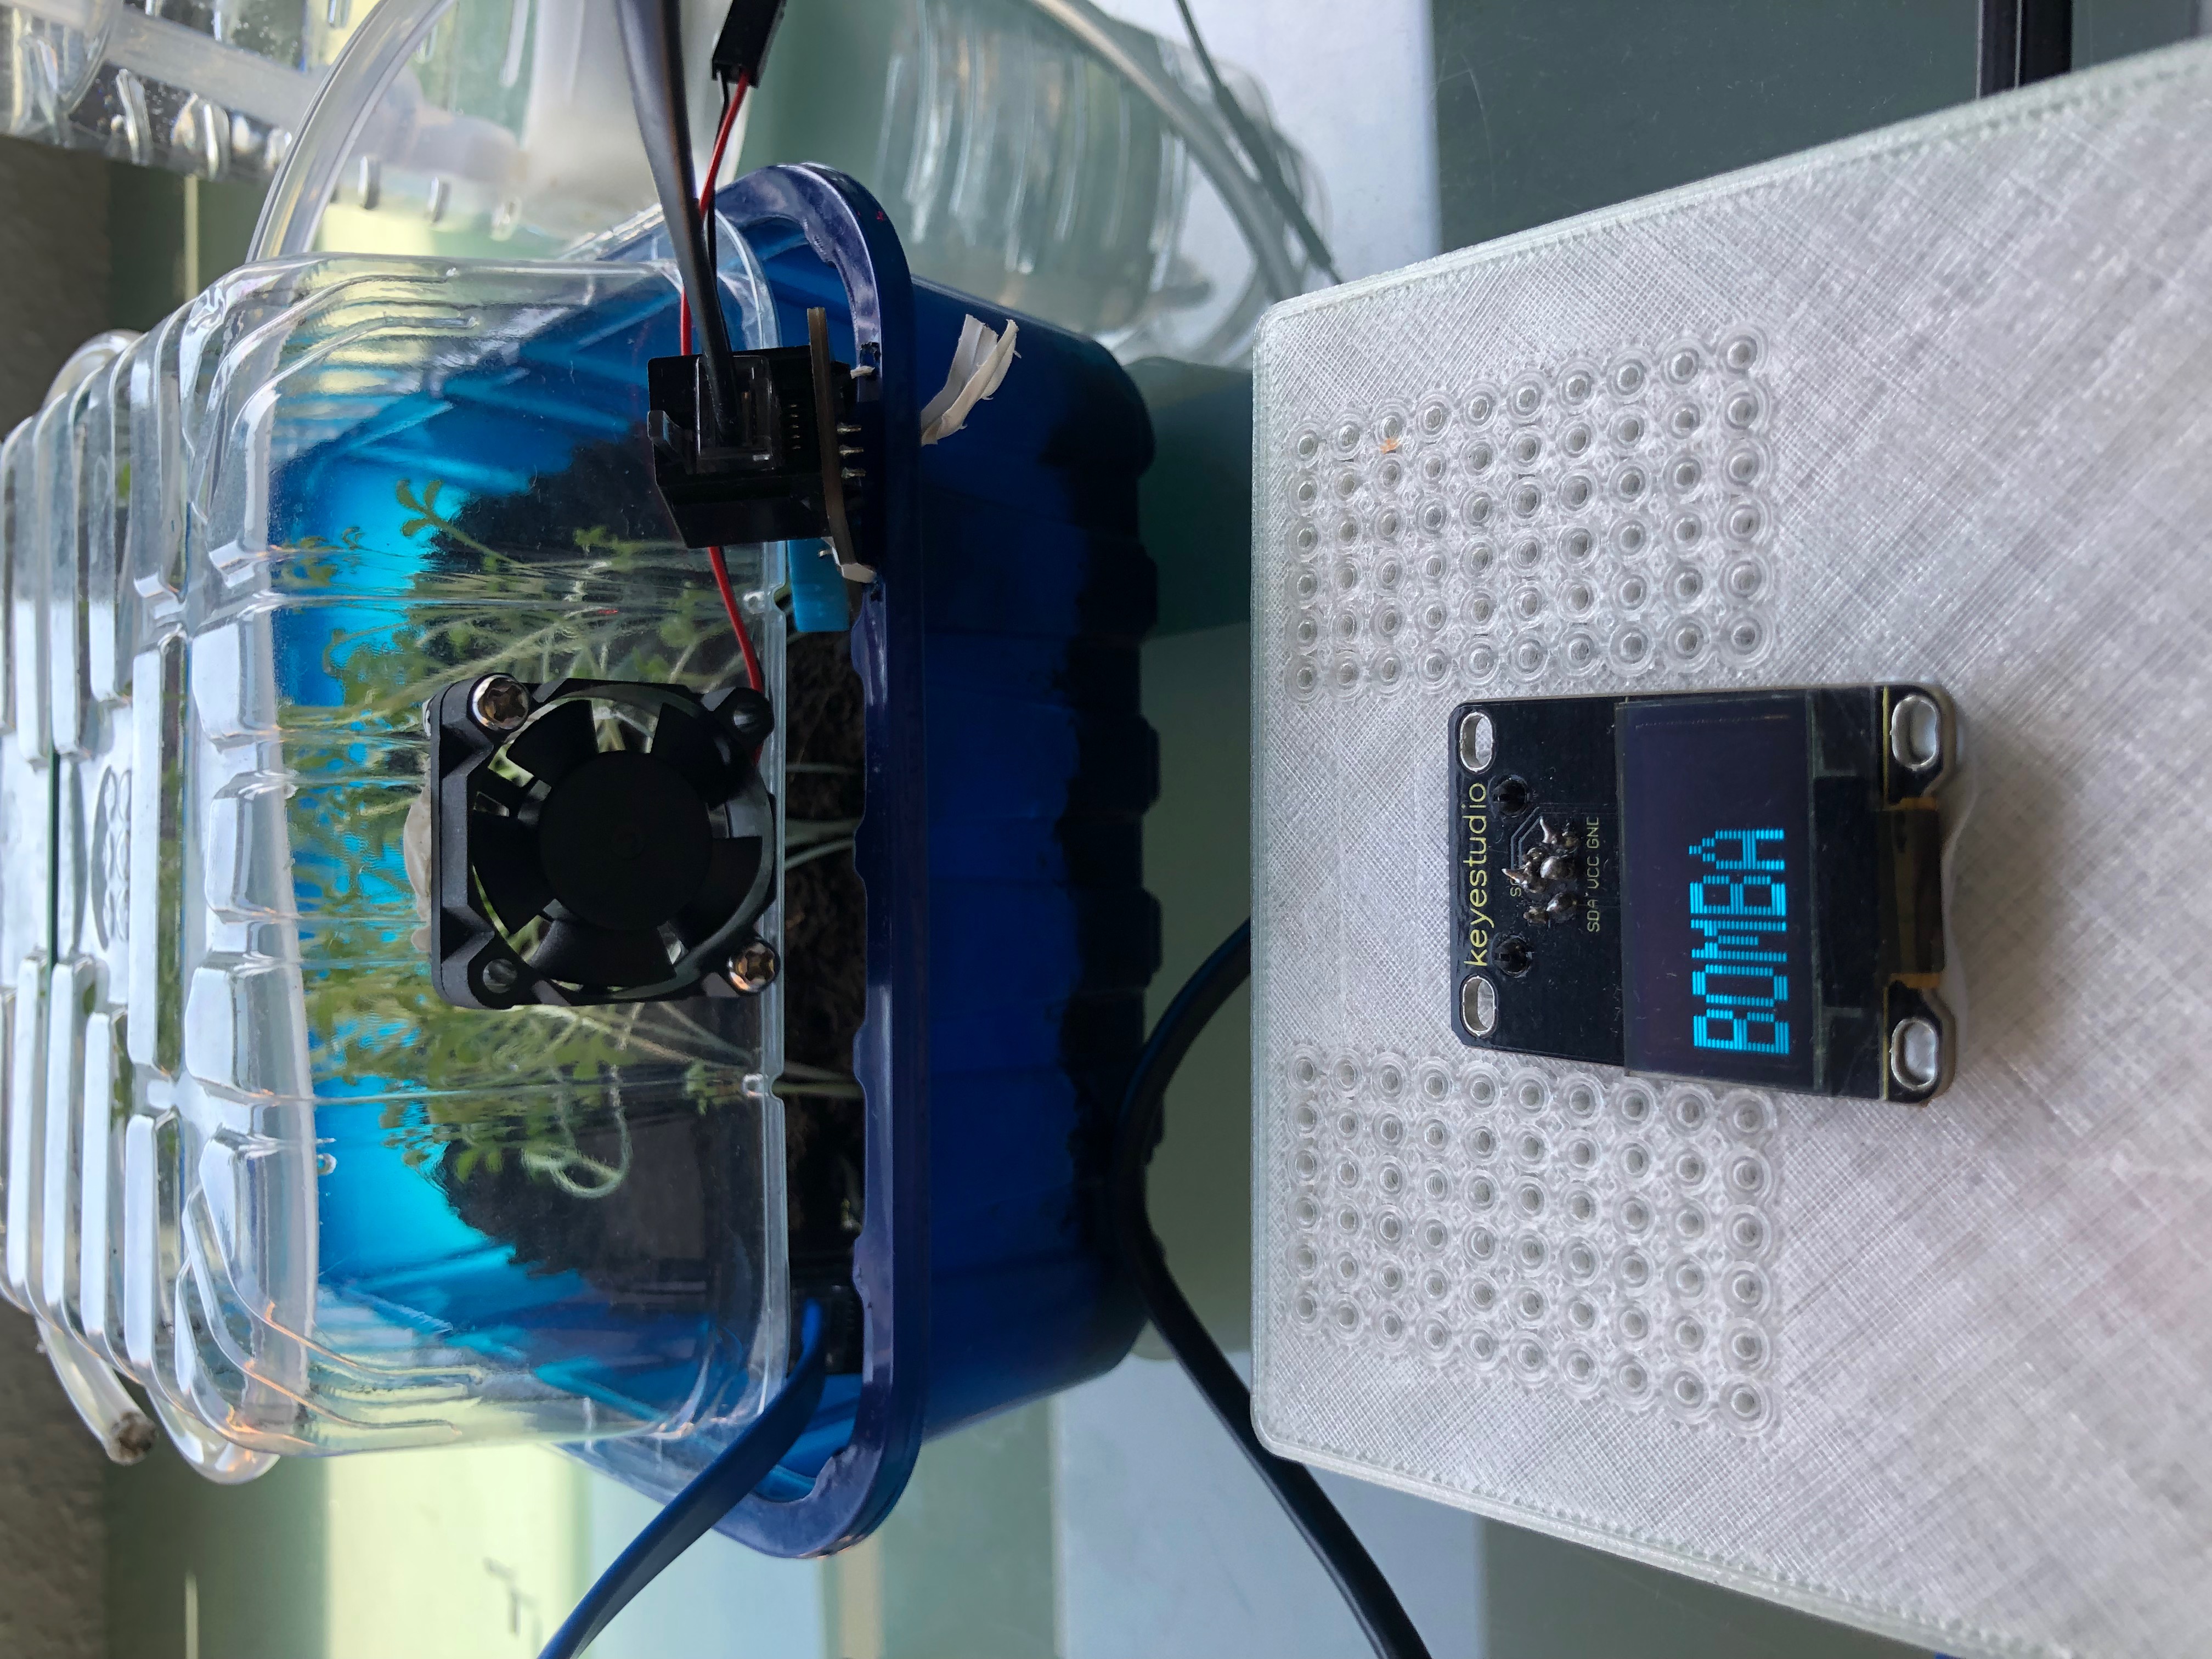
display.print("BOMBA");
display.display();
display.clearDisplay();
delay(250);
}
}else{
digitalWrite(8,LOW);
}
if(analogRead(A1)<604.6){
digitalWrite(6,LOW);
display.display();
display.clearDisplay();
delay(250);
display.setTextSize(3);
display.setTextColor(WHITE);
display.setCursor(1,10);
display.print("LED");
display.display();
display.clearDisplay();
delay(250);
}
else{
digitalWrite(6,HIGH);
}
display.display();
display.clearDisplay();
delay(250);
}
Facilino junior Code
Finally. Facilino Junior is an open Source block programming software developed by RoboticaFacil.
I have developed all the special blocks to the realization of this project.
This software application allows to program using any web browser.
When you finish programming your project you can export or download the instructions in the program language you want and for the board you want choosing between Arduino, Arduino UNO or Easy-Plug KeyStudio Main Board.
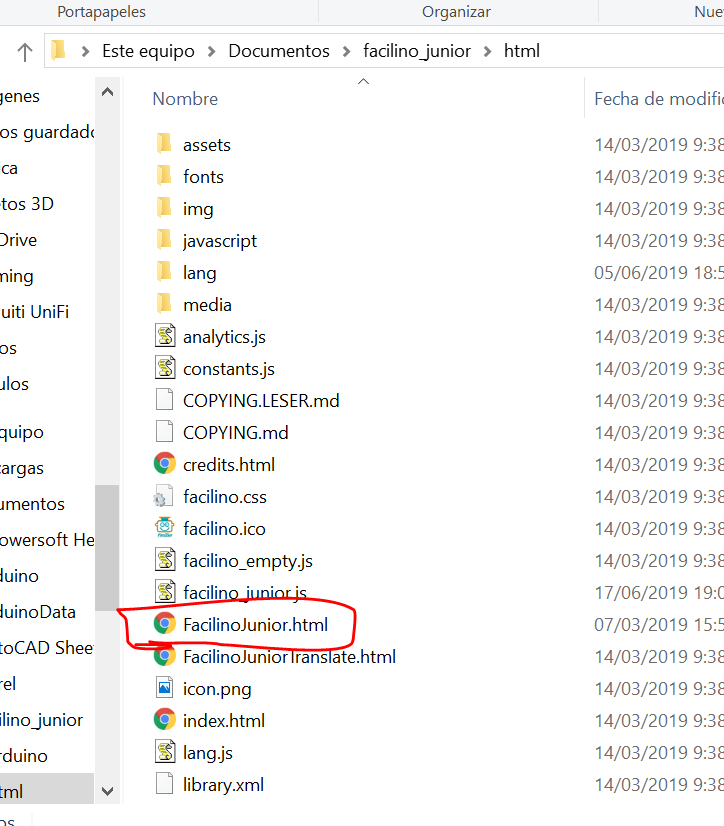
This software is in the resource facilino_junior.zip.
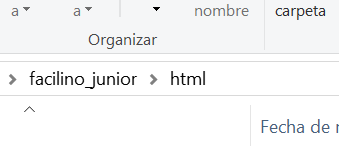
You just have to follow the next route:
And you just have to click on FacilinoJunior.html and open it with a Web Browser.
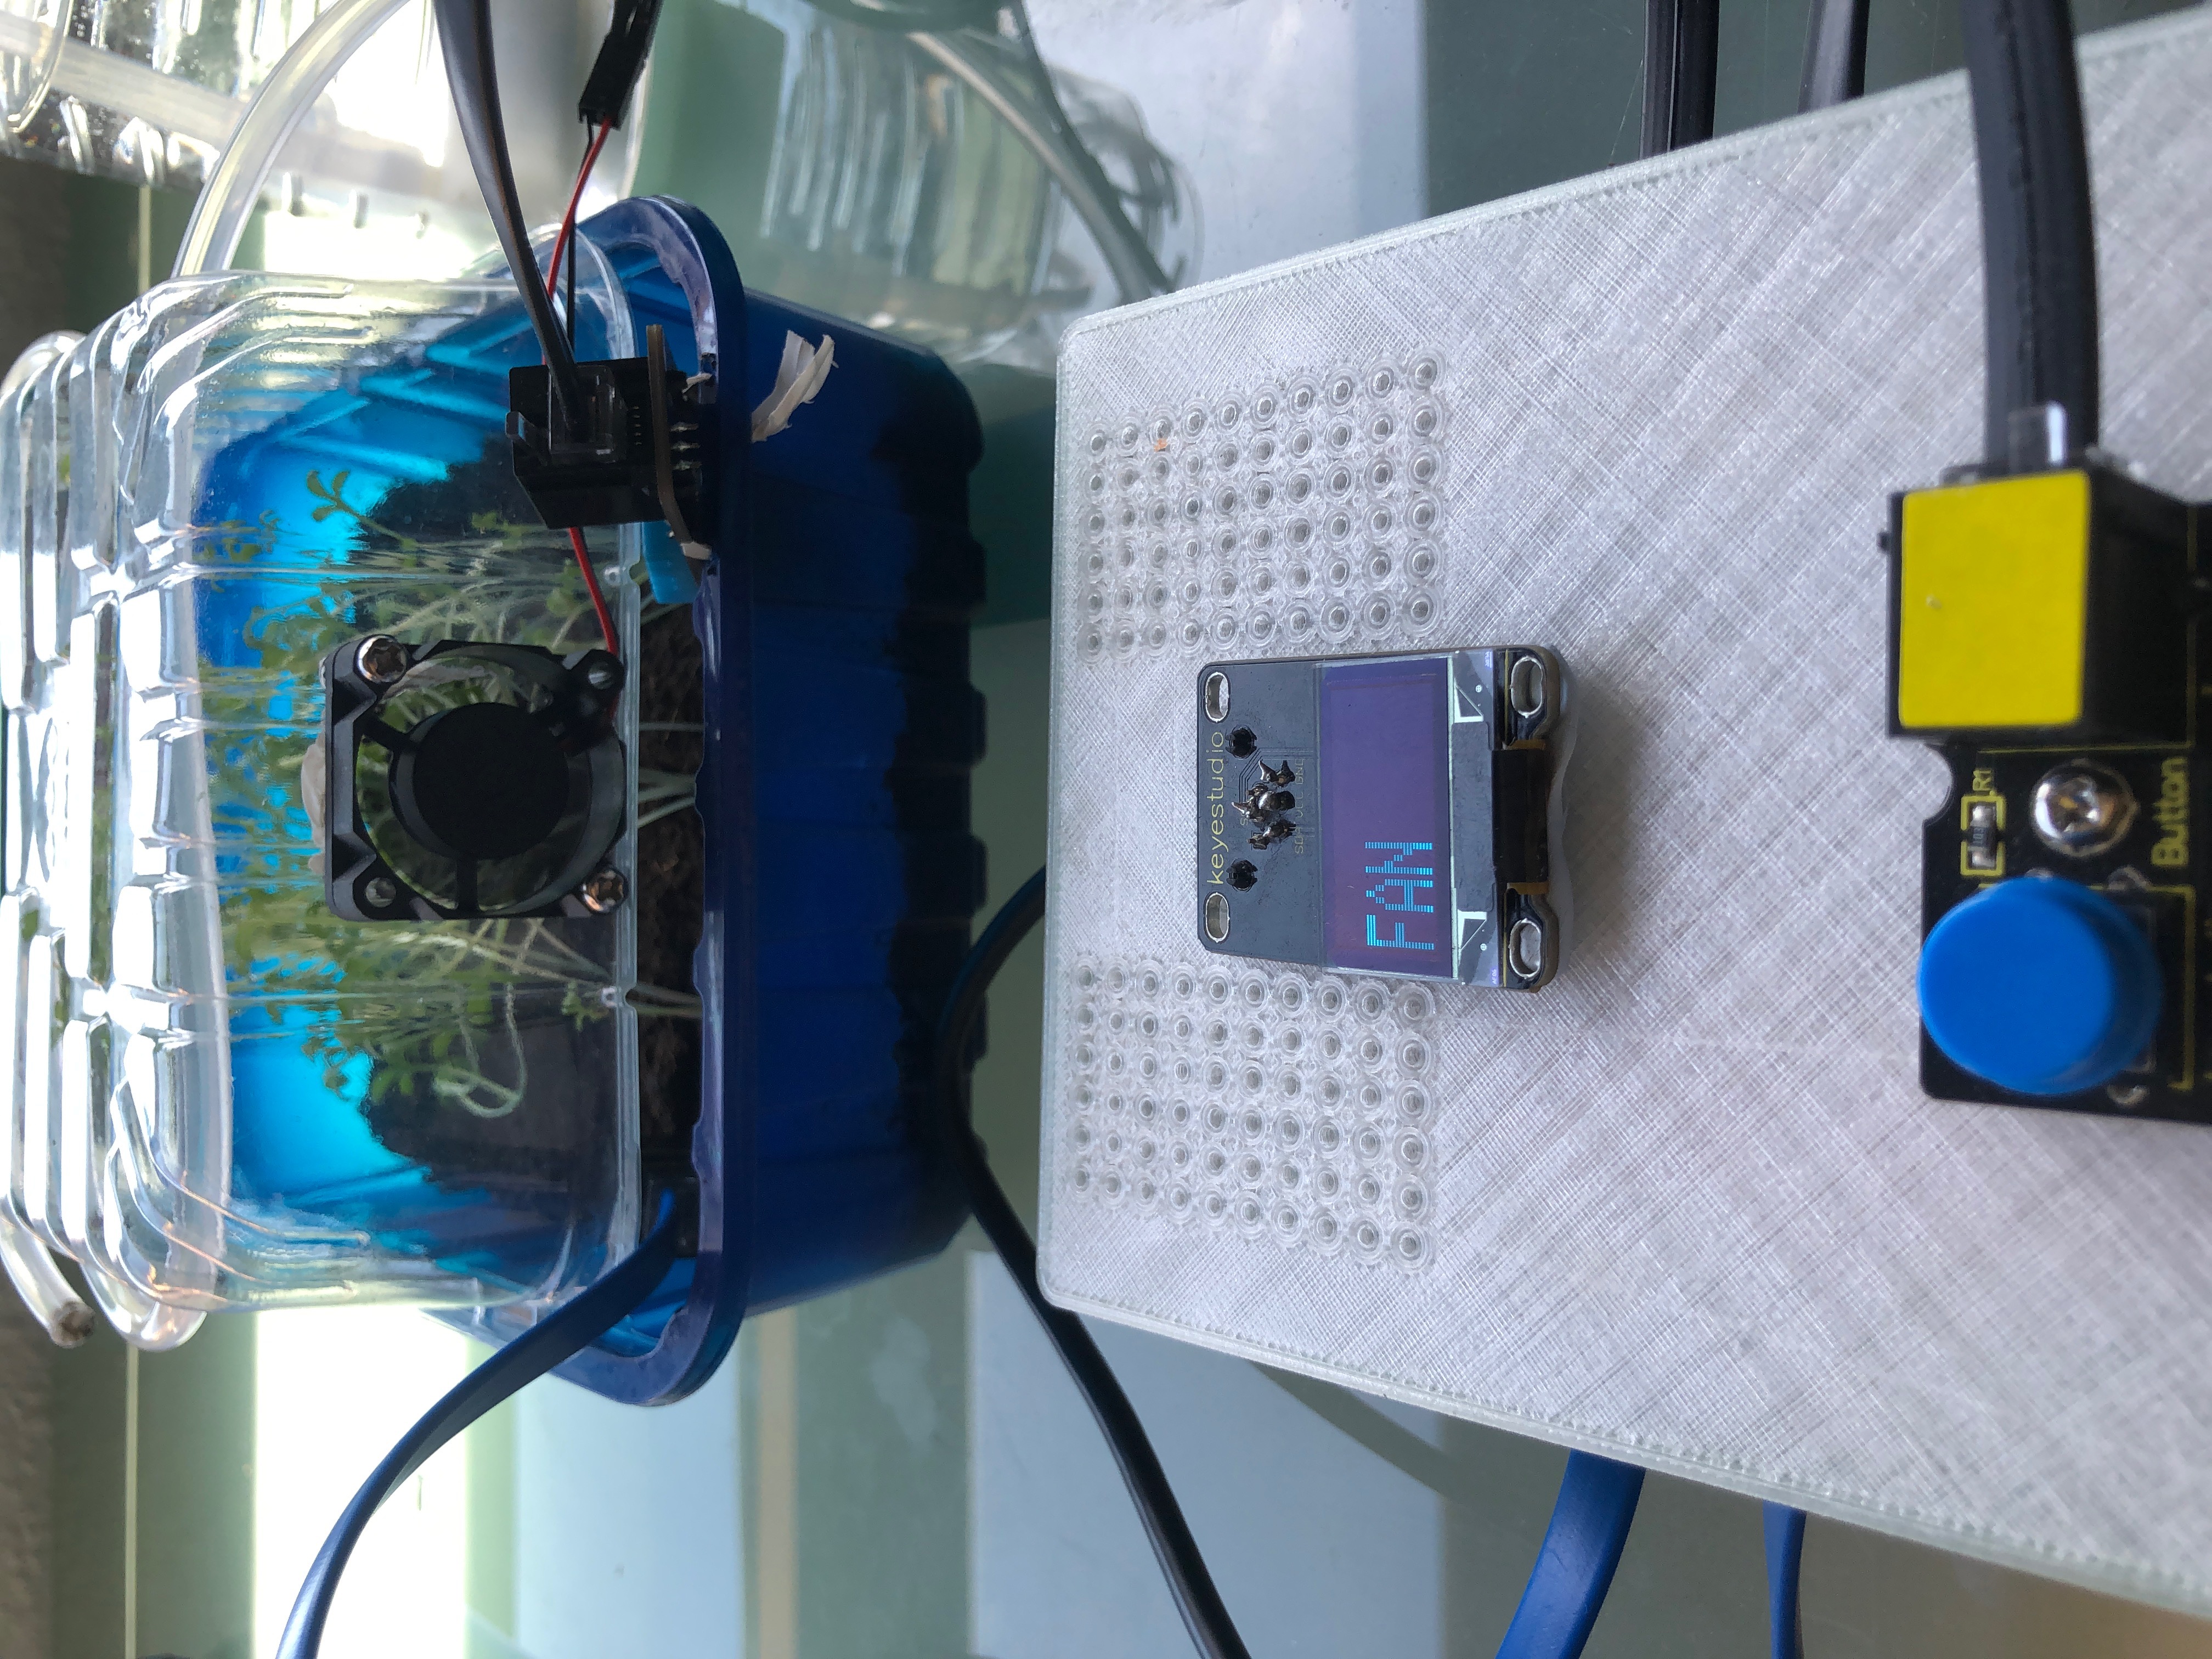
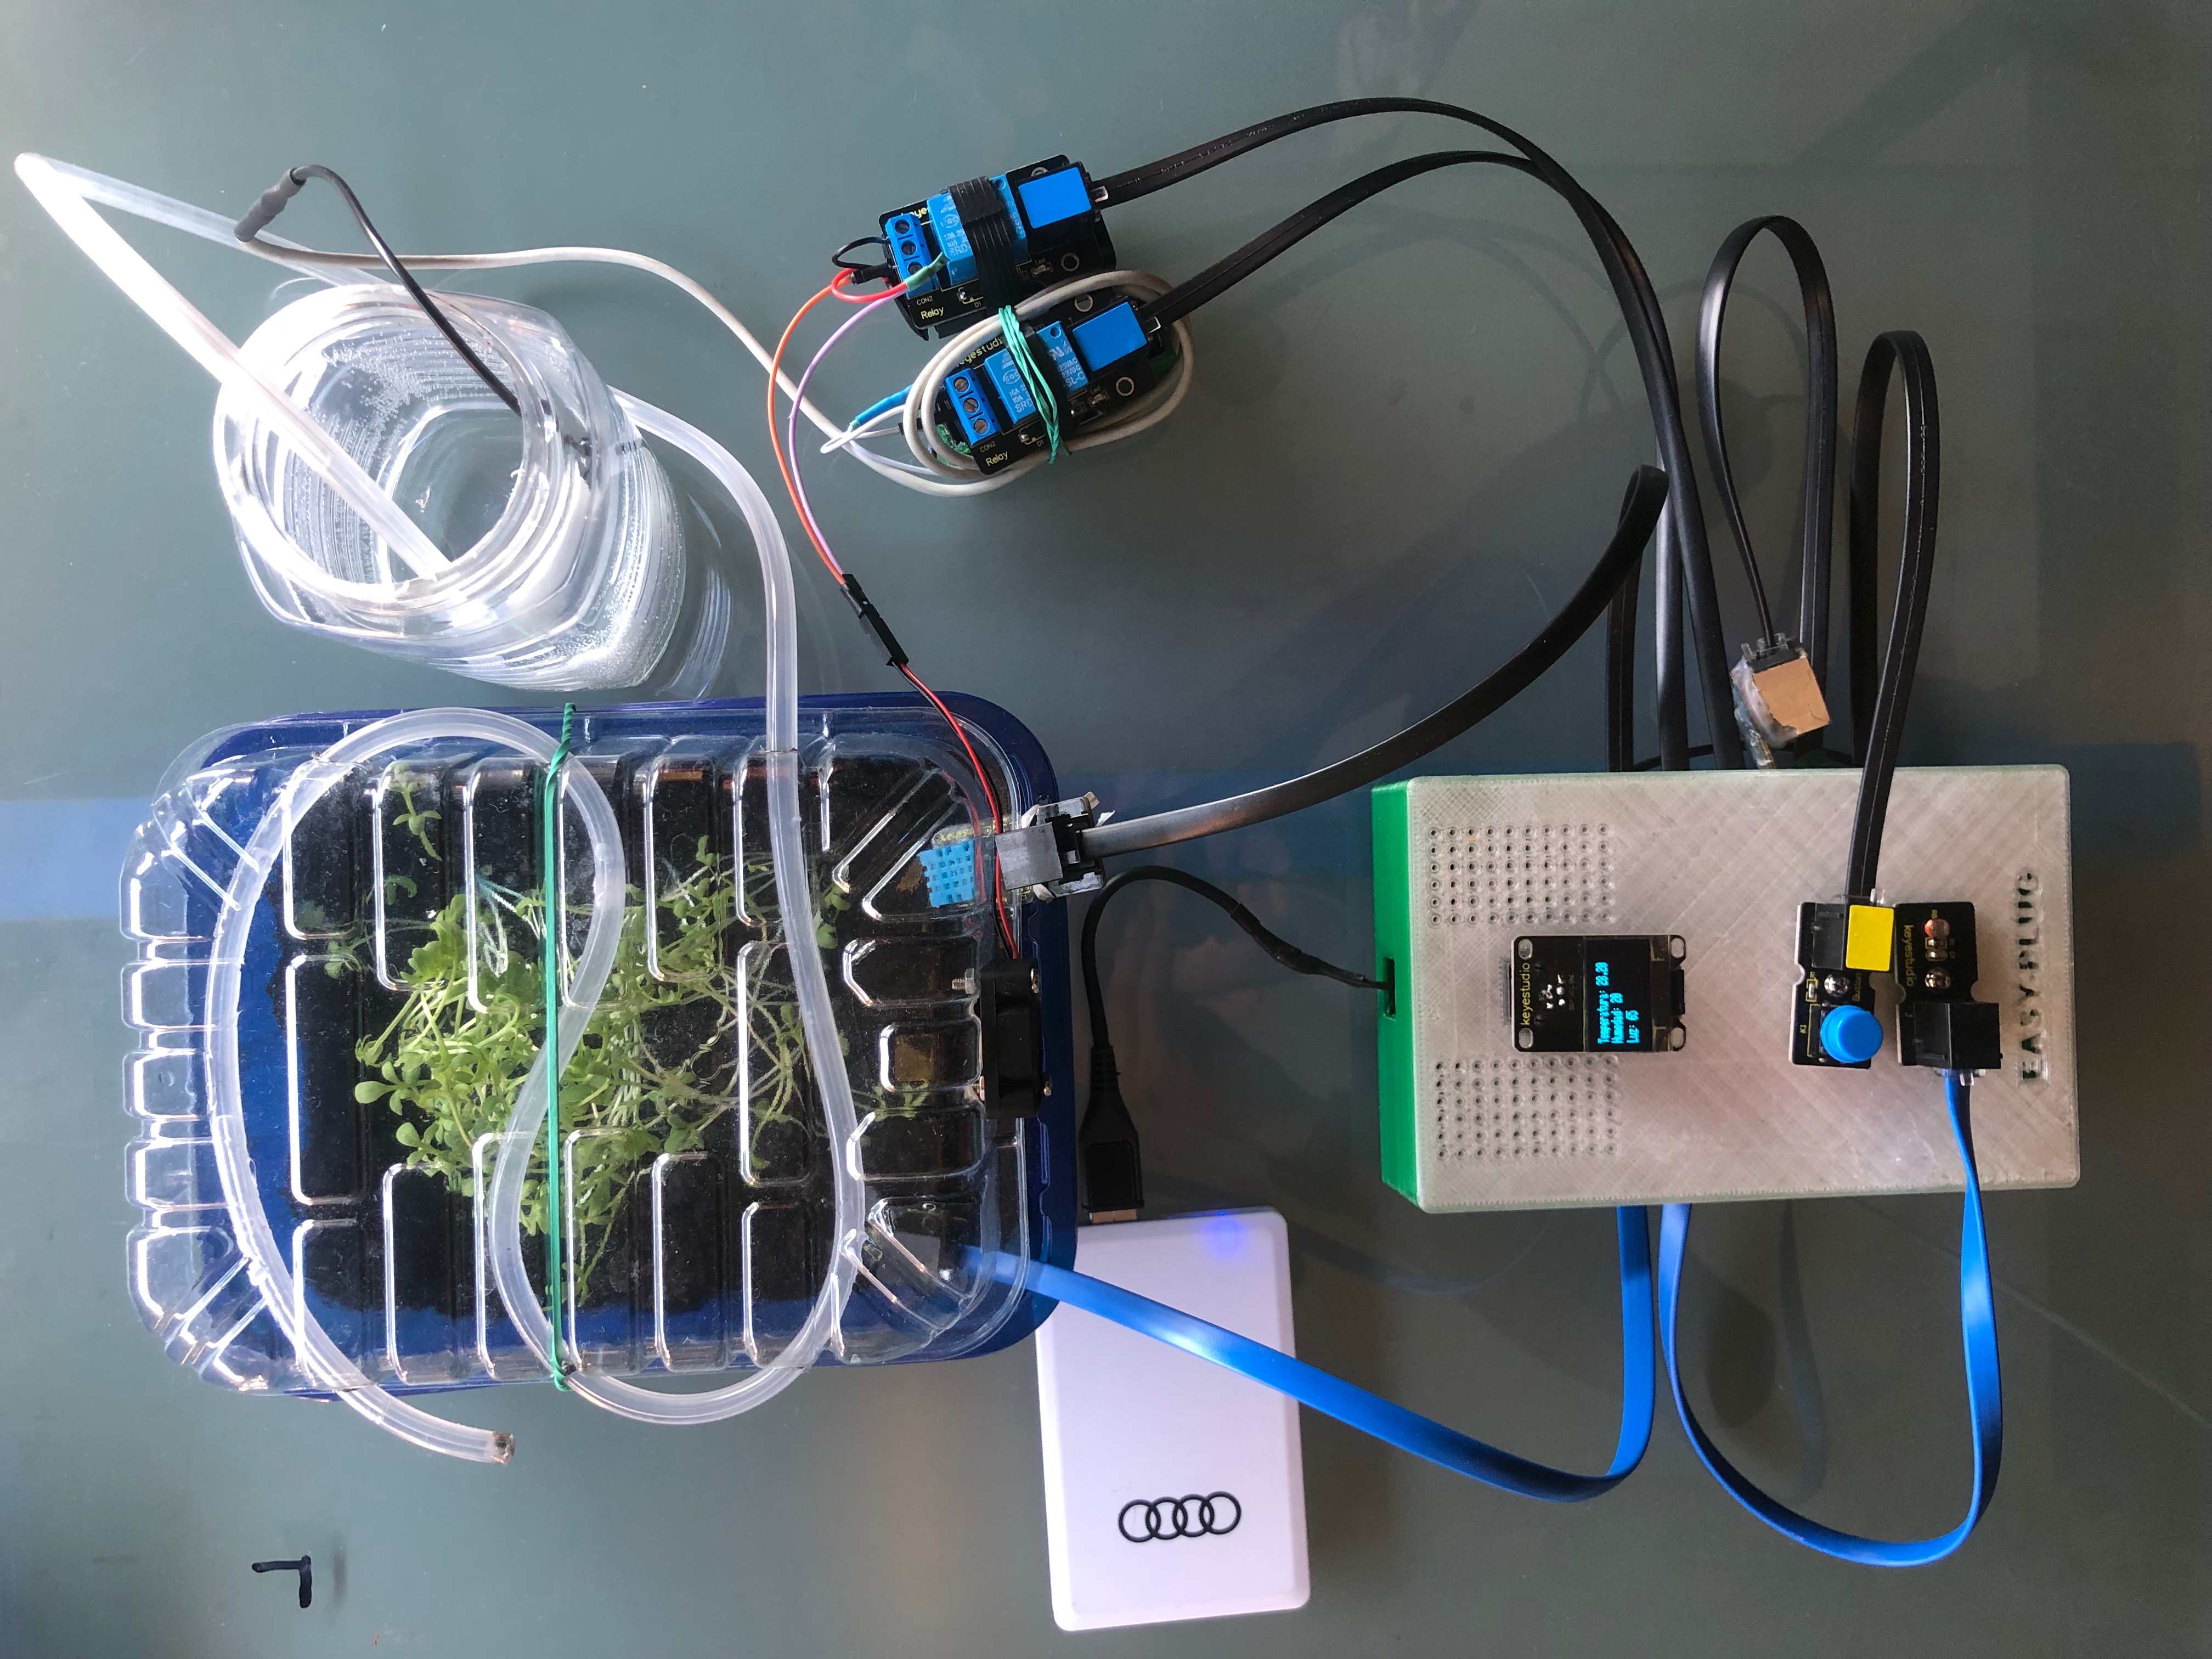
Results
Here are the results of this project. I have alse developed a 3D case fot the microcontroler wich is on Thingeverse.
All the blueprints of the case are in Thingeverse:
- Case: https://www.thingiverse.com/thing:3695320
-TopCase: https://www.thingiverse.com/thing:3709331