In this article, learn to build a sensor that will be able to detect the liquid level in any kind of container!
You will learn how to build your own contactless DIY liquid level sensing device using Arduino, an I2C OLED display, and VL53L0X sensor module.
Different Methods of Liquid Level Measurement
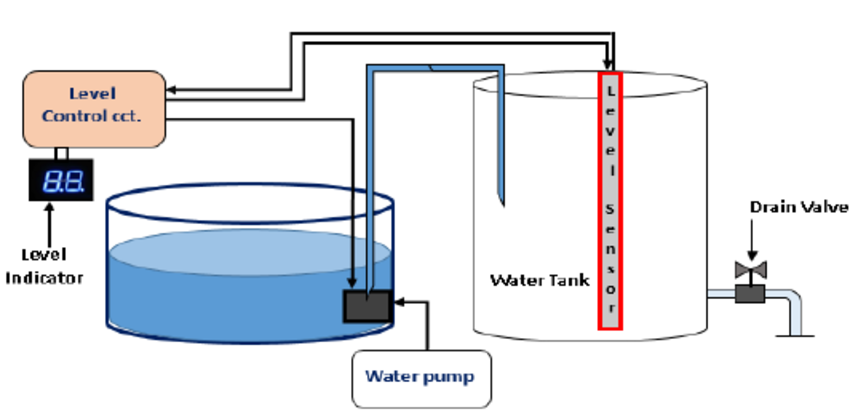
Most of the time, industries use a probe-dipped method to measure the liquid level. The probe-dipped method is measuring technique in which a probe is placed in the liquid to measure its conductivity. This measurement is basically made by measuring the resistance change caused by the change in water level. The image below shows this kind of method.
The probe-dipped method of liquid level sensing.
Another method used in liquid level systems involves detecting only the full state of the liquid. For example, motor pumps that turn off automatically when it detects that the water tank is full. In this system there will be a float-based sensor which turns off the flow mechanically, these systems are usually clunky and owe to mechanical failures.
In this project, we are going to use a third method: a contactless laser-based sensor module that utilizes the VL53L0X sensor chip.
What is the VL53L0X?
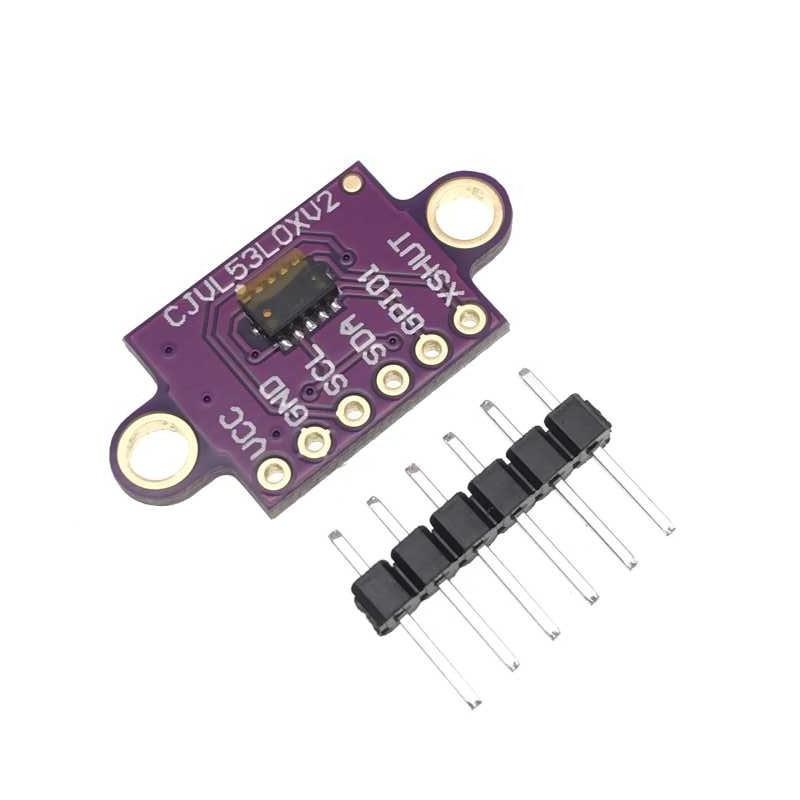
The VL53L0X sensor module uses a laser-based time-of-flight (ToF) distance ranging technique. It bounces invisible IR laser rays from any surface and measures the time that it takes for the light to reach the detector.
The VL53L0X comes in a small breakout board with a built-in regulator and an I2C-based capable device.
Other specifications include:
- Weight: 0.5 g
- Working voltage: between 2.6 V to 5.5 V
- Current consumption: 10 mA, Peak current can reach 40 mA.
- Size and width dimensions: 0.5″ × 0.7″ × 0.085″ (13 mm × 18 mm × 2 mm)
- Communication with microcontrollers (I²C): 16-bit distance reading (in millimeters)
- Range of this sensor: up to 2m (6.6 ft)
Arduino Sketches
We are going to use two Arduino sketches. Our first Arduino sketch is a calibration sketch. Here we will measure the distance of an empty liquid container from the top to bottom in millimeters. Next, we will calibrate our second Arduino sketch based on the data from the first sketch.
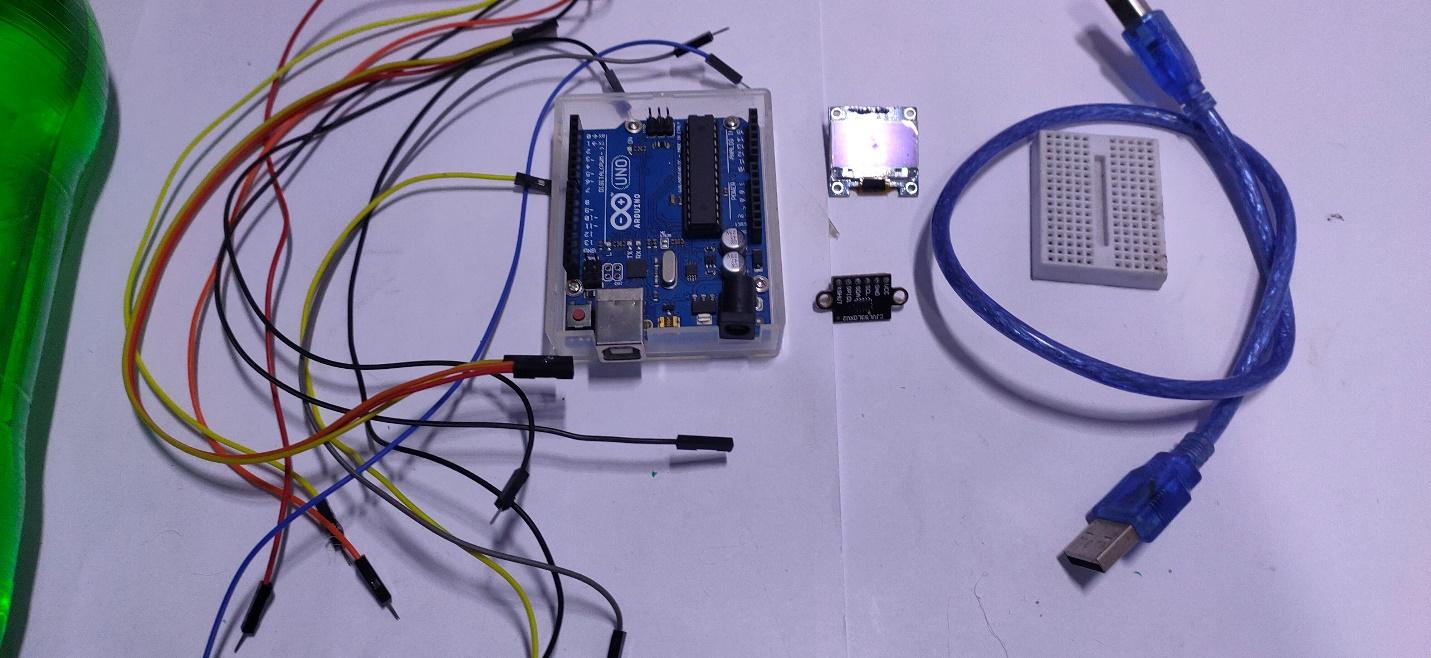
Required Hardware
- Arduino UNO
- OLED Display i2c
- Bread Board
- Jumper wires
- VL53L0X sensor module
Required Software
- Arduino IDE
- VL53L0X Library.
- SSD1306
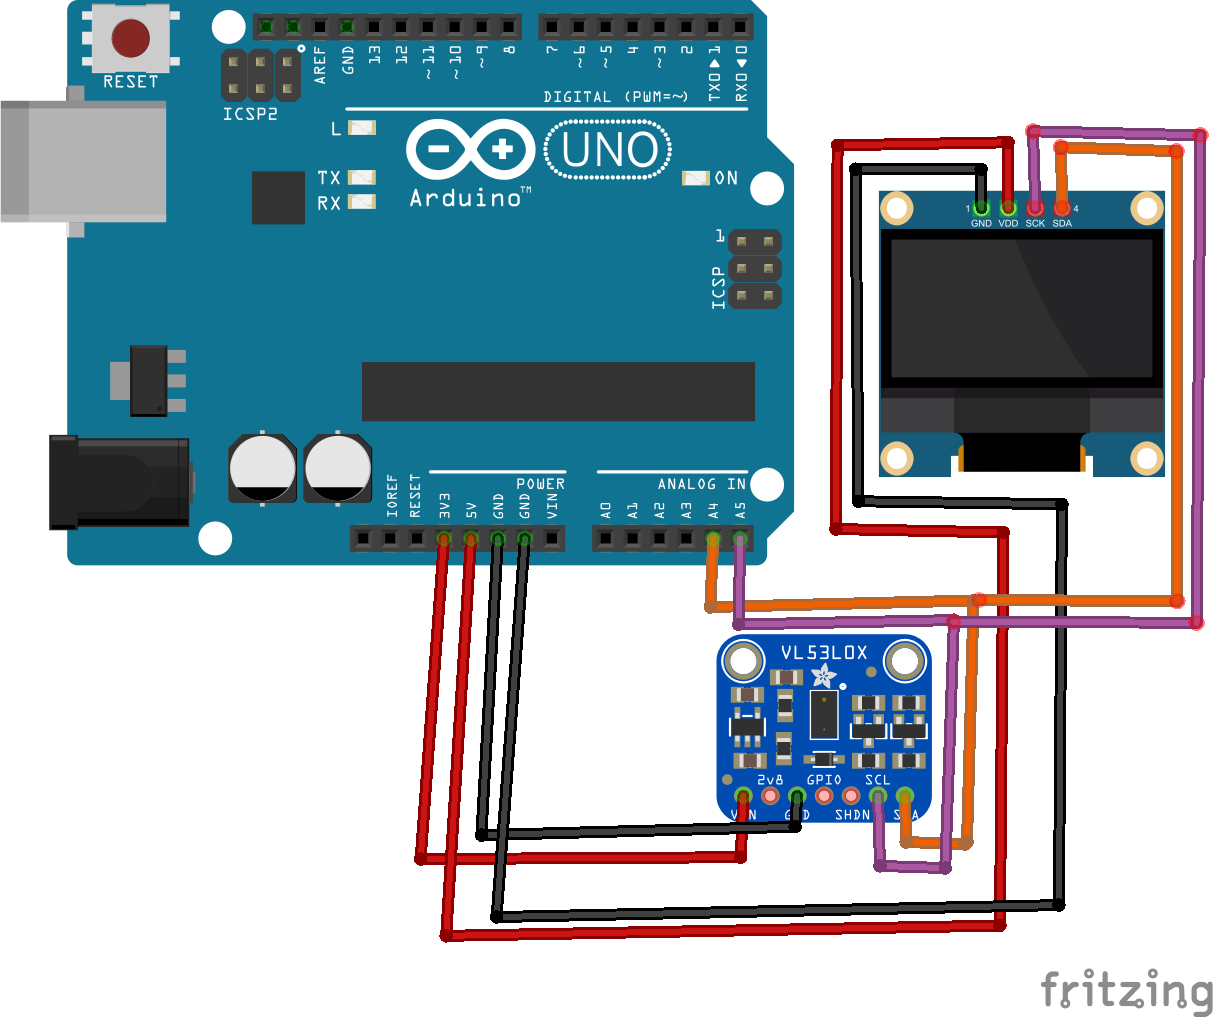
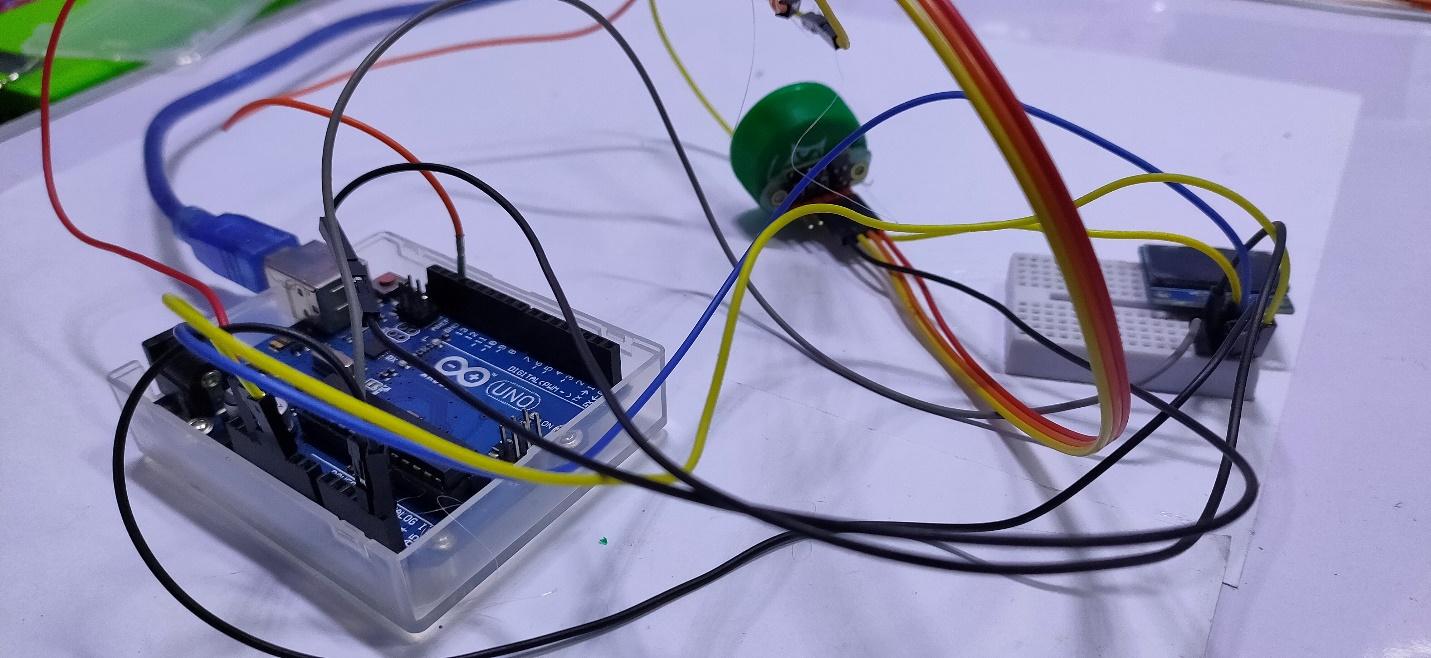
Wiring the Hardware
Wire the hardware as shown below in the Fritzing diagram.
Or, follow the pinout table:
Arduino Uno | OLED | VL53L0X |
|---|
A4(SDA) | SDA | SDA |
A5(SCL) | SCL | SCL |
3.3V | ----- | VCC to Arduino 3.3v |
5V | VCC to Arduino 5V | ----- |
Ground | GND | GND |
Calibrating the Liquid Container
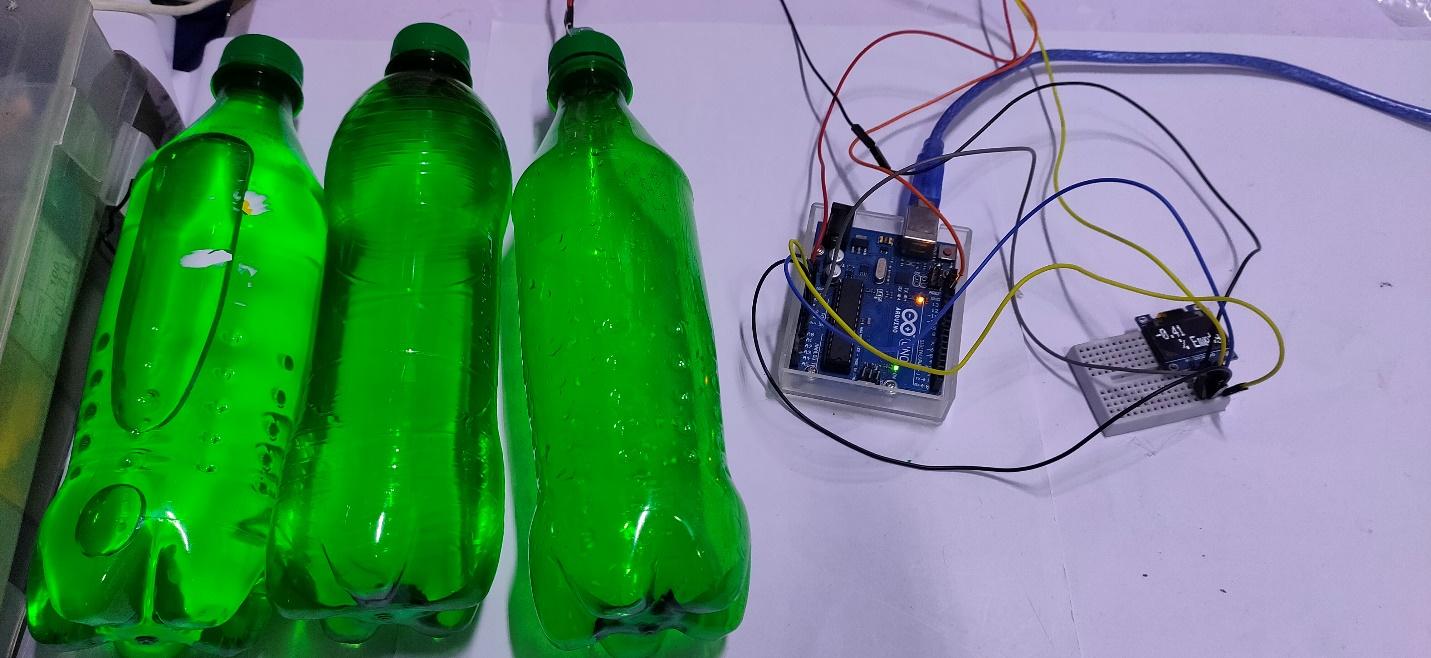
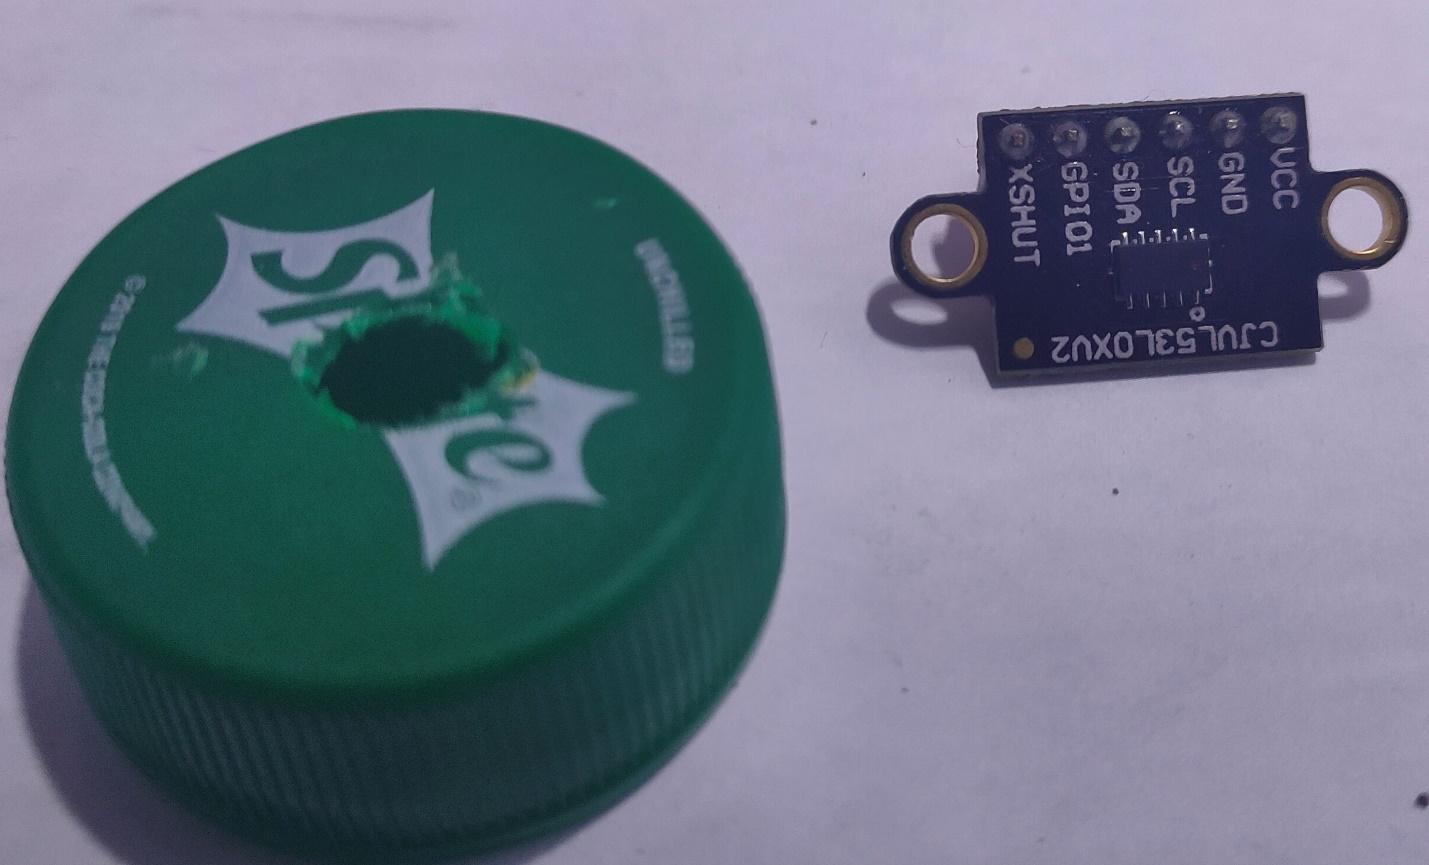
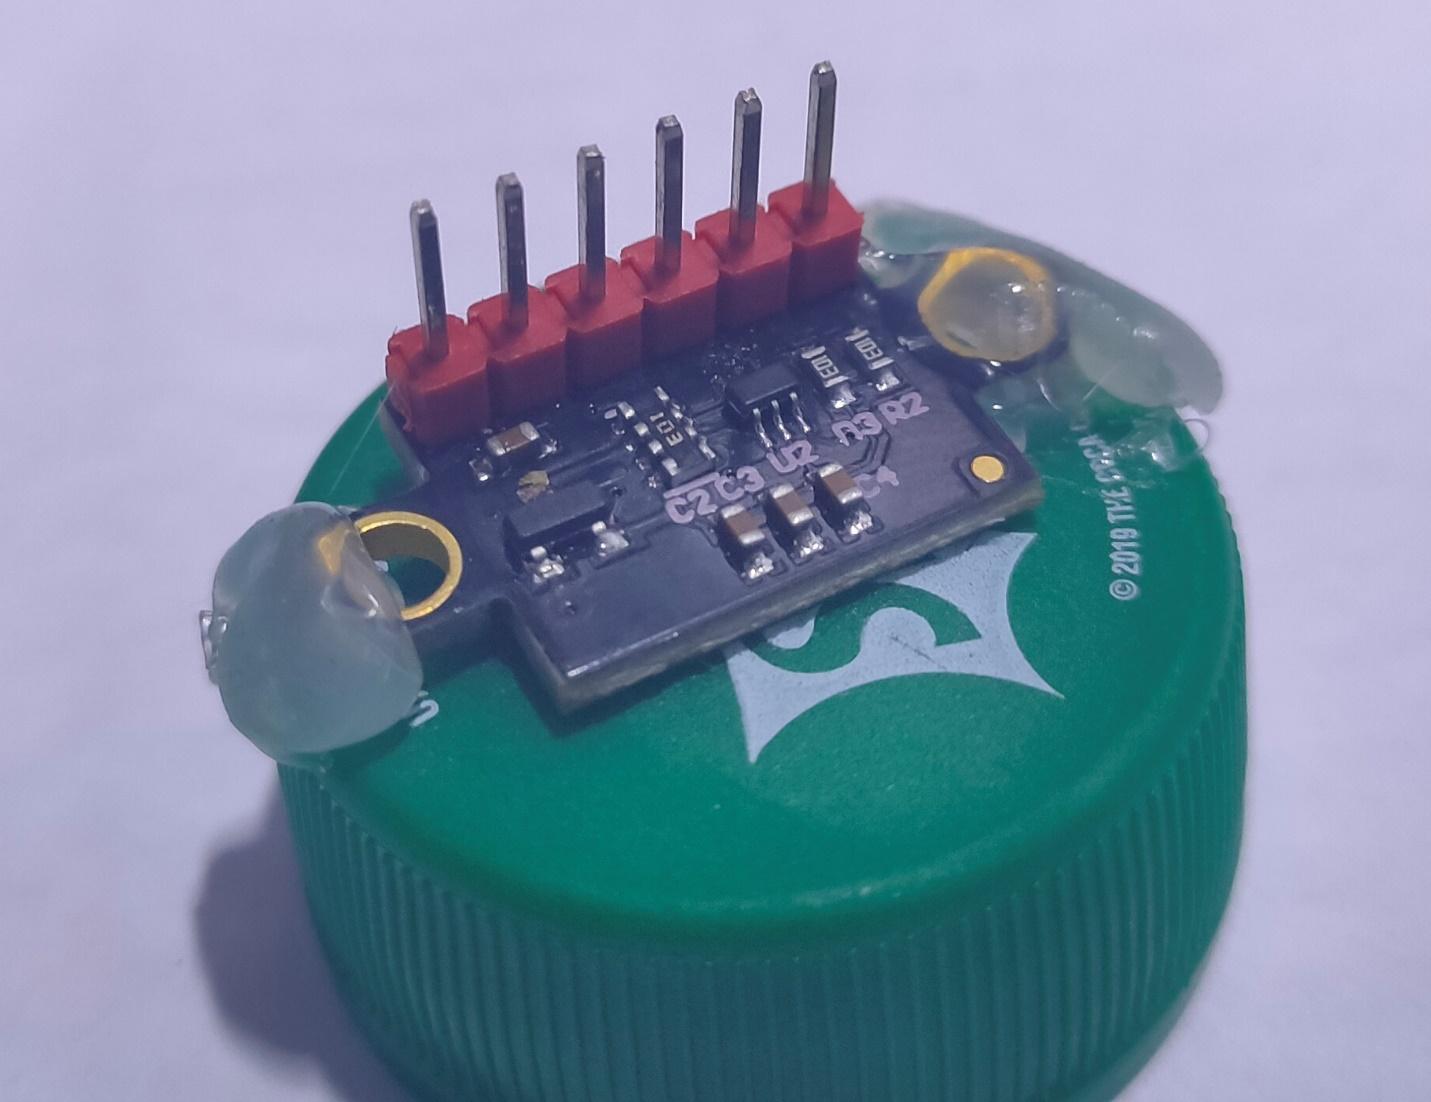
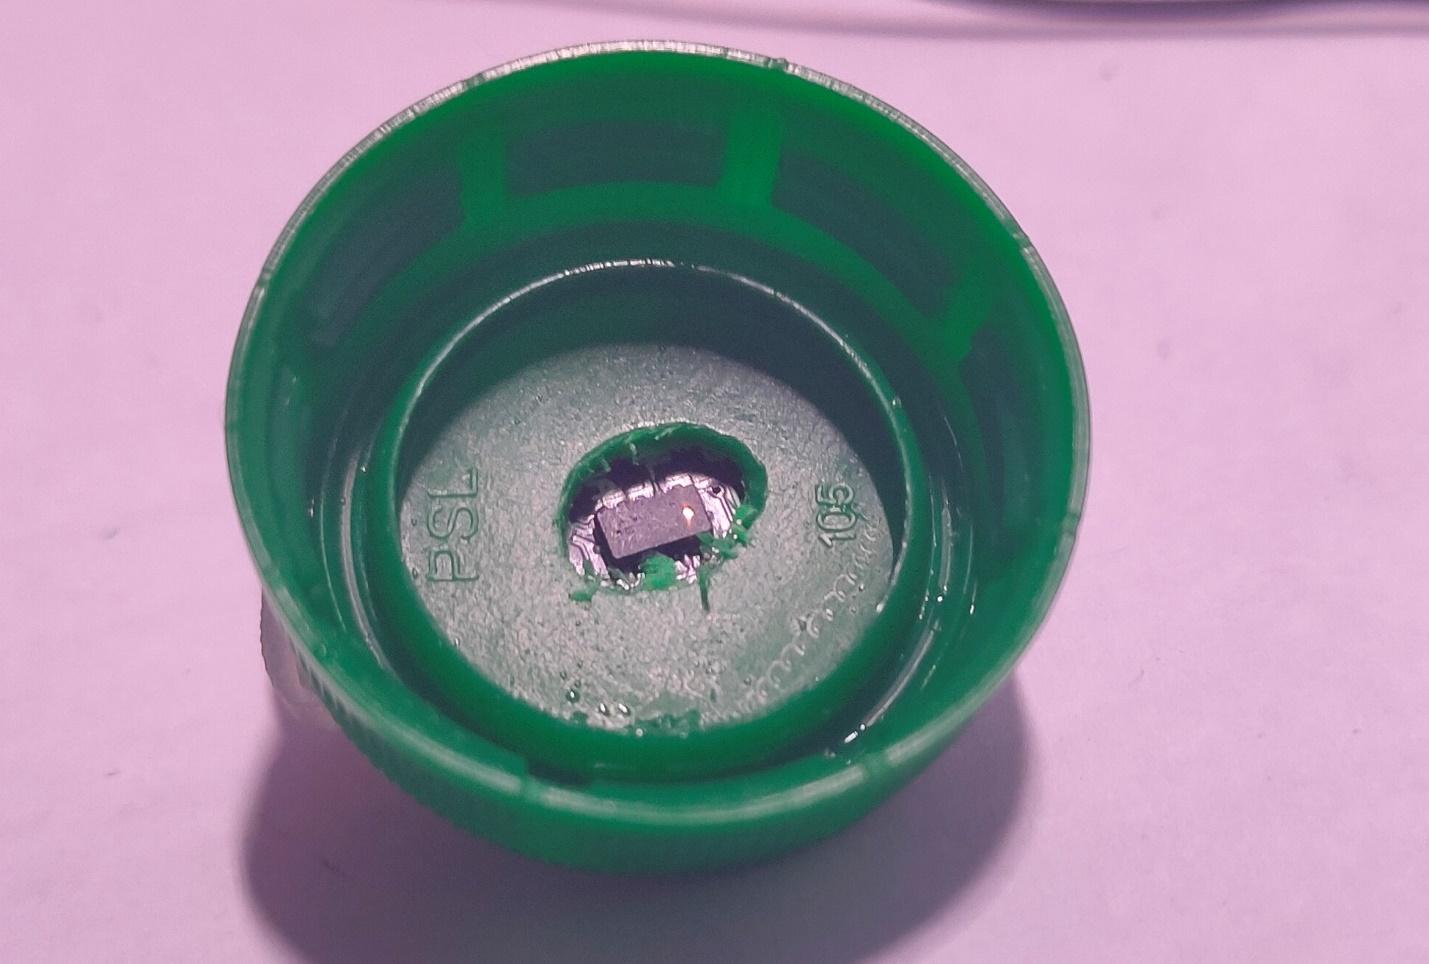
In order to calibrate the liquid container simply set the VL53L0X sensor module at the top of the container and note the value from the OLED display module. In my case, I am using an old soft drink bottle and its cap. I made a hole on the cap of this empty bottle and set the sensor on it as shown below in the image.
Copy the first sketch found at the end of this article. After uploading the code, place the sensor on the top of the bottle and note the distance in millimeters on the OLED screen. Use this value inside the second sketch (also at the end of this article).
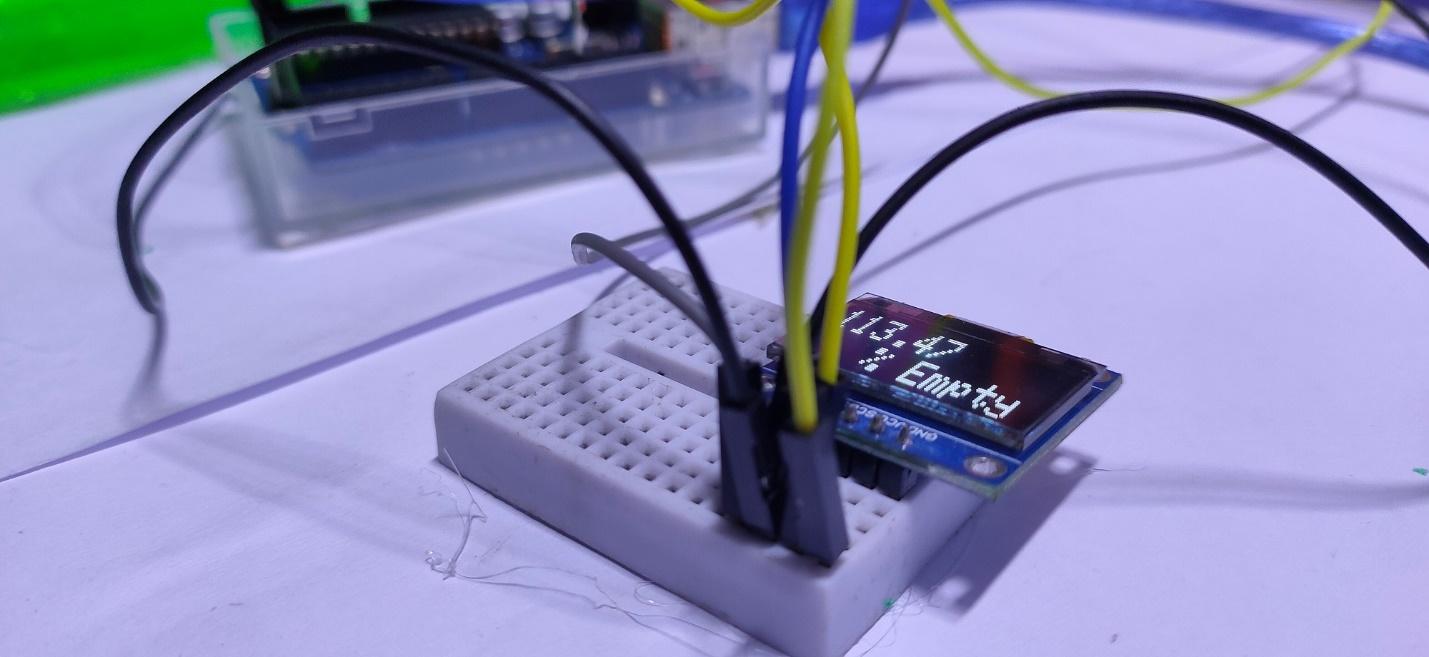
After changing the above value in the second Arduino sketch, upload the code. Now the Arduino will start displaying the liquid level as a percentage. For example, if the bottle/liquid container is completely empty, it will display 100% empty on the OLED Screen. If it is half full, it will display 50% empty and so on.
If the value goes above 100% then calibrate the build again in order to get an accurate result.
This sensor module makes it really easy to measure distances in a contactless way. It can be used for a lot of different projects that need you to measure distances accurately.
Calibration Sketch
#include <Wire.h>
#include <VL53L0X.h>
#include <Adafruit_GFX.h>
#include <Adafruit_SSD1306.h>
#include <MedianFilter.h>
#define OLED_RESET 4
Adafruit_SSD1306 display(OLED_RESET);
VL53L0X sensor;
MedianFilter test(10, 0);
// Uncomment this line to use long range mode. This
// increases the sensitivity of the sensor and extends its
// potential range, but increases the likelihood of getting
// an inaccurate reading because of reflections from objects
// other than the intended target. It works best in dark
// conditions.
//#define LONG_RANGE
// Uncomment ONE of these two lines to get
// - higher speed at the cost of lower accuracy OR
// - higher accuracy at the cost of lower speed
//#define HIGH_SPEED
//#define HIGH_ACCURACY
void setup()
{
Serial.begin(9600);
Wire.begin();
display.begin(SSD1306_SWITCHCAPVCC, 0x3C);
sensor.init();
sensor.setTimeout(500);
#if defined LONG_RANGE
// lower the return signal rate limit (default is 0.25 MCPS)
sensor.setSignalRateLimit(0.1);
// increase laser pulse periods (defaults are 14 and 10 PCLKs)
sensor.setVcselPulsePeriod(VL53L0X::VcselPeriodPreRange, 18);
sensor.setVcselPulsePeriod(VL53L0X::VcselPeriodFinalRange, 14);
#endif
#if defined HIGH_SPEED
// reduce timing budget to 20 ms (default is about 33 ms)
sensor.setMeasurementTimingBudget(20000);
#elif defined HIGH_ACCURACY
// increase timing budget to 200 ms
sensor.setMeasurementTimingBudget(200000);
#endif
// Clear the buffer.
display.clearDisplay();
display.setRotation(2);
display.display();
display.setTextColor(WHITE);
}
void displayDistance( int val){
display.clearDisplay();
display.setTextSize(4);
display.setCursor(0,0);
display.print(val);
display.setTextSize(2);
display.setCursor(0,30);
display.print("mm");
display.display();
delay(100);
}
void loop()
{
int o,r = sensor.readRangeSingleMillimeters();
test.in( r );
o = test.out();
Serial.print(o);
if (sensor.timeoutOccurred()) { Serial.print(" TIMEOUT"); }
Serial.println();
displayDistance( o );
}
Project Sketch
#include <Wire.h>
#include <VL53L0X.h>
#include <Adafruit_GFX.h>
#include <Adafruit_SSD1306.h>
#include <MedianFilter.h>
#define OLED_RESET 4
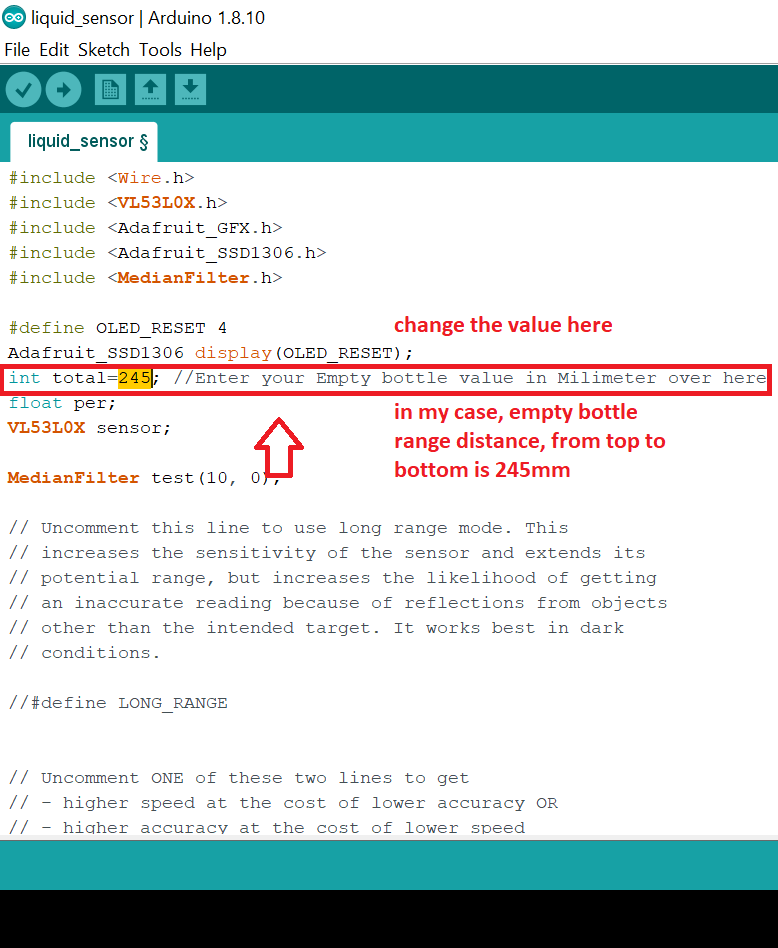
Adafruit_SSD1306 display(OLED_RESET);
int total=245; //Enter your Empty bottle value in Milimeter over here
float per;
VL53L0X sensor;
MedianFilter test(10, 0);
// Uncomment this line to use long range mode. This
// increases the sensitivity of the sensor and extends its
// potential range, but increases the likelihood of getting
// an inaccurate reading because of reflections from objects
// other than the intended target. It works best in dark
// conditions.
//#define LONG_RANGE
// Uncomment ONE of these two lines to get
// - higher speed at the cost of lower accuracy OR
// - higher accuracy at the cost of lower speed
//#define HIGH_SPEED
//#define HIGH_ACCURACY
/*
#if (SSD1306_LCDHEIGHT != 64)
#error("Height incorrect, please fix Adafruit_SSD1306.h!");
#endif
*/
void setup()
{
Serial.begin(9600);
Wire.begin();
display.begin(SSD1306_SWITCHCAPVCC, 0x3C);
sensor.init();
sensor.setTimeout(500);
#if defined LONG_RANGE
// lower the return signal rate limit (default is 0.25 MCPS)
sensor.setSignalRateLimit(0.1);
// increase laser pulse periods (defaults are 14 and 10 PCLKs)
sensor.setVcselPulsePeriod(VL53L0X::VcselPeriodPreRange, 18);
sensor.setVcselPulsePeriod(VL53L0X::VcselPeriodFinalRange, 14);
#endif
#if defined HIGH_SPEED
// reduce timing budget to 20 ms (default is about 33 ms)
sensor.setMeasurementTimingBudget(20000);
#elif defined HIGH_ACCURACY
// increase timing budget to 200 ms
sensor.setMeasurementTimingBudget(200000);
#endif
// Clear the buffer.
display.clearDisplay();
display.setRotation(2);
display.display();
display.setTextColor(WHITE);
}
void displayDistance( float val){
display.clearDisplay();
display.setTextSize(2);
display.setCursor(0,0);
display.print(val);
display.setTextSize(2);
display.setCursor(38,17);
display.print("% Empty");
display.display();
delay(100);
}
void loop()
{
float o,r = sensor.readRangeSingleMillimeters();
test.in( r );
o = test.out();
if(o<50)
{
display.clearDisplay();
display.setTextSize(1);
display.setCursor(0,0);
display.print("Full");
display.display();
Serial.println("Full");
delay(100);
}
int t= total;
per=(o/t)*100;
displayDistance( per );
if (sensor.timeoutOccurred()) { Serial.print(" TIMEOUT"); }
Serial.print("value of : sensor");
Serial.println(o);
Serial.println();
Serial.print(per);
Serial.println("%");
return;
}