Learn how you can use your mobile phone, a SIM900 module, and an Arduino to control a relay from anywhere in the world!
In this project, I'll show you how to set up your mobile phone to control a relay through a simple SMS. The mobile phone will send the messages and a SIM900 module will receive the message.
SIM900 modules are handy for a variety of different applications including vehicle tracking, remote automation, or even for simple things like feeding your fish when you are not home.
The SIM900 module will communicate with Arduino through serial communication and the Arduino will turn the relay on or off according to the message it receives.
Required Components for Your SMS Controlled Relay
- Arduino
- SIM900
- Active SIM card
- Relay module
- Power adapter
- Jumper wires
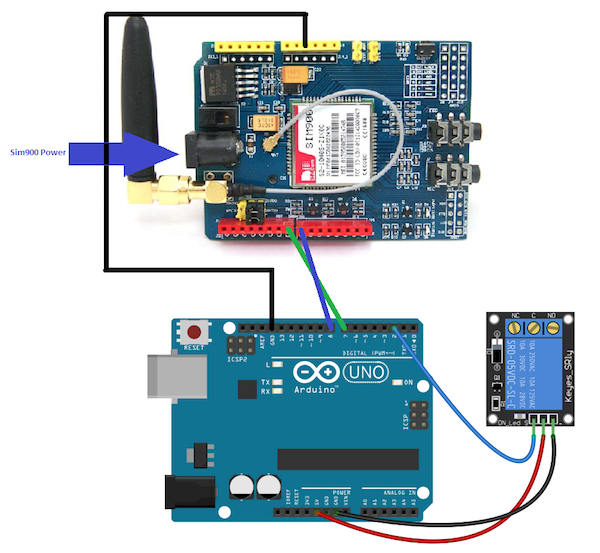
Circuit Diagram for Your SMS-Controlled Relay
Before making the connections, insert a SIM card in the SIM900. You can use any active SIM card that you have lying around. The SIM card slot is located on the back side of the SIM900 module. Insert the SIM card in it and lock the slot.
NOTE: Make sure that the sim card you have inserted still has credit available.
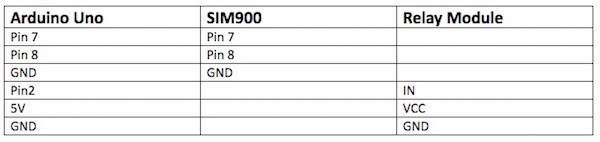
Now make the connections as listed in the following table.
Circuit diagram of how your connections will look on the board.
We cannot power the SIM900 from the Arduino because the Arduino does not provide a high enough current. We will, therefore, have to use external power. The recommended power for SIM900 is 5V, 2A but I used a 5V, 1500 mA adapter and it worked fine for me.
Finally, connect the Arduino to your PC using the USB cable.
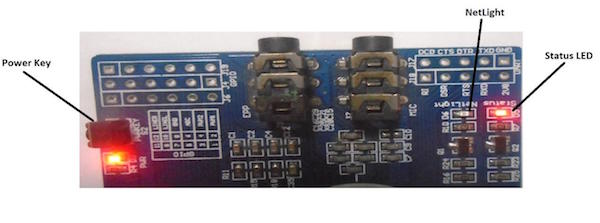
Once everything is connected, press the power key on the SIM900. The status LED should light up and the NetLight LED should begin blinking.
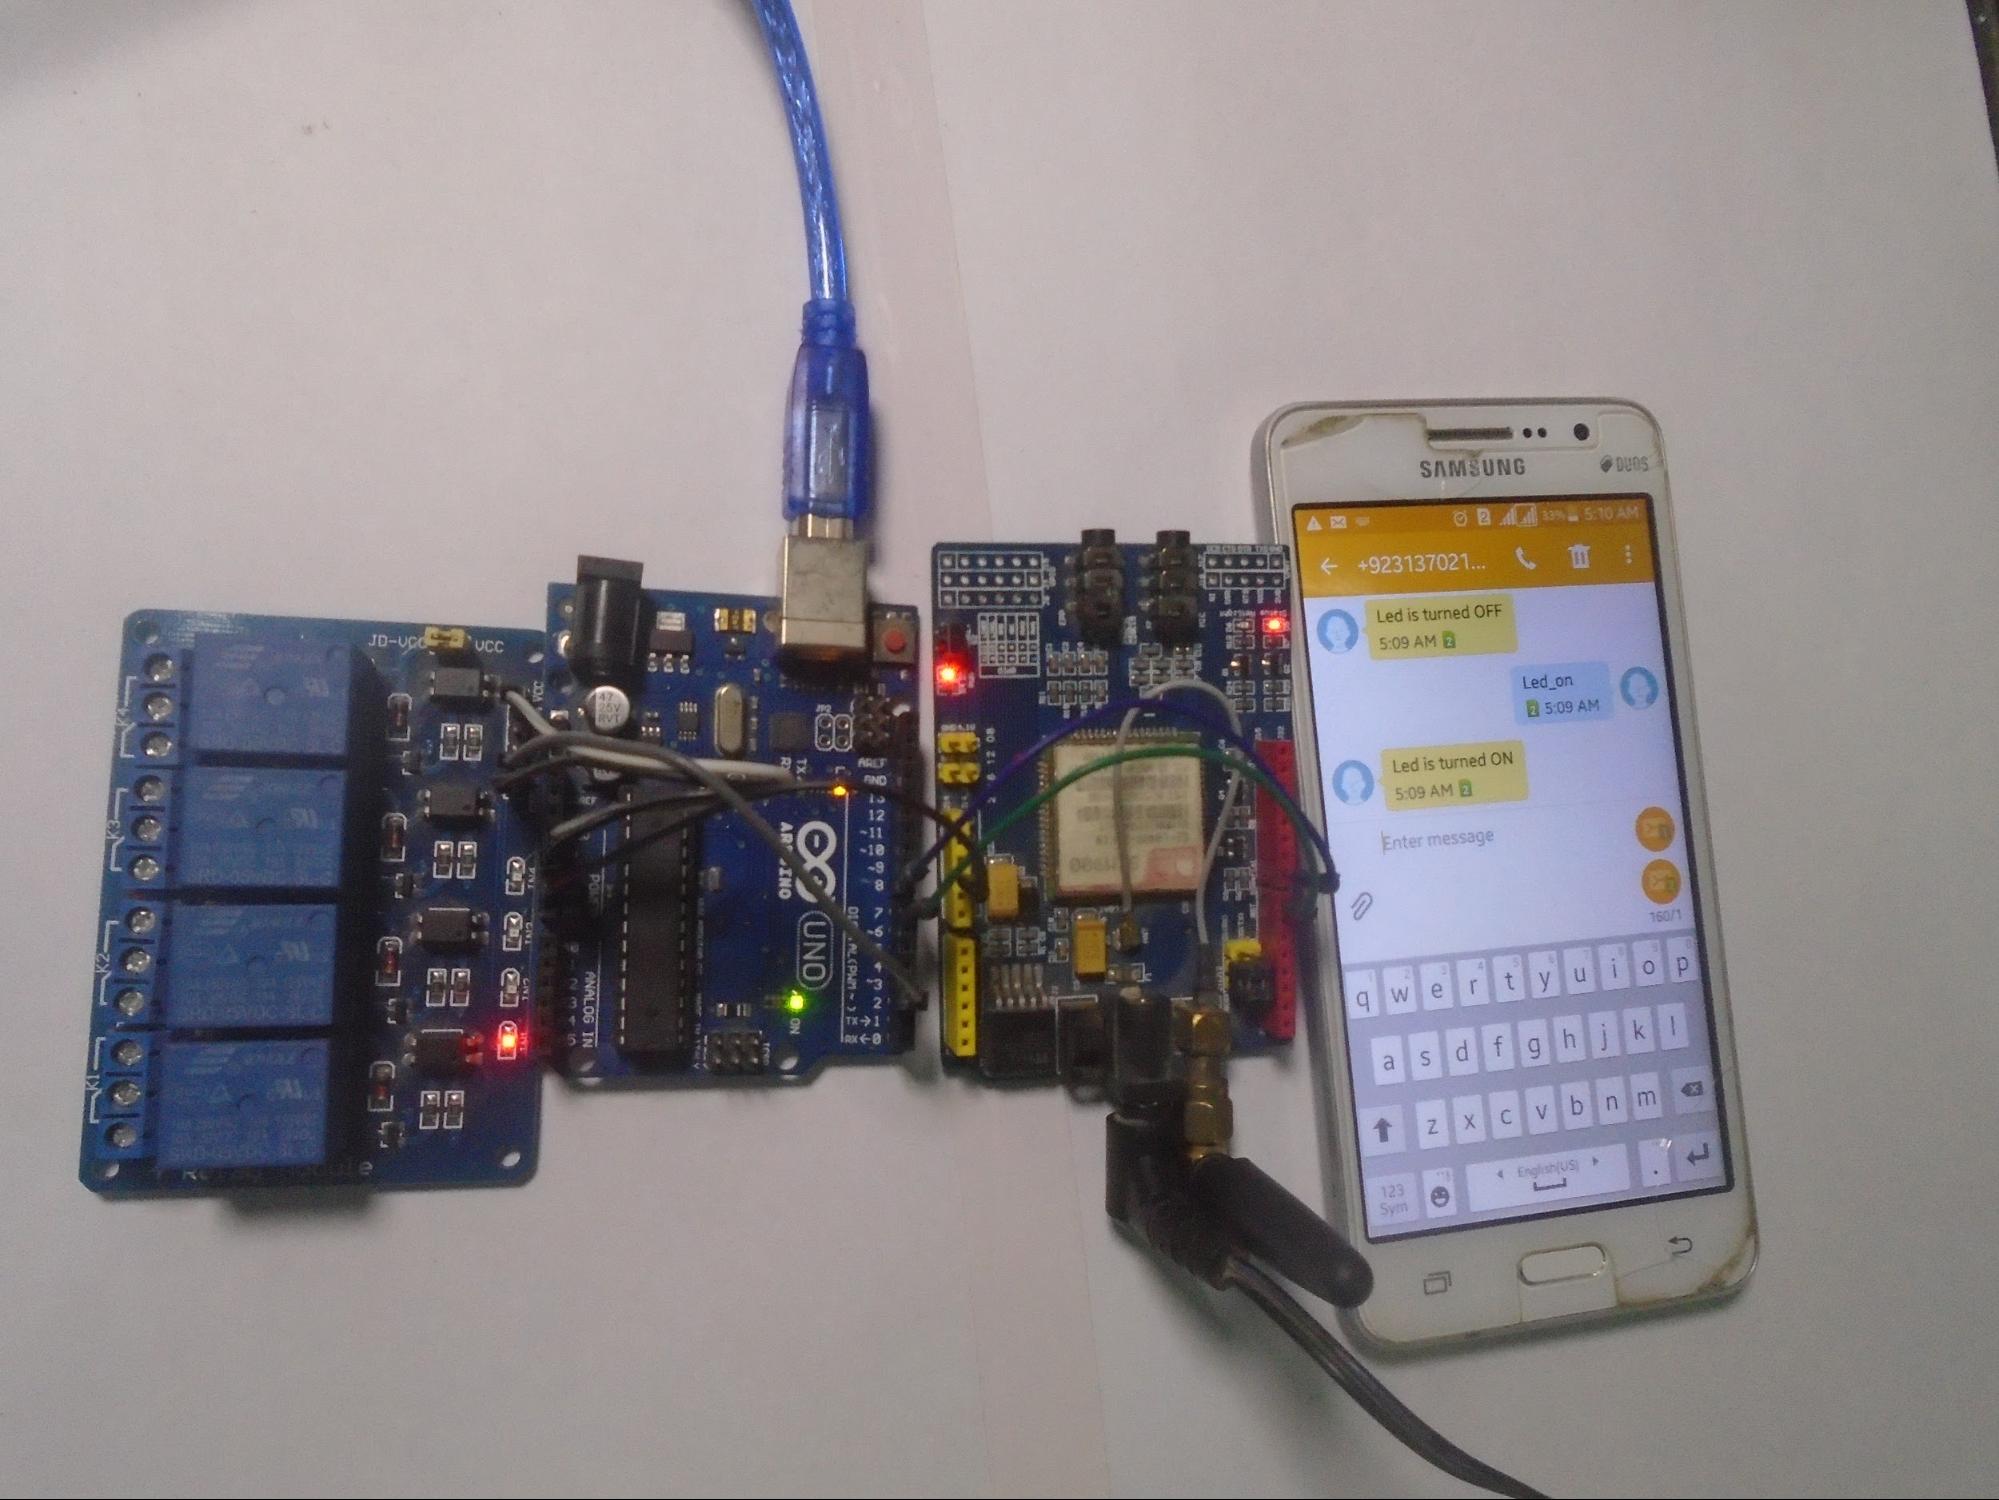
Once you have confirmed the LEDs on the SIM900 are on, make a call to the SIM you inserted in the SIM900 by dialing the phone number for that SIM card from your phone.
If the call is successful, you have connected the SIM900 with your Arduino and can now control the relay module by sending an SMS from your mobile phone.
Code Explanation for Your SMS-Controlled Relay
First, we need to add the software serial library so we won’t have to remove the TX or RX pins while uploading the code.
The full code for this project can be found without explanation breaks at the end of the article.
#include <SoftwareSerial.h> // Library for using serial communication
SoftwareSerial SIM900(7, 8); // Pins 7, 8 are used as used as software serial pins
In the setup function, set the mode of the SIM900 to SMS and set the module to show the received message on the serial monitor.
// set SMS mode to text mode
  SIM900.print("AT+CMGF=1\r");
  delay(100);

  // set gsm module to tp show the output on serial out
  SIM900.print("AT+CNMI=2,2,0,0,0\r");
  delay(100);
In the loop function, we call the receive message function to check whether or not messages are received. Any message we receive will be stored in the ‘incoming_data’ string.
void receive_message()
{
  if (SIM900.available() > 0)
  {
    incomingData = SIM900.readString(); // Get the data from the serial port.
    Serial.print(incomingData);
    delay(10);
  }
}
Now set received commands to turn the relay on or off accordingly, i.e., "Led_on" and "Led_off".
// if received command is to turn on relay
  if(incomingData.indexOf("Led_on")>=0)
  {
    digitalWrite(relay_pin, LOW);
    message = "Led is turned ON";
    // Send a sms back to confirm that the relay is turned on
    send_message(message);
  }

  // if received command is to turn off relay
  if(incomingData.indexOf("Led_off")>=0)
After setting up relay commands, we need to set up the code for messages to be sent to your mobile phone, which will let you know whether the relay is turned on or off.
void send_message(String message)
{
  SIM900.println("AT+CMGF=1");    //Set the GSM Module in Text Mode
  delay(100);
  SIM900.println("AT+CMGS=\"+923030502311\""); // Replace it with your mobile number
  delay(100);
  SIM900.println(message);   // The SMS text you want to send
  delay(100);
  SIM900.println((char)26);  // ASCII code of CTRL+Z
  delay(100);
  SIM900.println();
  delay(1000);
}
Make sure to change the number in the code to your own phone number and use this format for sending the text message for controlling the LED: "Led_on" and "Led_off". Upload the code after making the changes and test if it works.
That's it! Have fun building your new Arduino project that you can control from anywhere in the world.
Watch the video below to see this project in action!
Full SMS-Controlled Relay Project Code
#include <SoftwareSerial.h> // Library for using serial communication
SoftwareSerial SIM900(7, 8); // Pins 7, 8 are used as used as software serial pins

String incomingData;   // for storing incoming serial data
String message = "";   // A String for storing the message
int relay_pin = 2;    // Initialized a pin for relay module

void setup()
{
  Serial.begin(115200); // baudrate for serial monitor
  SIM900.begin(19200); // baudrate for GSM shield

  pinMode(relay_pin, OUTPUT);   // Setting erlay pin as output pin
  digitalWrite(relay_pin, HIGH);  // Making relay pin initailly low

  // set SMS mode to text mode
  SIM900.print("AT+CMGF=1\r");
  delay(100);

  // set gsm module to tp show the output on serial out
  SIM900.print("AT+CNMI=2,2,0,0,0\r");
  delay(100);
}

void loop()
{
  //Function for receiving sms
  receive_message();

  // if received command is to turn on relay
  if(incomingData.indexOf("Led_on")>=0)
  {
    digitalWrite(relay_pin, LOW);
    message = "Led is turned ON";
    // Send a sms back to confirm that the relay is turned on
    send_message(message);
  }

  // if received command is to turn off relay
  if(incomingData.indexOf("Led_off")>=0)
  {
    digitalWrite(relay_pin, HIGH);
    message = "Led is turned OFF";
    // Send a sms back to confirm that the relay is turned off
    send_message(message);
  }
}

void receive_message()
{
  if (SIM900.available() > 0)
  {
    incomingData = SIM900.readString(); // Get the data from the serial port.
    Serial.print(incomingData);
    delay(10);
  }
}

void send_message(String message)
{
  SIM900.println("AT+CMGF=1");    //Set the GSM Module in Text Mode
  delay(100);
  SIM900.println("AT+CMGS=\"+923030502311\""); // Replace it with your mobile number
  delay(100);
  SIM900.println(message);   // The SMS text you want to send
  delay(100);
  SIM900.println((char)26);  // ASCII code of CTRL+Z
  delay(100);
  SIM900.println();
  delay(1000);
}