Learn the basic function and working operation of an FM MP3 player by building this simple project.
This is the basic functioning and working operation of an FM MP3 player. The audio amplification is control with the help of triggering input signal. Depending on the power source we used it is capable of functioning for long hours. I hope you all enjoy the project!
Principle:
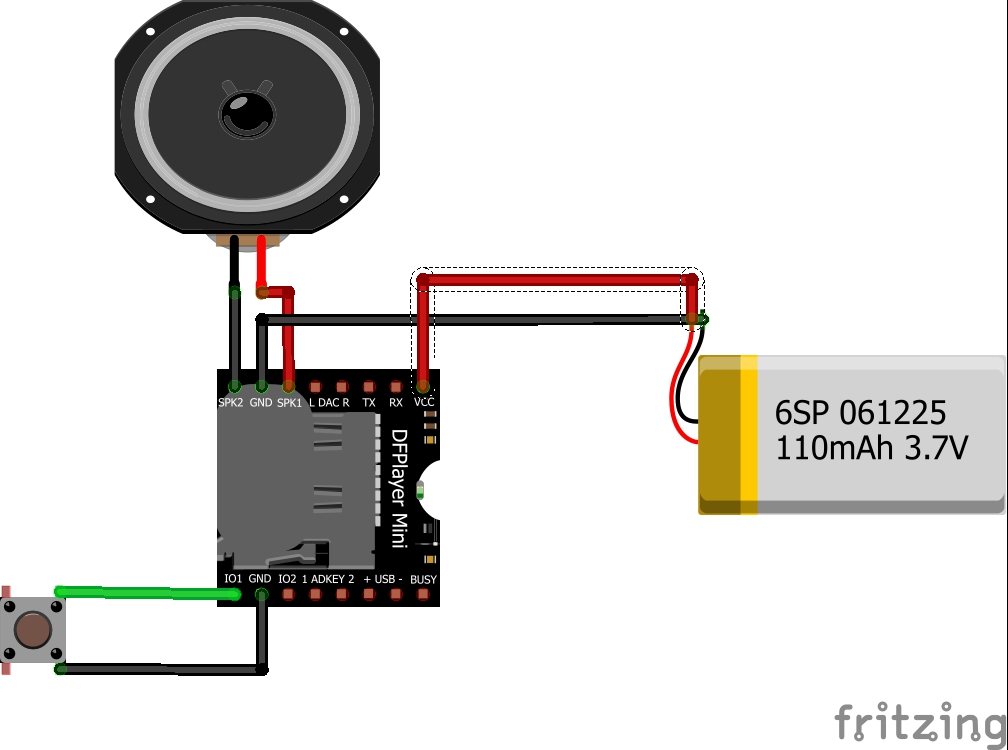
The working of an MP3 player is very simple. After connecting the power supply, the trigger input is applied to our integrated circuit and LED flashes giving us the signal about its working.
Inserting and connecting the DF player mini on our PCB with the external power supply, having the momentary push button the triggering the present song or music and audio amplification.
We can also insert our SD in the circuit mini player to listen any type of music we love to listen and set up according to it. So this is the basic functional and principal operation of MP3 player. Interested let’s move on.
Components Required
- FM-16p
- Speaker
- Push button
- Memory card
- PCB
- Soldering iron
- Soldering wire
- Connecting Wires
- Plastic box
- 3.7 V battery
Circuit Diagram Schematic
Steps
- Solder the header pins with a soldering iron. Be careful while soldering!
- Take the FM-16p speaker and solder the two input terminals of the speaker to the mini-player.
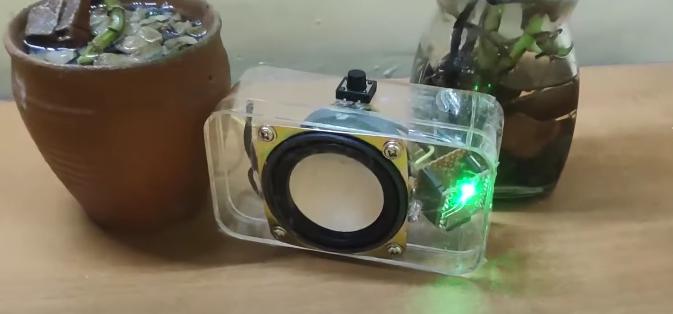
- Put the FM speaker in the plastic box for audio amplification.
- Connect the momentary push button to the plastic box for changing the output. The push-button is used to change the output by triggering the input from the external source. The audio amplification of the circuit is done by connecting the speaker directly to the power source.
- Connect the LED light to the circuit for getting the signal about its present condition. If the LED light flashes, it indicates the ON condition and vice versa for the MP3 circuit.
- Connect the power supply to the circuit. After a moment, the LED should start flashing, representing that it is working.
- Cover the plastic box carefully without breaking any connecting wires.
Now we can enjoy the best music and chill out with our self-made MP3 player having beautiful amplification and bass.