Make a fan turn on automatically when the room temperature reaches a certain degree.
In this article, you are going to learn about Arduino temperature controlled fan using DHT22 sensor and relay. We will use the DHT22 sensor to get the temperature value and we will print this temperature value on the LCD. Then we will check if the temperature value is greater than 35 or not, if the temperature will be greater than 35, then the relay will be activated and the fan will start to rotate.
Hardware Part
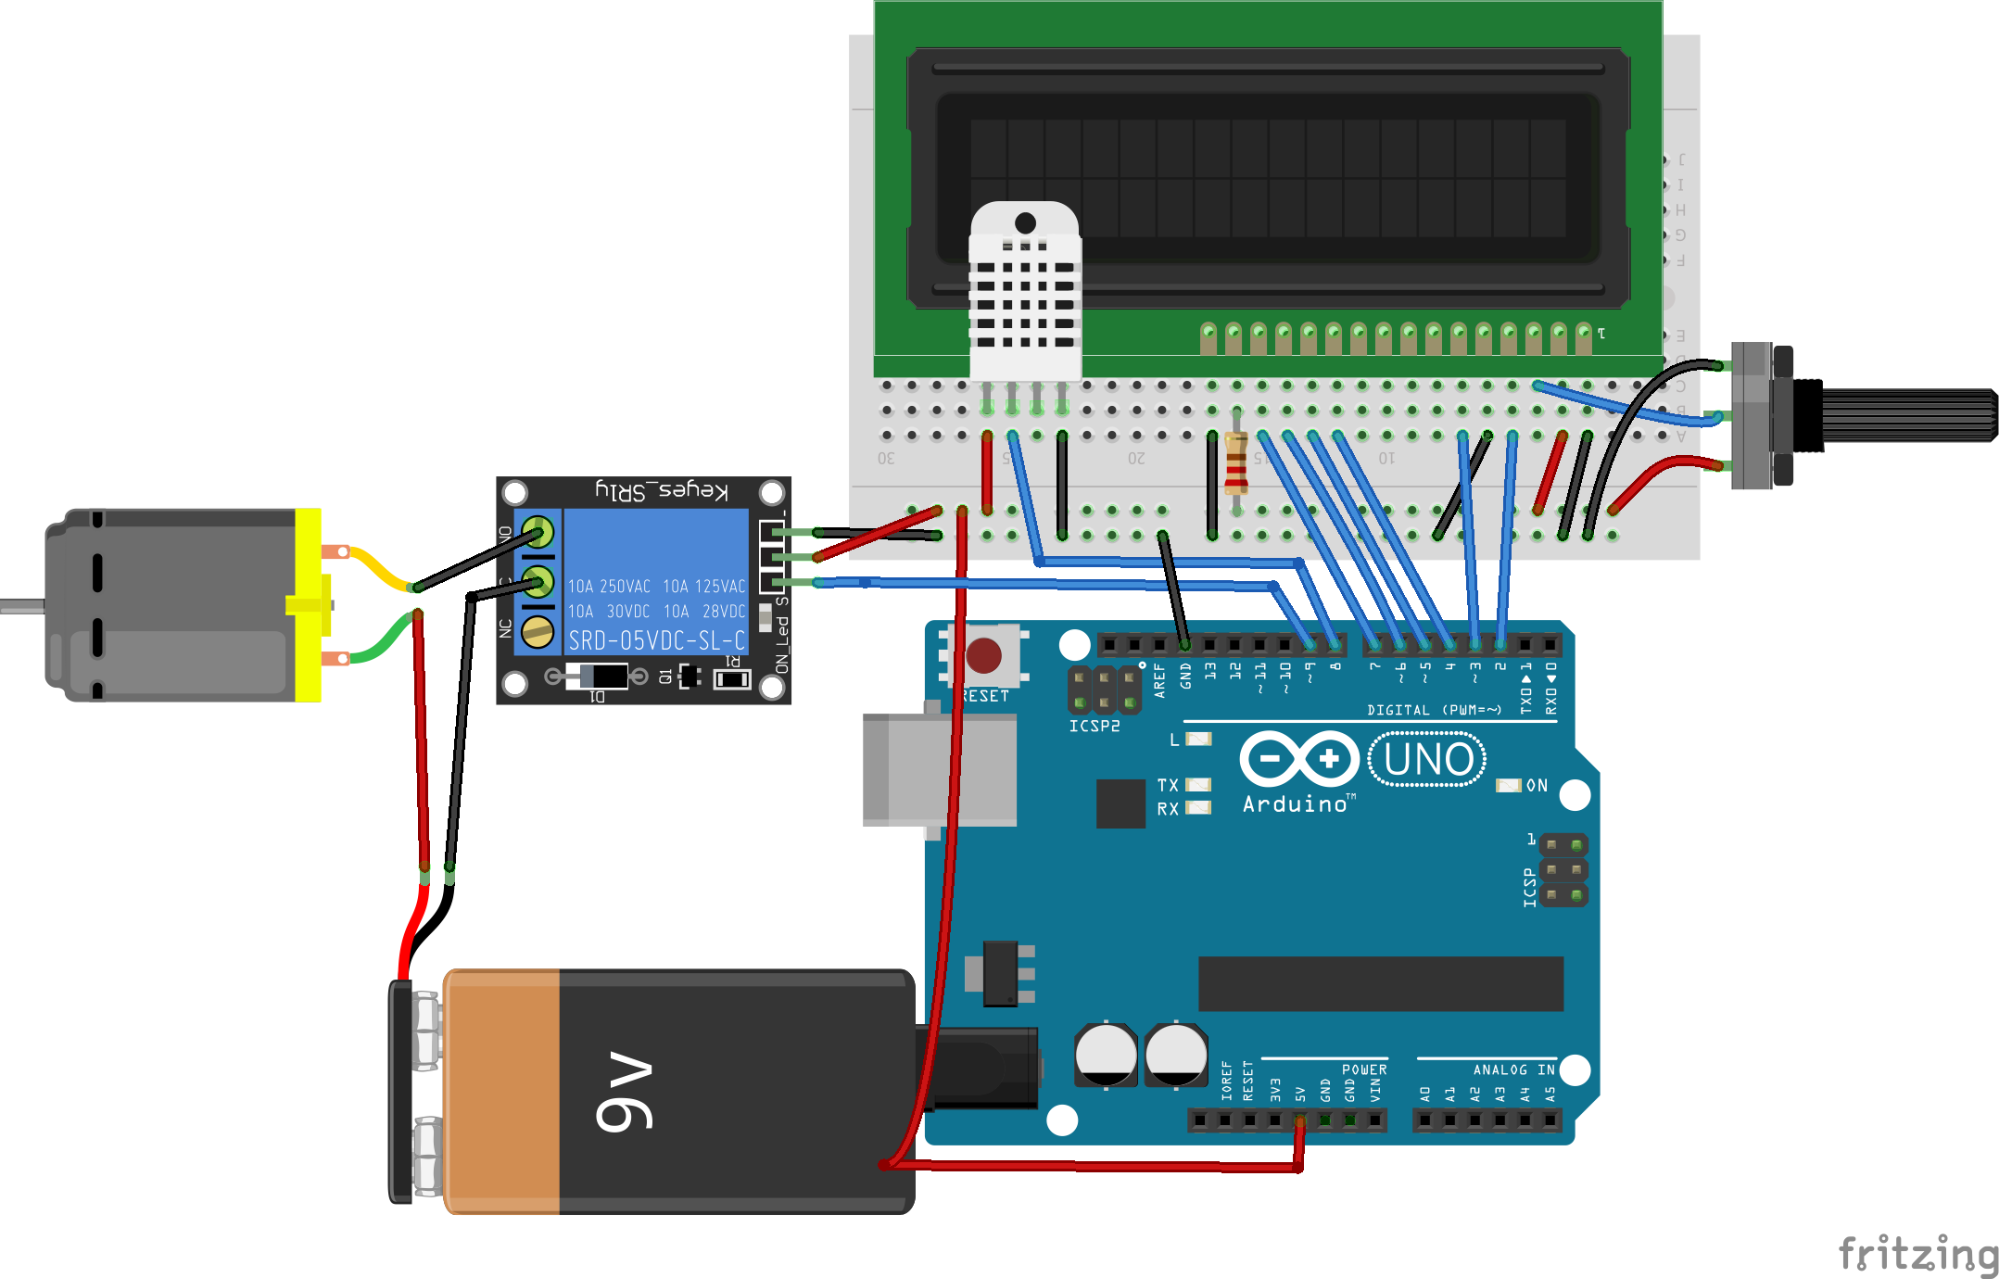
First of all, make the connection of the LCD module with the Arduino as follows:
- Connect VSS pin of LCD to ground of Arduino.
- Connect VDD pin to 5V of Arduino.
- Connect V0 pin to the center pin of 10K potentiometer. Connect other two pins of potentiometer to the 5V and the ground.
- Connect RS pin to the pin 2 of Arduino.
- Connect R/W pin to ground of Arduino. This will put the LCD in read mode.
- Connect E (Enable) pin to the pin 3 of Arduino.
- Connect D4-D7 pins to the pin 4, 5, 6, 7 of Arduino.
- Connect pin 15 which is the positive pin of backlight of LED to the 5V pin through the 220ohm resistor.
- Connect pin 16 which is the negative of backlight of LED to the ground of Arduino.
Then connect the Keyes_ST1y relay module to the Arduino. On the input side of the relay module, make the following connections:
- Connect VCC pin of relay module to the 5V pin of Arduino.
- Connect the IN pin of the relay module to the pin 9 of Arduino.
- Connect the GND pin of relay module to the GND of Arduino.
On the output side of Keyes_SR1y relay module, connect the negative of the 9V battery to the Common (C) of relay module and connect the NC of relay module to negative of fan. Then connect the positive of battery to the positive of fan.
Finally, make the following connections for the DHT22 temperature and humidity sensor:
- Connect the pin 1 of DHT22 which is the VCC pin to the 5V of Arduino
- Connect pin 2 of DHT22 which is the data pin to the pin 8 of Arduino.
- Connect pin 4 of DHT22 which is the ground pin to the ground of Arduino
Code Explanation
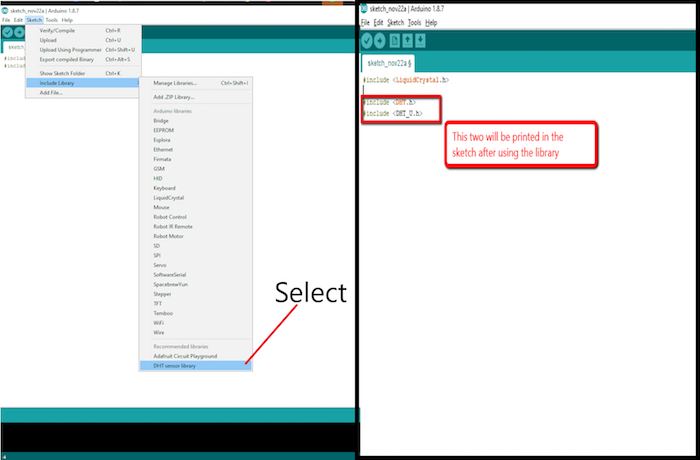
We included the libraries for the DHT22 sensor and for the LCD.
The libraries will help to make the code easier. Since we are using libraries, we must make sure that the libraries we are using are installed in our Arduino IDE. To install in the Arduino IDE, go to the Sketch tab, drop down to Include Library, and click Manage Library. In the Library Manager search for DHT and LiquidCrystal then install.
#include "DHT.h"
#include "LiquidCrystal.h"
Add the two libraries to your Arduino IDE through Library Manager.
Then we initialized the pins where we have connected the LCD and the DHT22 sensor. After that, we defined the type of DHT sensor that which DHT sensor we are using. There are many other types of DHT sensor are available like DHT11 so it is important to define the type here.
LiquidCrystal lcd(2, 3, 4, 5, 6, 7);
#define DHTPIN 8
#define DHTTYPE DHT22
DHT sensor(DHTPIN, DHTTYPE);
In the setup function, we gave the command to the DHT22 and LCD to start communicating with the Arduino. Then we declared the relay pin as output pin because we will give the voltage from the Arduino to the relay to activate the relay. The relay works opposite (High means Low for relay).
lcd.begin(16,2);
sensor.begin();
pinMode(relay_pin, OUTPUT);
digitalWrite(relay_pin, HIGH);
In the loop function, we clear the LCD screen and then we read the temperature value from the sensor.
lcd.clear();
float t = sensor.readTemperature(); //reading the temperature from the sensor
// Checking if the sensor is sending values or not
if (isnan(t)) {
lcd.print("Failed");
delay(1000);
return;
}
Then we printed this temperature value on the LCD and if the temperature value will be greater than 35, then the relay will be activated and the fan will start to rotate.
lcd.setCursor(0,0);
lcd.print("Temp: ");
lcd.print(t);
lcd.print(" C");
if (t > 35){
digitalWrite(relay_pin, LOW);
lcd.setCursor(0,1);
lcd.print("Fan is ON ");
delay(10);
}
#include "DHT.h"
#include "LiquidCrystal.h"
LiquidCrystal lcd(7, 8, 9, 10, 11 ,12);
#define DHTPIN 6
#define DHTTYPE DHT22
DHT sensor(DHTPIN, DHTTYPE);
int relay_pin = 9;

void setup() {
lcd.begin(16,2);
sensor.begin();
pinMode(relay_pin, OUTPUT);
digitalWrite(relay_pin, HIGH);
}
void loop() {
lcd.clear();
float t = sensor.readTemperature(); //reading the temperature from the sensor
// Checking if the sensor is sending values or not
if (isnan(t)) {
lcd.print("Failed");
delay(1000);
return;
}
lcd.setCursor(0,0);
lcd.print("Temp: ");
lcd.print(t);
lcd.print(" C");
if (t > 35){
  digitalWrite(relay_pin, LOW);
  lcd.setCursor(0,1);
  lcd.print("Fan is ON ");
  delay(10);
}
else{
  digitalWrite(relay_pin, HIGH);
  lcd.setCursor(0,1);
  lcd.print("Fan is OFF ");
}
delay(2000);
}