Build your own gas and smoke detector that can read and display smoke levels using the MQ-2 and an Arduino.
This tutorial walks you through building a smoke detector that not only senses smoke and other harmful gases in the air but also reads and displays smoke levels in PPM (parts per million).
When the smoke concentration is above 1000 ppm, the circuit triggers a buzzer that can be changed in the code as required. This project uses the MQ-2 sensor and an Arduino to determine and detect different smoke intensities.
This smoke detector can be easily built onto a breadboard or a polka dot plate. The MQ-2 sensor is used to detect the levels of gas around the area, so you can utilize this sensor as a gas leak monitoring system for homes, businesses, or factories, and is suitable for monitoring devices such as gas, butane, propane, methane, alcohol, hydrogen, and smoke.
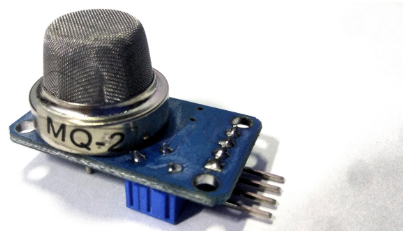
What is the MQ-2 Smoke Sensor?
The MQ-2 smoke sensor is sensitive to smoke and also responsive to the following flammable gases:
- LPG
- Butane
- Propane
- Methane
- Alcohol
- Hydrogen
The resistance of MQ2 varies depending on the type of gas. The smoke sensor has a built-in potentiometer that adjusts the sensitivity of the sensor based on the accuracy of the gas you are testing.
How Does the MQ-2 Work?
The sensor’s voltage output varies proportionately with the measured smoke/gas in the atmosphere. In other words, the relationship between voltage and gas concentration is as follows:
- The higher the gas concentration, the higher the output voltage.
- The lower the gas concentration, the lower the output voltage.
MQ-2 Specifications
- Dimensions: 35 mm x 22 mm x 23 mm (length x width x height)
- Main chip: LM393, ZYMQ-2 gas sensor
- Working voltage: DC 5V
MQ-2 Features
- With signal output command.
- Dual signal output (analog output and high/low digital output).
- 0~4.2V analog output voltage, the higher the concentration, the higher the voltage.
- It has higher sensitivity to natural gas, natural gas and city gas.
- Long service life, stable and reliable.
- Fast response and recovery features.
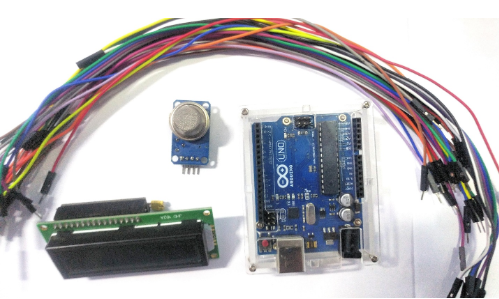
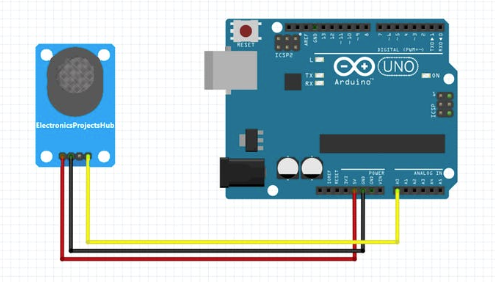
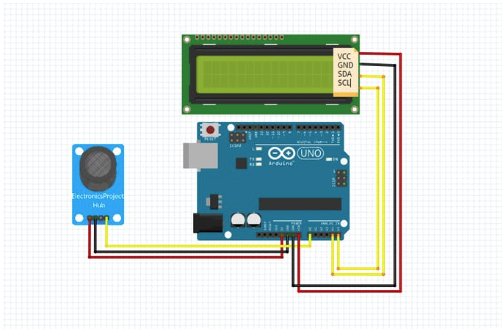
Wiring Up the Project
Wire up everything as described below:
Arduino | MQ2 |
|---|
A0 | A0 |
5V | VCC |
GND | GND |
Arduino | I2C LCD |
|---|
VCC | 5V |
GND | GND |
SDA | A4 |
SCL | A5 |
Project Source Code
After you are done with the connections, connect the Arduino to your computer and upload the source code below:
#include <MQ2.h>
#include <Wire.h>
#include <LiquidCrystal_I2C.h>
//I2C pins declaration
LiquidCrystal_I2C lcd(0x27, 2, 1, 0, 4, 5, 6, 7, 3, POSITIVE);
int Analog_Input = A0;
int lpg, co, smoke;
MQ2 mq2(Analog_Input);
void setup(){
Serial.begin(9600);
lcd.begin(16,2);//Defining 16 columns and 2 rows of lcd display
lcd.backlight();
mq2.begin();
}
void loop(){
float* values= mq2.read(true); //set it false if you don't want to print the values in the Serial
//lpg = values[0];
lpg = mq2.readLPG();
//co = values[1];
co = mq2.readCO();
//smoke = values[2];
smoke = mq2.readSmoke();
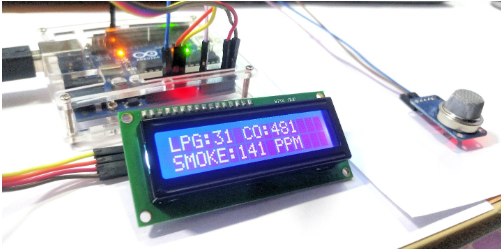
lcd.setCursor(0,0);
lcd.print("LPG:");
lcd.print(lpg);
lcd.print(" CO:");
lcd.print(co);
lcd.setCursor(0,1);
lcd.print("SMOKE:");
lcd.print(smoke);
lcd.print(" PPM");
delay(1000);
}
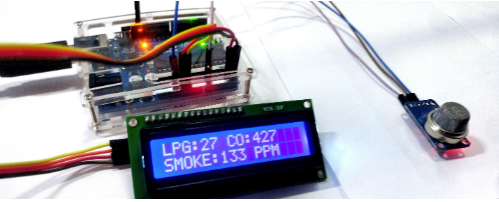
After uploading the code, you can start testing the sensor out using a small lighter to see how it responds to the flame and gas. Start slowly and, as always, be careful around flames.
Check out the video below to see the project in action!