Stay away from harmful UV rays with the help of this DIY UV Index Meter based off of theVEML6070 sensor!
Summer is always fun with the bright sun up in the sky and lots of outdoor activities. However, we often don’t take into account the invisible UV rays that seep through our atmosphere. And we should — this radiation can cause skin cancer and other harmful disorders.
A lot of companies are now selling wearables and other devices that can measure UV radiation to warn you about harmful levels in your area. For example, the Apple Watch lets you know about UV levels through its UV index widget.
In this project, I will show you how you can measure UV radiation using the VEML6070 UV sensor, an Arduino UNO, and a Nokia 5110 LCD to build your own UV exposure meter. This project allows us to measure UV radiation in realtime.
What is Ultraviolet Index?
The ultraviolet index is basically an international standard measurement system for measuring the strength of ultraviolet radiation at a particular place and time. For reporting the gathered information, the UV index scale is used to help determine the UV level.
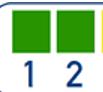
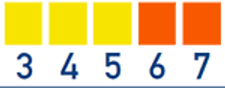
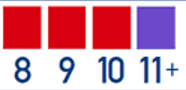
The following diagram shows the UV index scale:
If the UV scale meter shows 1-2, then the radiation is at a very safe level.
From 3 to 7 you need protection when you go outside; apply a decent amount of sunscreen on the exposed skin and wear protective clothes, a brimmed hat, and sunglasses.
A level of 8+ is very high to extreme. In this case, you should refrain from going outside or equip yourself with the necessary protection.
Now that we understand the UV index scale, we can dive into building our UV index meter!
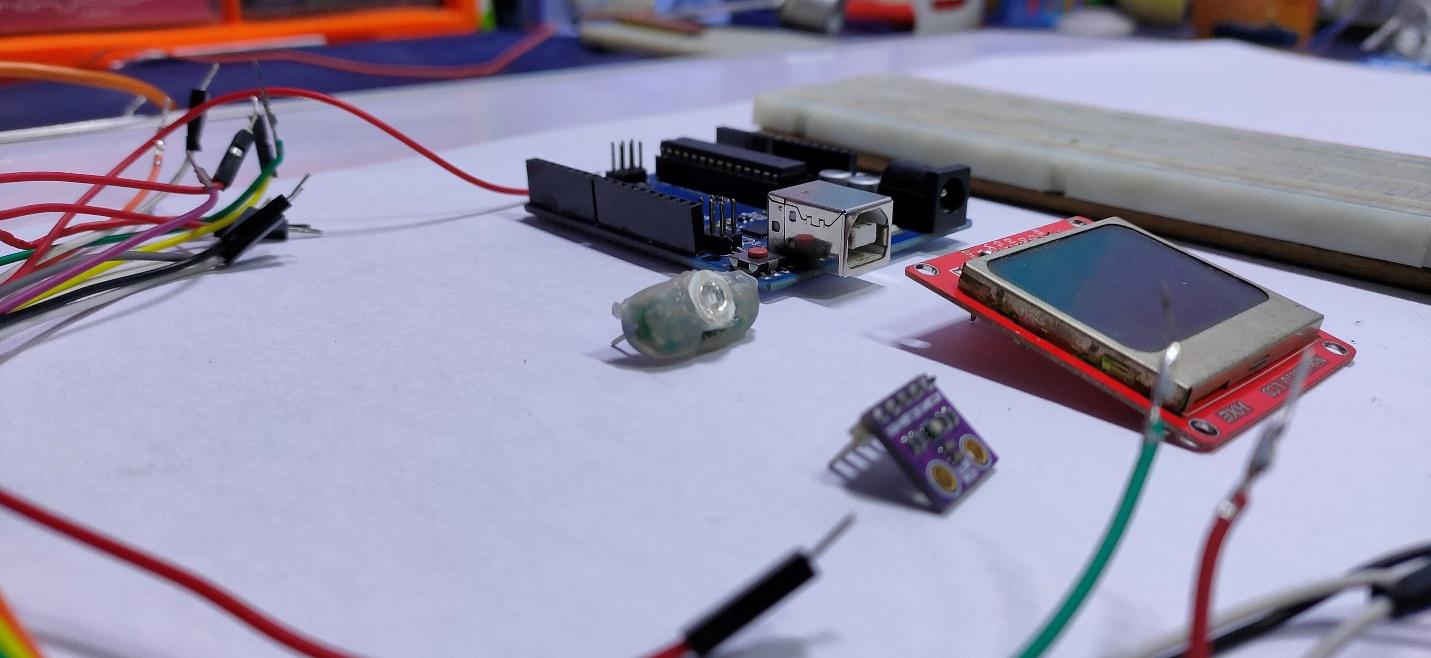
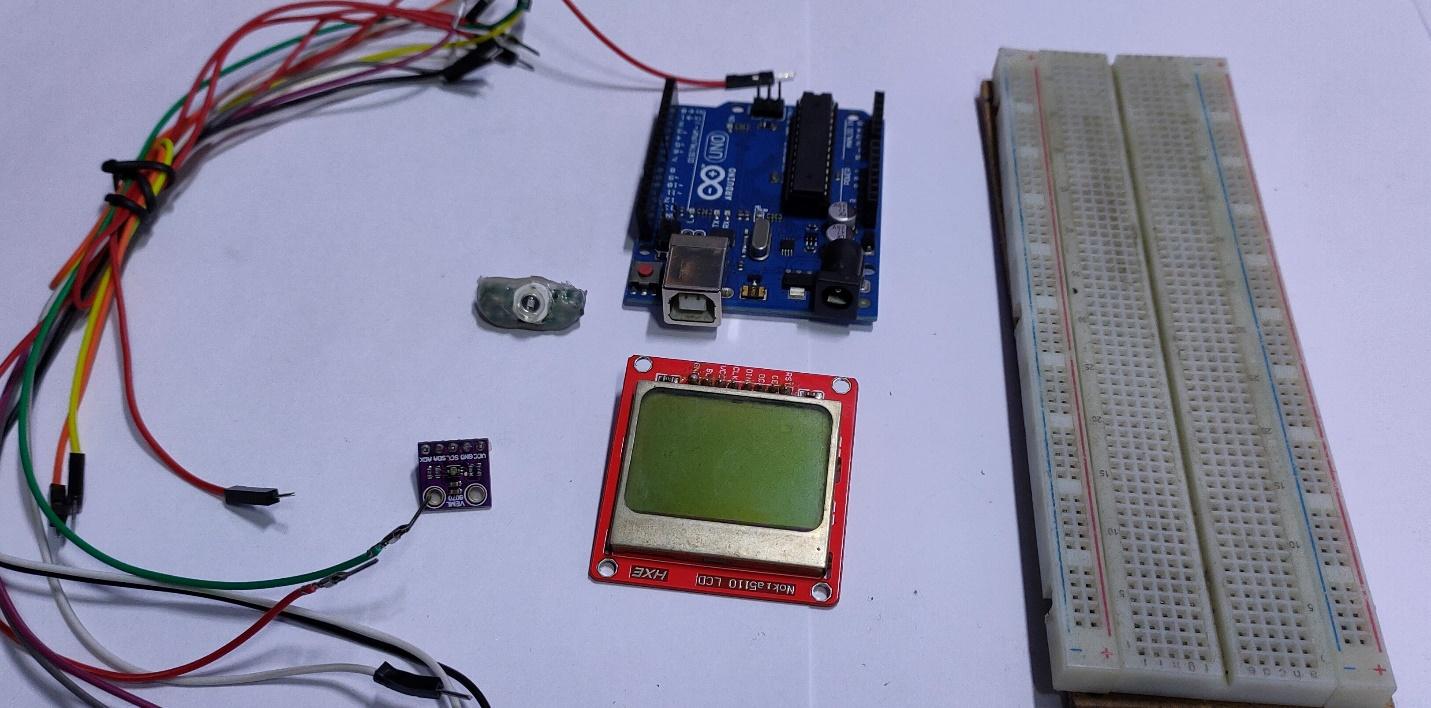
Required Hardware
- Arduino UNO
- Nokia 5110 LCD Module (SPI)
- VEML6070
- Jumper wires
- Breadboard
- A UV LED for testing(optional)
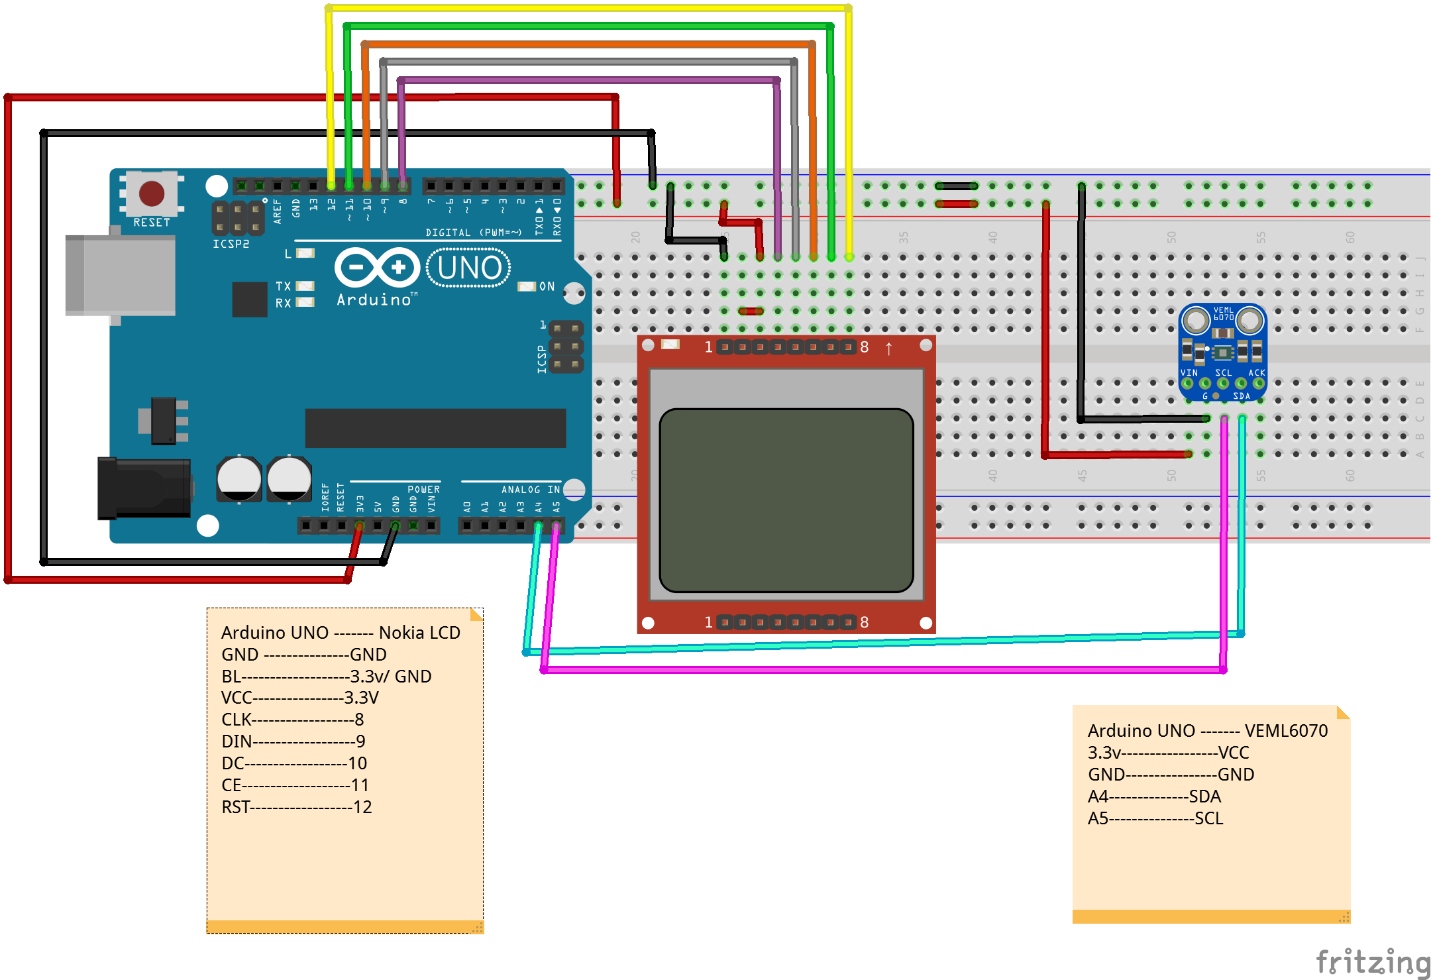
Wiring the Hardware
Wire up everything as shown below in the Fritzing diagram below. If you are using other Arduino models, follow the pin-to-pin datasheet.
Arduino Uno | Nokia LCD |
|---|
GND | ContentGND |
BL | 3.3V/GND |
VCC | 3.3V |
CLK | 8 |
DIN | 9 |
DC | 10 |
CE | 11 |
RST | 12 |
Arduino Uno | VEML6070 |
|---|
3.3V | VCC |
GND | GND |
A4 | SDA |
A5 | SCL |
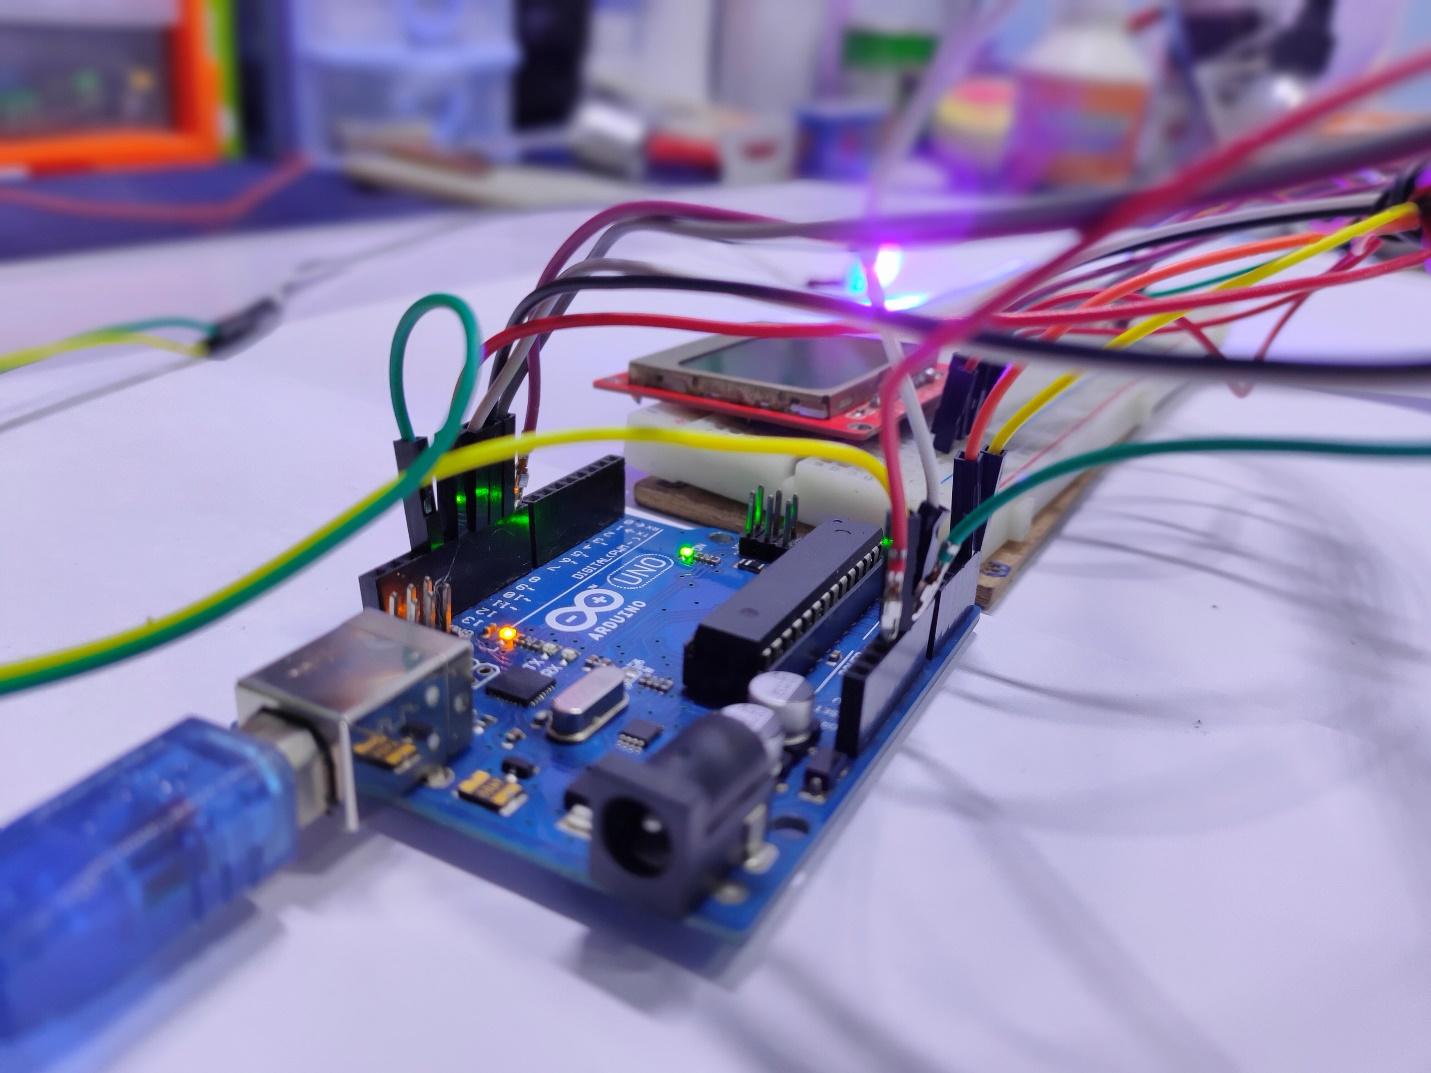
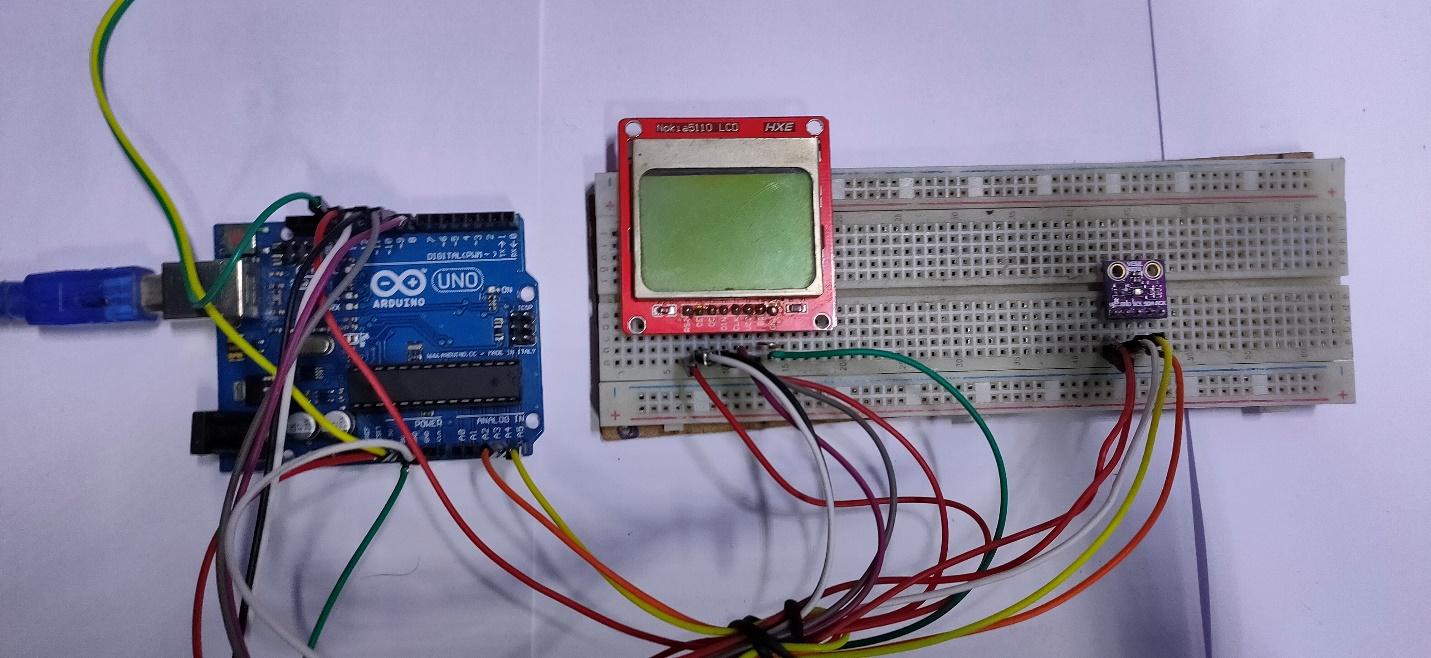
Your wired setup will look much like the one shown below.
The hardware is all connected for our UV index meter.
Software Requirements
With the hardware connected and ready to go, we now need to download the necessary libraries for Arduino.
Download Arduino IDE and all the necessary libraries from the links above. Add the libraries into your Arduino library folder. If you are a beginner to Arduino and this is your first project, please follow How to Get Started With Arduino IDE before downloading and adding the required libraries.
After downloading, add the zip files of each library into your Arduino IDE.
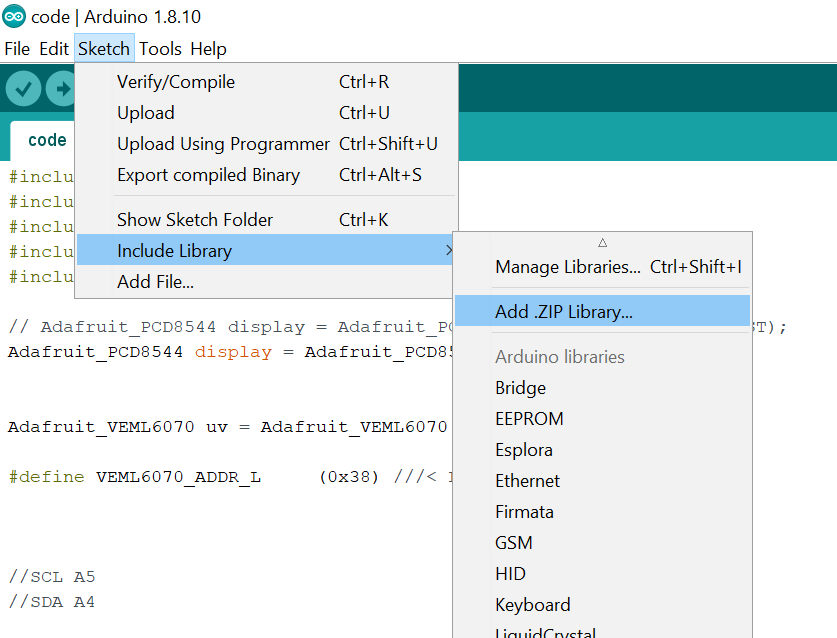
To add a library, go to Sketch —>Include Library —> Add .Zip Library. Repeat the same step for all four libraries.
How to add a library in Arduino IDE.
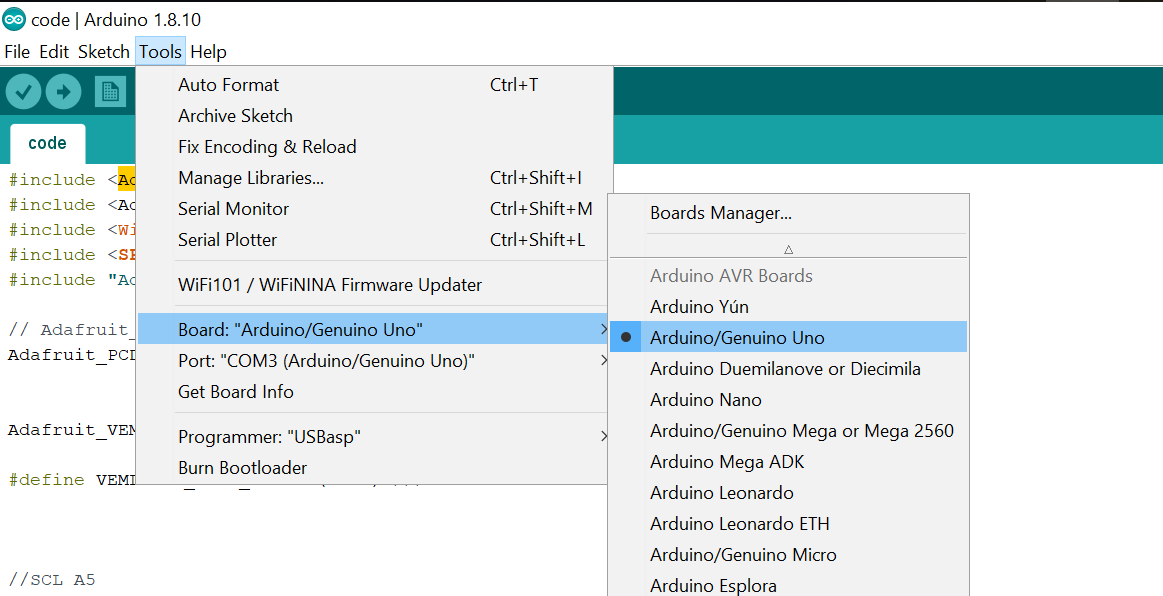
After adding the libraries, connect your Arduino board with your computer and then go to Tools —> Board —> Select Arduino UNO Board.
Connect your Arduino board to the IDE.
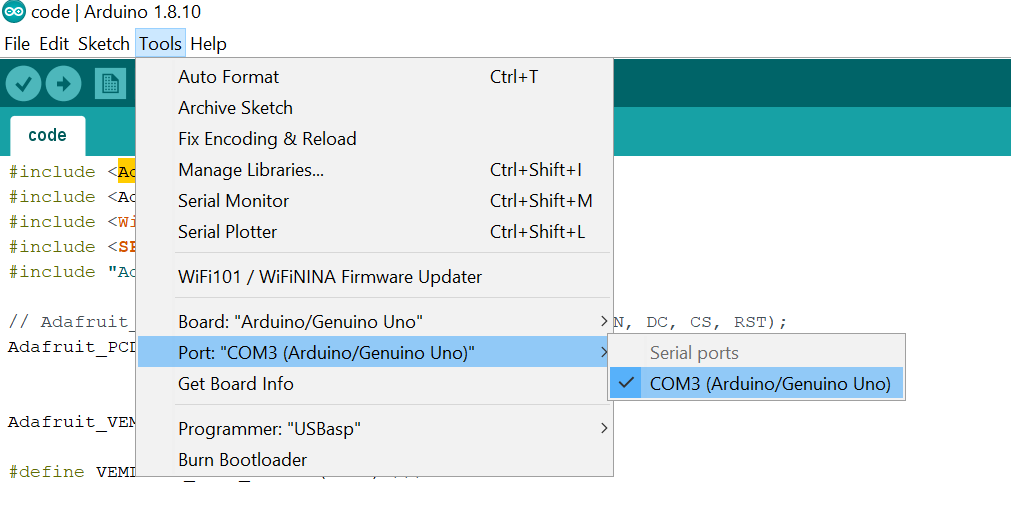
Next, go to Tools —> Port —> Select COM PORT. In my case, it’s COM3.
Select your port in Arduino IDE.
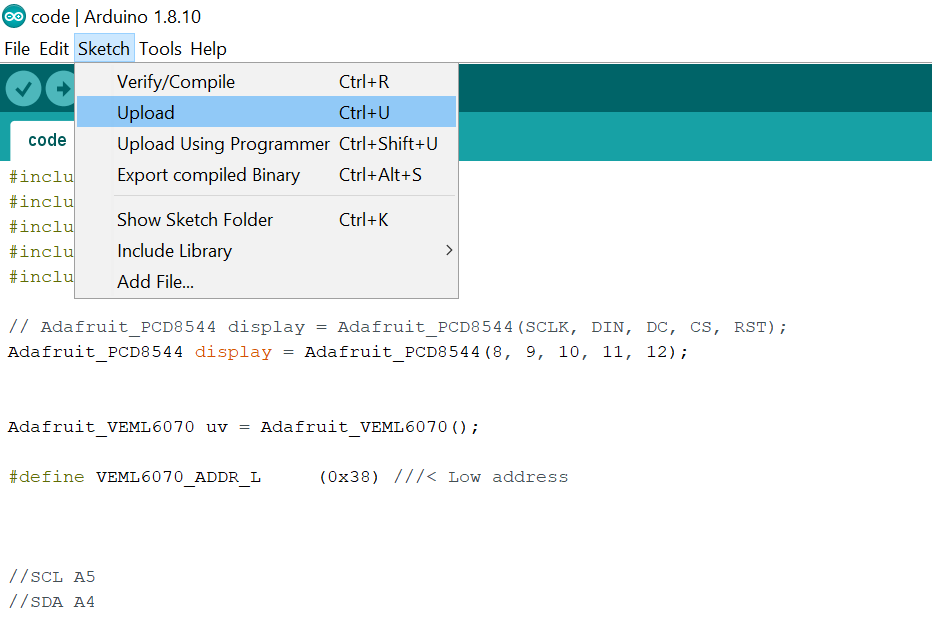
Copy and paste the project code to your Arduino — which is available at the end of this project — and upload the code.
Testing for UV Levels
Once the code uploads, you can test for UV levels. To do this, expose the sensor to sunlight or use a UV LED as I did on the sensor.
The Nokia LCD will start to display the reading from the sensor. The best part about this LCD is that you can read its screen even in bright sunlight, so you can have it with you whenever you go outside!
You can see my index meter working in the video below.
//Full Project Code

#include <Adafruit_GFX.h>
#include <Adafruit_PCD8544.h>
#include <Wire.h>
#include <SPI.h>
#include "Adafruit_VEML6070.h"

// Adafruit_PCD8544 display = Adafruit_PCD8544(SCLK, DIN, DC, CS, RST);
Adafruit_PCD8544 display = Adafruit_PCD8544(8, 9, 10, 11, 12);


Adafruit_VEML6070 uv = Adafruit_VEML6070();

#define VEML6070_ADDR_L     (0x38) ///< Low address


//SCL A5
//SDA A4

void setup () {

   Serial.begin(9600);
   Serial.println("VEML6070 Test");
   uv.begin(VEML6070_1_T);


  display.begin();
  delay(1000);
  display.clearDisplay(); // clears the screen and buffer
  display.display();
  display.setTextColor(BLACK);
  display.setContrast(60);
  }

void loop() {
  display.clearDisplay();
  display.setContrast(60);
  display.setTextSize(1);
  display.setCursor(20,0);
  display.print("UV Index");
  display.setTextSize(3);
  display.setCursor(35,20);
  display.print(uv.readUV()/230); //250

  if(uv.readUV()>=0 && uv.readUV()<689 )
  {
    display.setTextSize(1);
  display.setCursor(30,10);
  display.print("LOW");
  } else

   if(uv.readUV()>=690 && uv.readUV()<1379)
  {
  display.setTextSize(1);
  display.setCursor(20,10);
  display.print("Moderate");
  } else

   if(uv.readUV()>=1380 && uv.readUV()<1839)
  {
  display.setTextSize(1);
  display.setCursor(30,10);
  display.print("High");
  } else


  if(uv.readUV()>=1839 && uv.readUV()<2529)
  {
  display.setTextSize(1);
  display.setCursor(20,10);
  display.print("Very High");
  }

  if(uv.readUV()>=2530 && uv.readUV()<2760)
  {
  display.setTextSize(1);
  display.setCursor(10,10);
  display.print("Extreme high");
  }

  display.display();
  delay(500);


  }