If you are a beginner looking for a fun way to start off your Arduino education, this memory game project is for you!
In this project, we are going to create a memory game that challenges your memory by recalling randomly generated sequences of multi-colored LEDs. I have simplified the wiring and connections involved to make it as beginner-friendly as possible.
The basic overview of this project is that the four LEDs blink in a certain, random pattern and the player has to imitate the same pattern to level up, and eventually win, the game. If the player enters a pattern incorrectly, they lose the game and it starts a new pattern.
Memory games help us to improve our memory. Next time you’re playing video games, think about playing a memory game instead to improve your memory and concentration.
Let’s get started!
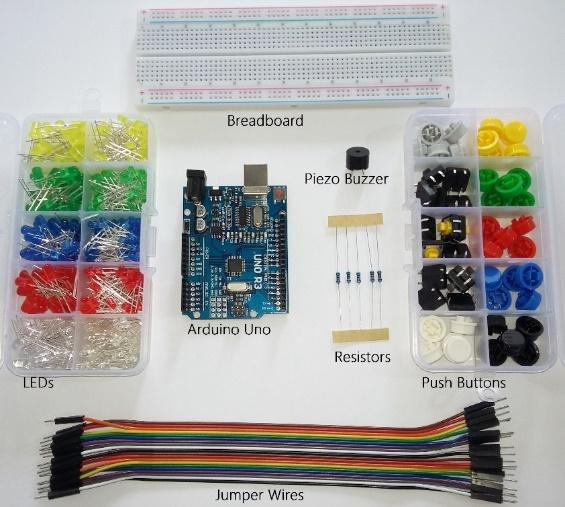
Required Hardware
- Arduino Uno
- 4x LEDs (one each of red, green, blue, and yellow)
- 4x Pushbuttons (one each of red, green, blue, and yellow)
- Piezo Buzzer
- 4x 220Ω Resistors
- 4x 10kΩ Resistors
- Breadboard and Jumper wires
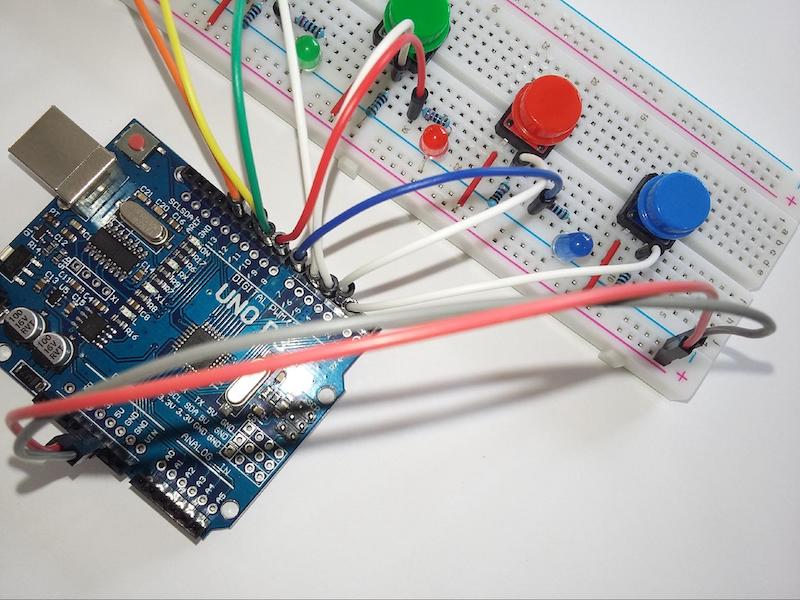
Assembling all of our required hardware.
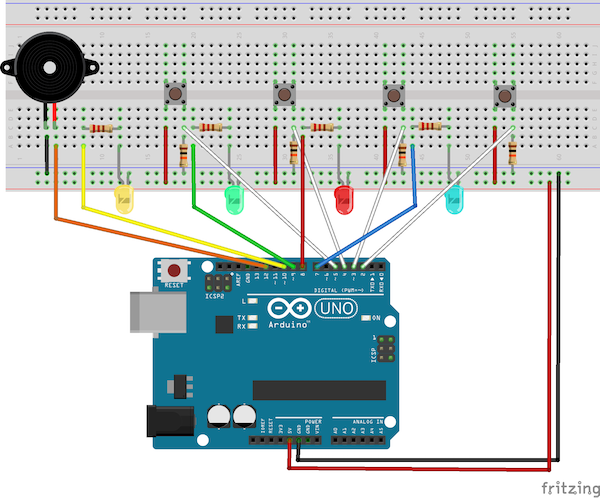
Memory Game Wiring Diagram
Below is the wiring diagram for the project.
Memory game wiring diagram.
The wiring for this project is not at all complicated. You can see that it has a pattern. First, make sure you understand how to connect a push-button and an LED to the Arduino with a breadboard. Once you’re squared away with those connections, you can replicate the wiring for all the other color LEDs and pushbuttons.
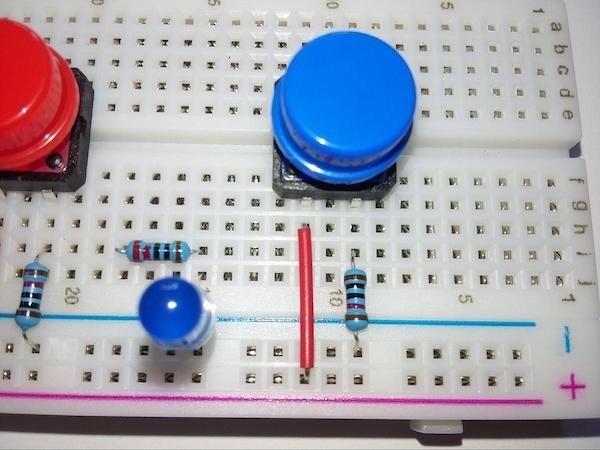
Placement of Pushbuttons and LEDs on the Breadboard
First, take the blue color pushbutton and place it in the middle of the breadboard. Connect a pin to the positive rail and the other pin to the negative rail through a 10kΩ resistor.
Connecting the pushbutton and LED on the breadboard.
Attach the cathode (shorter leg) of the blue color LED to the negative rail of the breadboard. Then connect a 220Ω resistor to the anode (longer leg) of the LED.
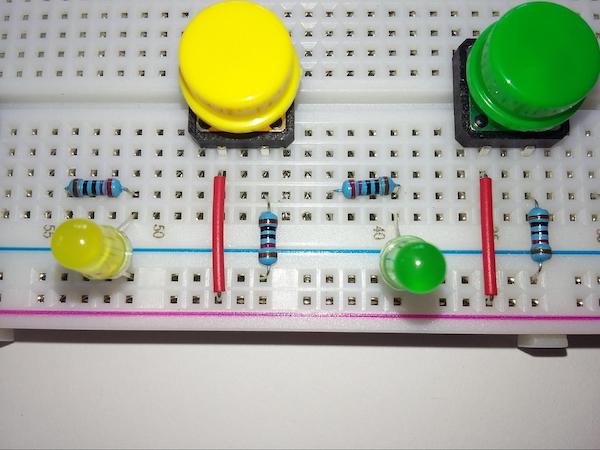
Follow the same instructions for the other colors.
Connecting the remaining pushbuttons and LEDs.
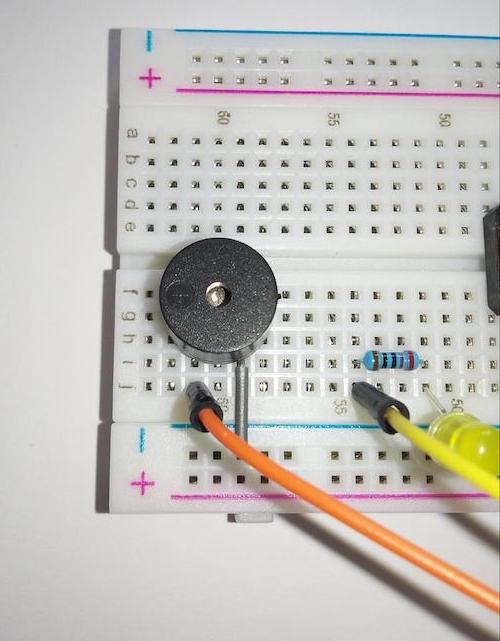
Place the buzzer on the breadboard and connect the negative pin of the buzzer to the negative rail of the breadboard.
Placing the buzzer on the breadboard.
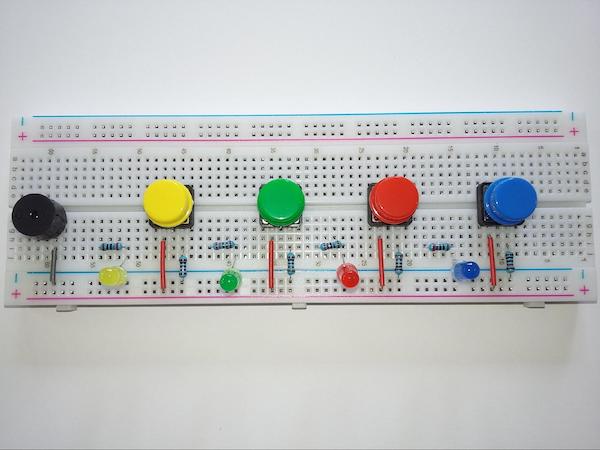
Once all the components are attached to the breadboard, it should look like this:
Our completed breadboard setup.
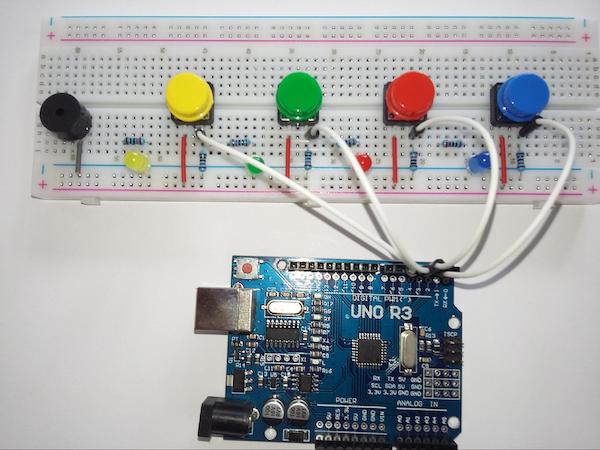
Wiring the Breadboard to the Arduino
Now it is time to wire all the components to the Arduino.
First, connect the negative pins of the pushbuttons into Arduino digital pins 2, 3, 4, and 5.
Connecting the pushbutton's negative pins to the Arduino.
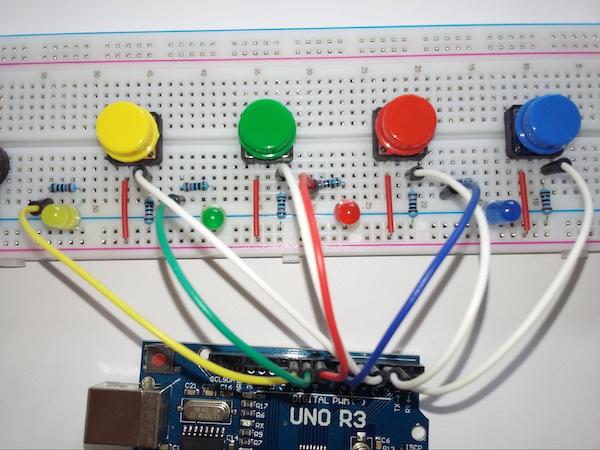
Connect the anodes (longer legs) of LEDs to Arduino digital pins 7, 8, 9, and 10 through 220Ω resistors.
Connecting the anodes of the LEDs to the Arduino.
Connect the positive pin of the buzzer to Arduino digital pin 12.
Connecting the buzzer to the Arduino.
Finally, power up the breadboard by connecting the 5V and ground jumpers into rails.
Connecting the 5V and ground jumpers.
Arduino Code
Let's go through how the code for the memory game works.
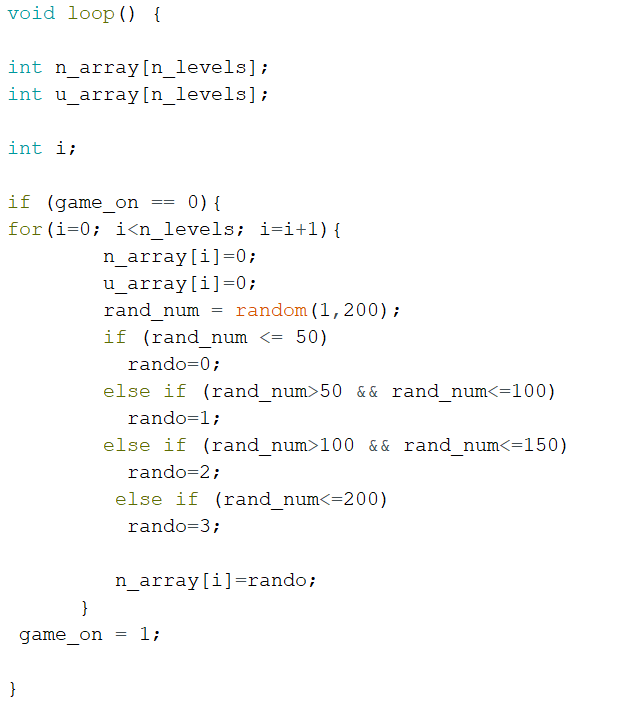
At the beginning of each game, the Arduino determines a pattern by randomly picking a number.
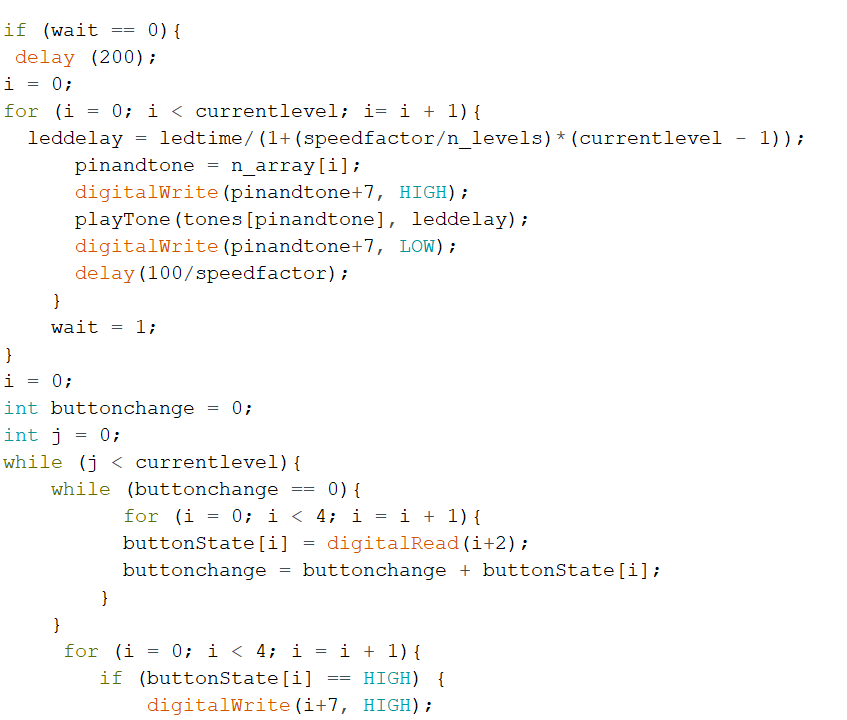
The game reveals lengthier sequences as the player progresses. Once a full pattern is shown, Arduino waits for a button press and then updates the status of the game. If the button is not pressed as expected, the game starts over.
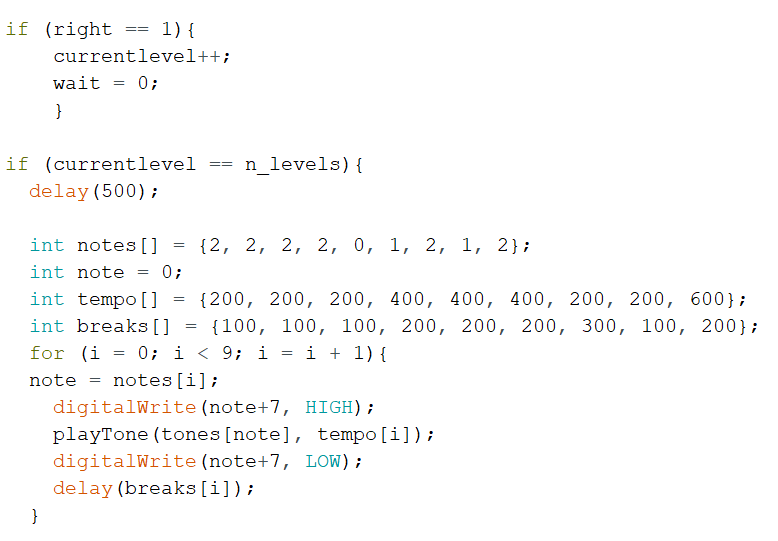
If the user inserts the right sequence, it levels up. And if the user wins the game, it plays the victory music!
The Arduino code is quite lengthy and it involves a lot of arrays. If you are a beginner to Arduino coding, don’t worry! You can find the full code here:
Full Arduino memory game code
This project is based on Jeremy Wilson’s Arduino Simon game. You can find the final etched version of the product on his GitHub repository.
Hope you enjoyed this project! It can be a cool party game to show off your new Arduino skills.