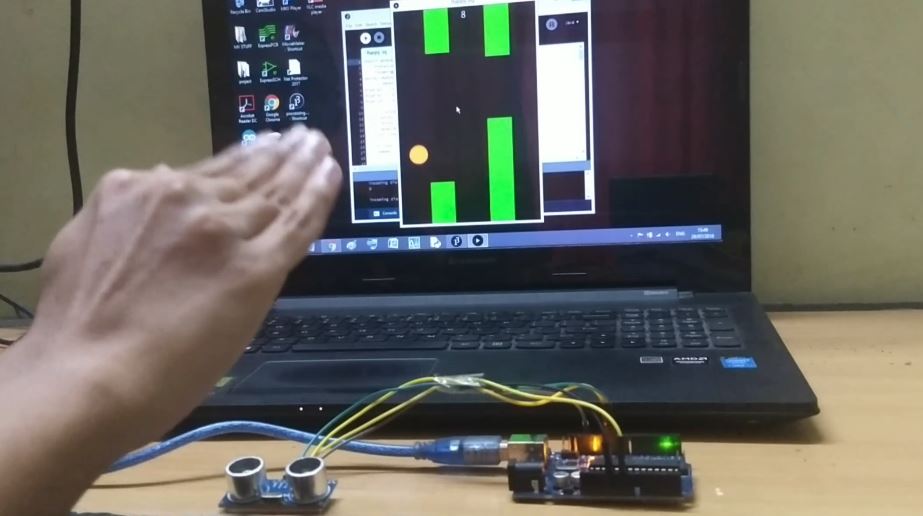
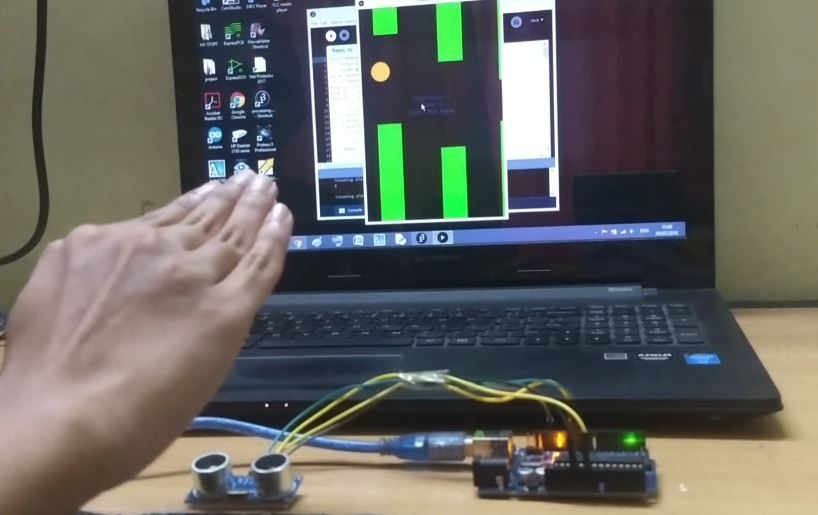
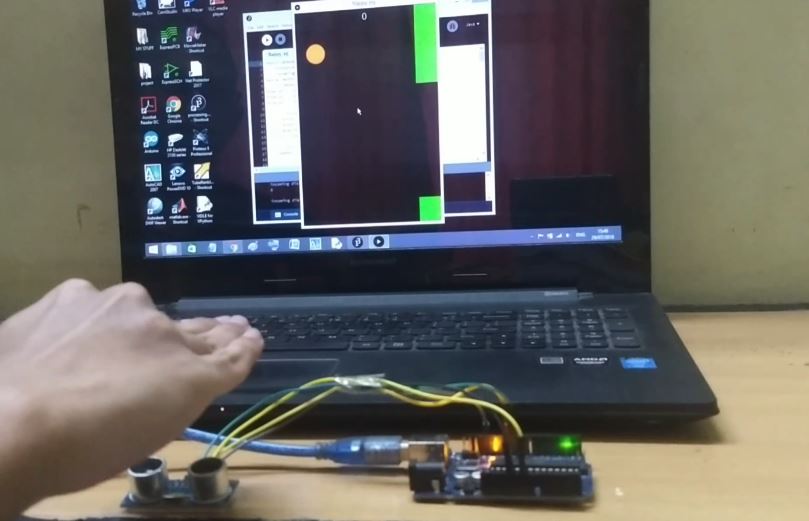
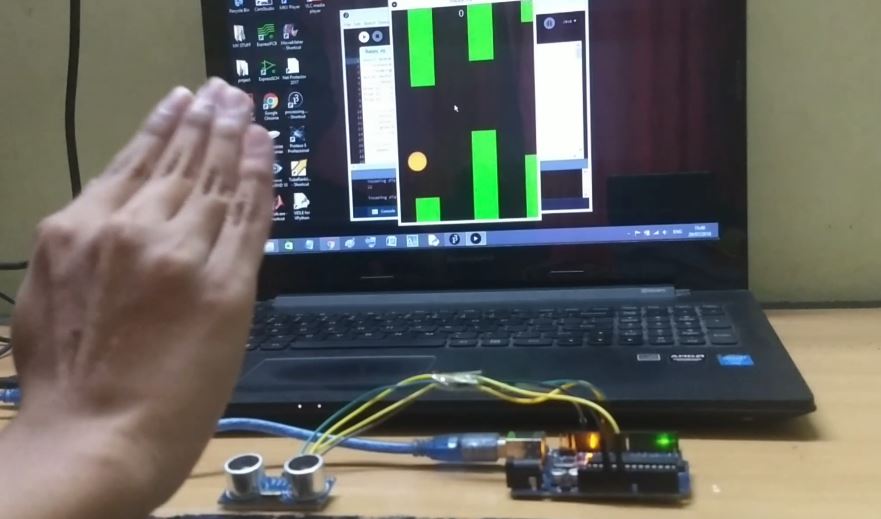
Basically I modified a classic flappy bird game made the bird fly with inputs from an ultrasonic sensor.
Hello everyone!!! Welcome to a new Arduino based project. We all have once in our life time played the flappy bird game. How if we play it on our PC and control it using our Arduino?? Follow all the steps given below and by the end of this tutorial you will control the game using your microcontroller.
Step 1 : Working in brief
The reason we used the ultrasonic sensor here is to get the distance data between our hand and the sensor and use those values to adjust the height of the moving bird. The game is created in Processing and the Arduino communicates with it using the serial port. I have linked few images of the game below so take a look at them in order to get some idea about this project. SPONSOR LINK - UTSource.net.
Step 3 : Let's Do the Connections
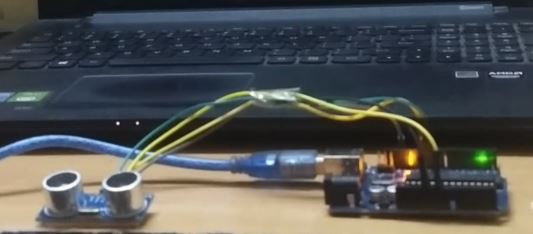
First connect the SR-04 sensor to the Arduino board. As there is just one sensor to interface I won't add a circuit diagram for this project. The connections are as follows -
SR-04 >> Arduino Uno
Vcc >> 5V
Gnd >> Gnd
Trigger Pin >> Digital pin 11
Echo Pin >> Digital pin 10
That's it the connections are done.
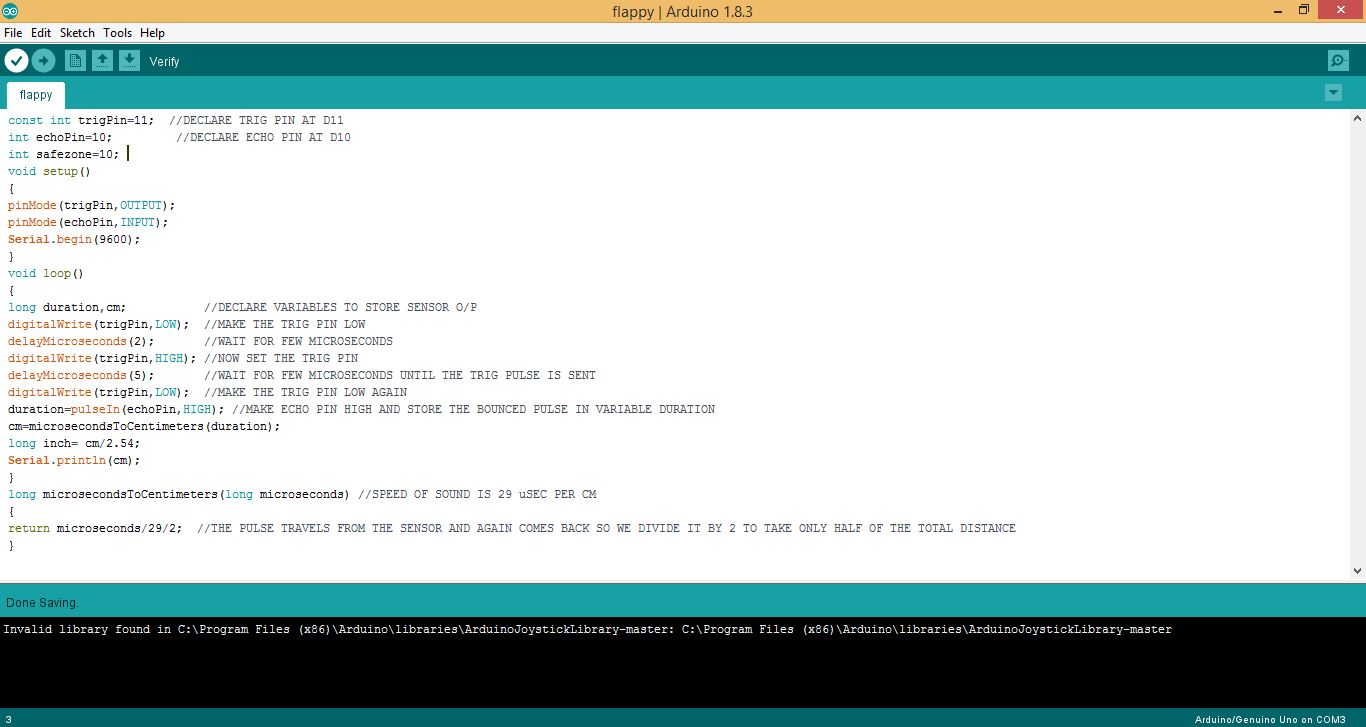
Step 4: Upload the Arduino Code
Now time to upload the code to your Arduino board.
Copy the code from below.
Before uploading the code make sure to select the proper com port and baud rate as we will be using it for sending data to the game.
const int trigPin=11;  //DECLARE TRIG PIN AT D11
int echoPin=10;         //DECLARE ECHO PIN AT D10
int safezone=10;
void setup()
{
pinMode(trigPin,OUTPUT);
pinMode(echoPin,INPUT);
Serial.begin(9600);
}
void loop()
{
long duration,cm;           //DECLARE VARIABLES TO STORE SENSOR O/P
digitalWrite(trigPin,LOW);  //MAKE THE TRIG PIN LOW
delayMicroseconds(2);       //WAIT FOR FEW MICROSECONDS
digitalWrite(trigPin,HIGH); //NOW SET THE TRIG PIN
delayMicroseconds(5);       //WAIT FOR FEW MICROSECONDS UNTIL THE TRIG PULSE IS SENT
digitalWrite(trigPin,LOW);  //MAKE THE TRIG PIN LOW AGAIN
duration=pulseIn(echoPin,HIGH); //MAKE ECHO PIN HIGH AND STORE THE BOUNCED PULSE IN VARIABLE DURATION
cm=microsecondsToCentimeters(duration);
long inch= cm/2.54;
Serial.println(cm);
}
long microsecondsToCentimeters(long microseconds) //SPEED OF SOUND IS 29 uSEC PER CM
{
return microseconds/29/2;  //THE PULSE TRAVELS FROM THE SENSOR AND AGAIN COMES BACK SO WE DIVIDE IT BY 2 TO TAKE ONLY HALF OF THE TOTAL DISTANCE
}
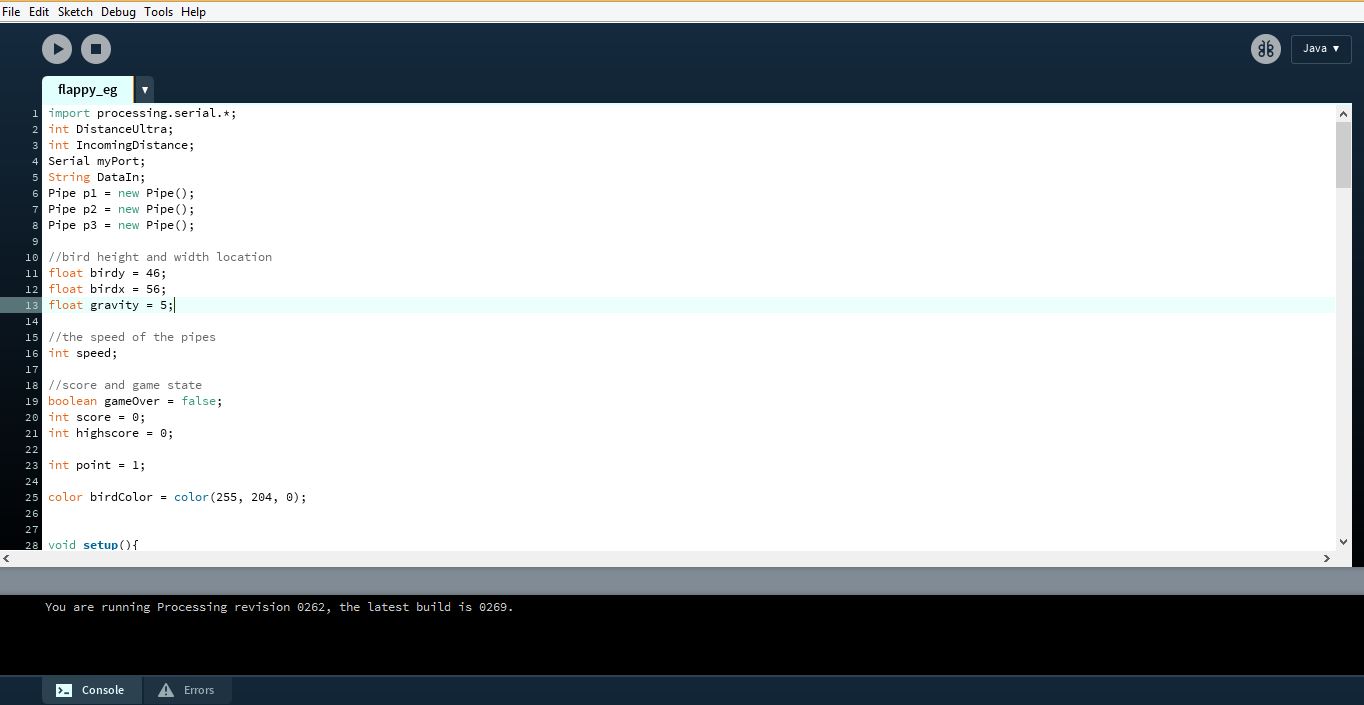
Step 5 : Open the Processing Program
Once the Arduino code is uploaded, download and open the processing code. Again set the same baud rate and mention the correct com port as you did earlier.
import processing.serial.*;
int DistanceUltra;
int IncomingDistance;
Serial myPort;
String DataIn;
Pipe p1 = new Pipe();
Pipe p2 = new Pipe();
Pipe p3 = new Pipe();

//bird height and width location
float birdy = 46;
float birdx = 56;
float gravity = 5;

//the speed of the pipes
int speed;

//score and game state
boolean gameOver = false;
int score = 0;
int highscore = 0;

int point = 1;

color birdColor = color(255, 204, 0);


void setup(){
  size(400,600);
  p1.x = width + 50;
  p2.x = width + 220;
  p3.x = width + 370;
  myPort = new Serial(this, "COM3", 9600);
  myPort.bufferUntil(10);
}
void serialEvent (Serial myPort){
DataIn = myPort.readString();
println(DataIn);
IncomingDistance = int(trim(DataIn));
println("incoming distance="+IncomingDistance);
if (IncomingDistance>1 && IncomingDistance<100 ) { DistanceUltra = IncomingDistance; //save the value only if its in the range 1 to 100 } }
}
}

void draw(){

  background(0);
  p1.pipe();
  p2.pipe();
  p3.pipe();

  fill(birdColor);
  ellipse(birdx, birdy, 55,55);
 // birdy += gravity;
  play();
  success(p1);
  success(p2);
  success(p3);

  if (IncomingDistance>10)
  {
    //birdy -= jumpForce;
    birdy -= gravity;
  }
  else
  {
    birdy += gravity;
  }

}


void play(){

  if(gameOver == false)
  {
    speed = 2;
    p1.x -= speed;
    p2.x -= speed;
    p3.x -= speed;

    textSize(24);
    fill(255,255,255);
    text(score, width/2, 30);
  }

  if(gameOver == true)
  {
    speed = 0;
    p1.x -= speed;
    p2.x -= speed;
    p3.x -= speed;

    if( highscore < score)
    {
       highscore = score;
    }

    textSize(16);
    fill(0, 102, 153);
    textAlign(CENTER);
    text("Click : Play Again", width/2, height/2);
    text("Score: " + score, width/2, height/2 - 20);
    text("High-Score: " + highscore, width/2, height/2 - 40);

    if (mousePressed)
    {
       delay(900);
       score = 0;
       gameOver = false;
       birdy = 100;
       birdx = 56;
       p1.x = width + 50;
       p2.x = width + 220;
       p3.x = width + 370;
       p1.top = random(height/2);
       p1.bottom = random(height/2);
       p2.top = random(height/2);
       p2.bottom = random(height/2);
       p3.top = random(height/2);
       p3.bottom = random(height/2);

    }
  }

}

void success(Pipe test){

  if(birdy < test.top || birdy > height - test.bottom)
  {
    if(birdx > test.x && birdx < test.x + test.w)
    {
      gameOver = true;
    }
  }
}
class Pipe
{
  float top = random(height/3 + 200);
  float bottom = random(height/3 +200);


  float x = width + 150;
  float w = 70;
  color pipeColor = color(0, 255, 0);

  void pipe()
  {
    fill(pipeColor);
    rect(x, 0, w, top);
    rect(x, height-bottom, w, bottom);

    if(x < -100)
    {
     score += point;
     x = width;
     top = random(height/2);
     bottom = random(height/2);
    }


  }


}
Now let's give this game a try. Just click on the run button in the processing Ide and you are good to go. The bird moves according to the distance between your hand and the sensor. If you have any queries related to this project feel free to comment below.