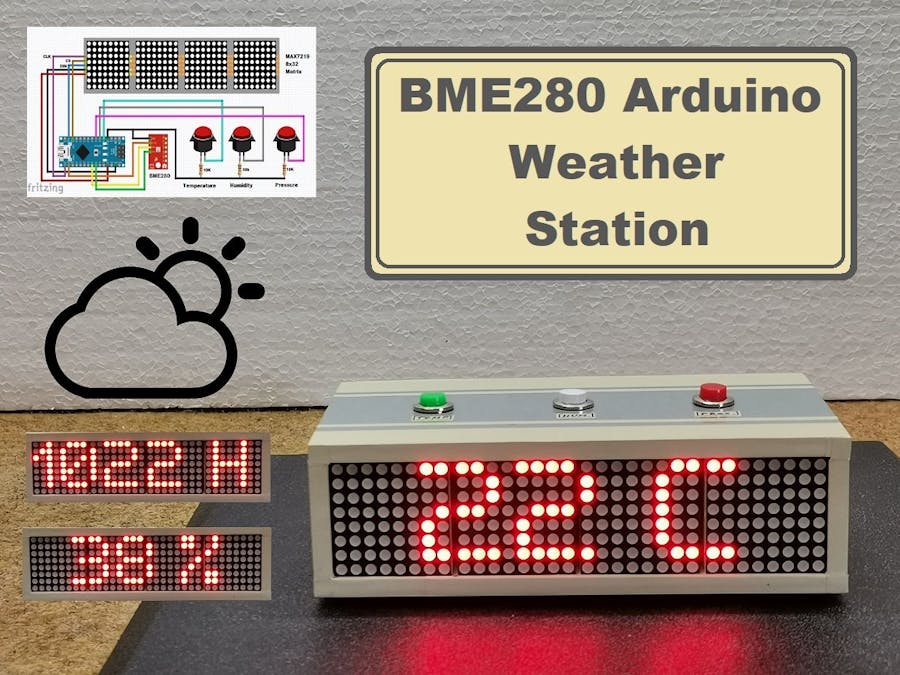
Super simple Weather station containing only two components.
This time I will show you how to make a simple home weather station. The measured values are displayed on an 8 by 32 dots Led display consisting of four 8 by 8 LED matrices controlled by MAX7219 chip, and connected together on one PCB
This module sells very cheaply for about $ 4. Recently, such modules have appeared that in addition to the basic red color, you can also choose a model with green or blue LEDs.
The basic code for this device is taken from Anas Kuzechie blog (https://akuzechie.blogspot.com/), and I just made some very small modifications, so that now, between the push of a button, the scrolling text "T * H * P" does not appear, which actually has no function and spoils the visual impression. Also to mention that while trying to compile the program, I received a message that the sketch uses more than the allowed program storage space. This is solved in the way we need to compile the sketch with the Arduino IDE version 1.8.10, or older.
In the code, in the line:
" pres = bme.seaLevelForAltitude(195, bme.readPressure())/100; "
instead of 195, you should enter the altitude from your place, so that the display shows the Relative Atmospheric Pressure.
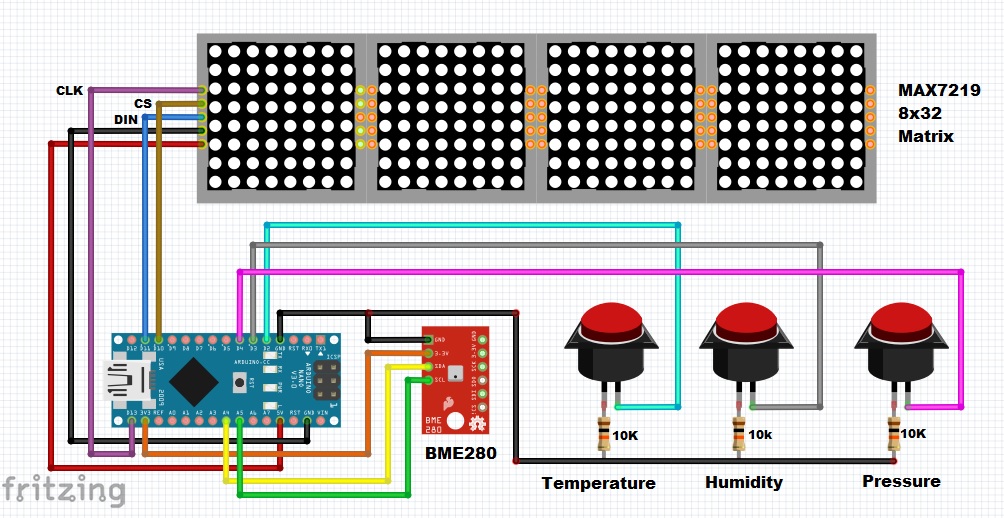
The device is extremely simple to make and contains only a few components:
- Arduino Nano microcontroller
- 8 by32 dots Led Display
- and 3 Buttons with pulldown resistors
Immediately after turning it on, appears scrolling text with the content "BME 280 sensor" on the screen. After that, the display turns off and remains empty until we press any of the buttons. Depending on which button we press, the value of Temperature, Humidity, or Atmospheric Pressure appears on the display. This information stays on the screen for ten seconds, which is quite clear enough to read, and then is lost and the screen is empty until the next button is pressed. This way we get the information only when we want it, avoiding the constant flickering and flashing of the display, which can be very unpleasant, especially at night.
Finally, the device is built into a small box made of PVC material with a thickness of 5 mm and coated with self-adhesive colored wallpaper.
//==========================================
//MAX72xx Dot Matrix Display & BME280 Sensor
//==========================================
#include <Wire.h>
#include <MD_MAX72xx.h>
#include <MD_Parola.h>
#include <SPI.h>
#include <Adafruit_BME280.h>
//------------------------------------------------------------
MD_Parola disp = MD_Parola(MD_MAX72XX::FC16_HW, 10, 4);
Adafruit_BME280 bme;
//------------------------------------------------------------
int temp, hum, pres; String tempString, humString, presString;
//==================================================================================
void setup()
{
  pinMode(2,INPUT); pinMode(3,INPUT); pinMode(4,INPUT);
  disp.begin(); bme.begin(0x76, &Wire);

  disp.displayText("BME280 Sensor", PA_LEFT, 40, 40, PA_SCROLL_LEFT,PA_SCROLL_LEFT);
}
//==================================================================================
void loop()
{
//  while(!disp.displayAnimate());
//  disp.displayText("T * H * P", PA_LEFT, 20, 20, PA_SCROLL_LEFT,PA_SCROLL_LEFT);
  while(!disp.displayAnimate());

  if(digitalRead(2) == HIGH) dispTemp();
  if(digitalRead(3) == HIGH) dispHum();
  if(digitalRead(4) == HIGH) dispPres();

  disp.displayClear();
}
//==================================================================================
void dispTemp()
{
  disp.displayClear();
  disp.displayText("Temperature", PA_LEFT, 30, 30, PA_SCROLL_LEFT,PA_SCROLL_LEFT);
  while(!disp.displayAnimate());
  delay(500);
  for(int i=1; i<=7; i++)
  {
    temp  = bme.readTemperature();
    tempString  = "  " + String(temp) + " C";
    disp.print(tempString);
    delay(1000);
  }
}
//==================================================================================
void dispHum()
{
  disp.displayClear();
  disp.displayText("Humidity", PA_LEFT, 30, 30, PA_SCROLL_LEFT,PA_SCROLL_LEFT);
  while(!disp.displayAnimate());
  delay(500);
  for(int i=1; i<=7; i++)
  {
    hum  = bme.readHumidity();
    humString  = "  " + String(hum) + " %";
    disp.print(humString);
    delay(1000);
  }
}
//==================================================================================
void dispPres()
{
  disp.displayClear();
  disp.displayText("Pressure", PA_LEFT, 30, 30, PA_SCROLL_LEFT,PA_SCROLL_LEFT);
  while(!disp.displayAnimate());
  delay(500);
  for(int i=1; i<=7; i++)
  {
    pres  = bme.seaLevelForAltitude(705, bme.readPressure())/100;
    presString  = "" + String(pres) + " H";
    disp.print(presString);
    delay(1000);
  }
}


