DIY Temperature, Humidity, Frost and Zombie sensing using NodeMCU ESP8266, HTTP protocol, DHT11 sensor and Ubidots
Frosts and Zombies
Off the cuff I know what your thinking...”Finally some one has devised a way to warn me if zombies are approaching my house and if there a frost to hopefully deter them”. Truly it is a good day to be alive.
Imagine this: You have your prized vegetables outside growing happily in anticipation of defeating your neighbor, Barney, in the upcoming Vegetable Barnyard Bonanza competition.
Now you face two key threats in preserving the livelihood of your vegetables other than Barneys underhanded tactics and general skulduggery.
Those two threats are:
1. Frosts
2. Zombie migrations
Now the threat of frost is self explanatory in my mind however for those of you who are not versed in zombie behavior this will be worth paying attention to.
Zombies often migrate in large herds trampling everything underfoot. I reference the multi part documentary “The Walking Dead” for the validity of this truth.
If one of these herds were to stumble through your vegetable patch you can bet that your vegetables will not come out on top from the experience. And Barney that greasy pig wrestler will be laughing all the way to the fair.
I would like to pose a query to the community here concerning a thought that has occurred to me as I am writing this Tutorial.
Query: Zombies who were vegetarians and vegans in life may in fact hold to that in the afterlife and in fact try and chow down on some of your prize winning vegetables. My theory is that they become omnivorous in the afterlife having a balanced diet of raw flesh and vegetables. It could be argued that their health may in fact have improved in death. Interesting thoughts.... but I digress.
With the help of the DHT11 temperature and humidity sensor we can rest easy at night knowing we will be warned if a tragedy is about to befall our beloved vegetables.
In the following tutorial we will explain how to detect frost and zombies with the use of temperature and humidity. Thanks to this simple tutorial, you and me can rest easy at night with this wonderful technology.
One thing I would like to note is that this tutorial feeds off of the Hydroponic tutorial that employed MQTT protocols and hence much of the hardware setup will simply be a cut and paste.
Requirements
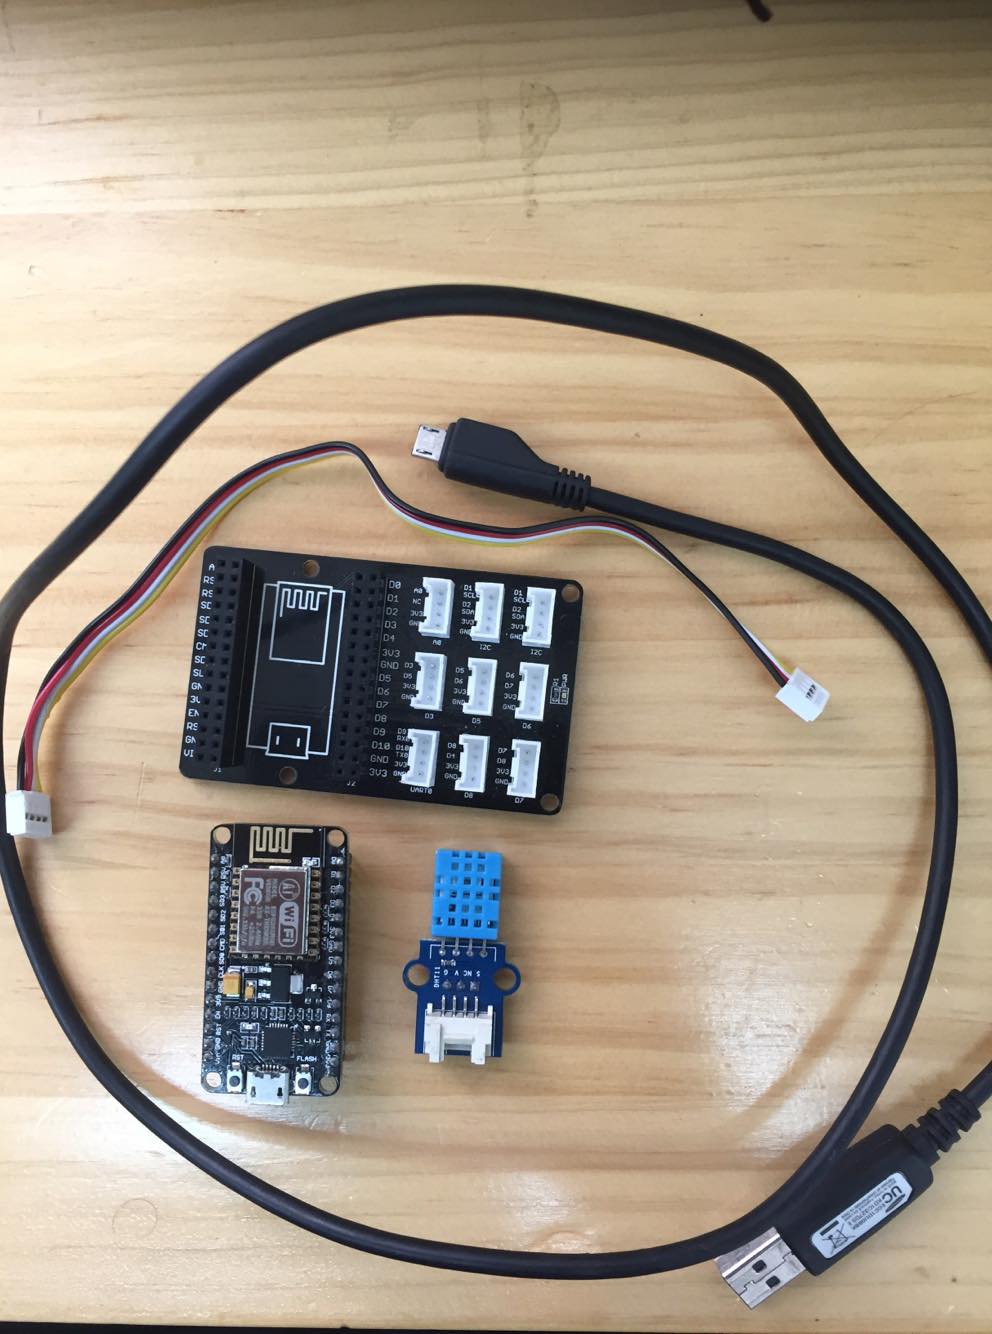
1. DHT11 (temperature and humidity sensor)
2. Grove cable
3. NodeMCU ESP8266 chip
4. Grove base shield for NodeMCU
5. Laptop
6. Micro-USB to USB cord
7. Arduino IDE
8. Ubidots account
Now you should be able to source all of this equipment, computer aside, for under $50 USD. You can easily spend more, expanding your application as you please.
Materials required for sensor
Setup Ubidots and Arduino
Step 1: Ubidots Account Setup
Firstly go to Ubidots and set up an account to manage and visualize the live data. Ubidots supports both the free educational account and the paid license accounts, both are great for this project.
In the top right hand corner of all Ubidots accounts you will find your name containing a the drop down menu your API Credentials. Here you can find your Ubidots TOKEN which will be crucial to making this all work. You will want to copy the Token into the code later on.
Note: we will be using your Ubidots API TOKEN not the API key.
Clicking on this link will take you to the Ubidots help page, which has a huge amount of documentation available to those who cannot find their way in my tutorial.
Step 2: Arduino Setup
The next step is to set up the Arduino IDE on your computer. This link will take you to a tutorial that will explain to you how to set up the IDE if you have not already done so.
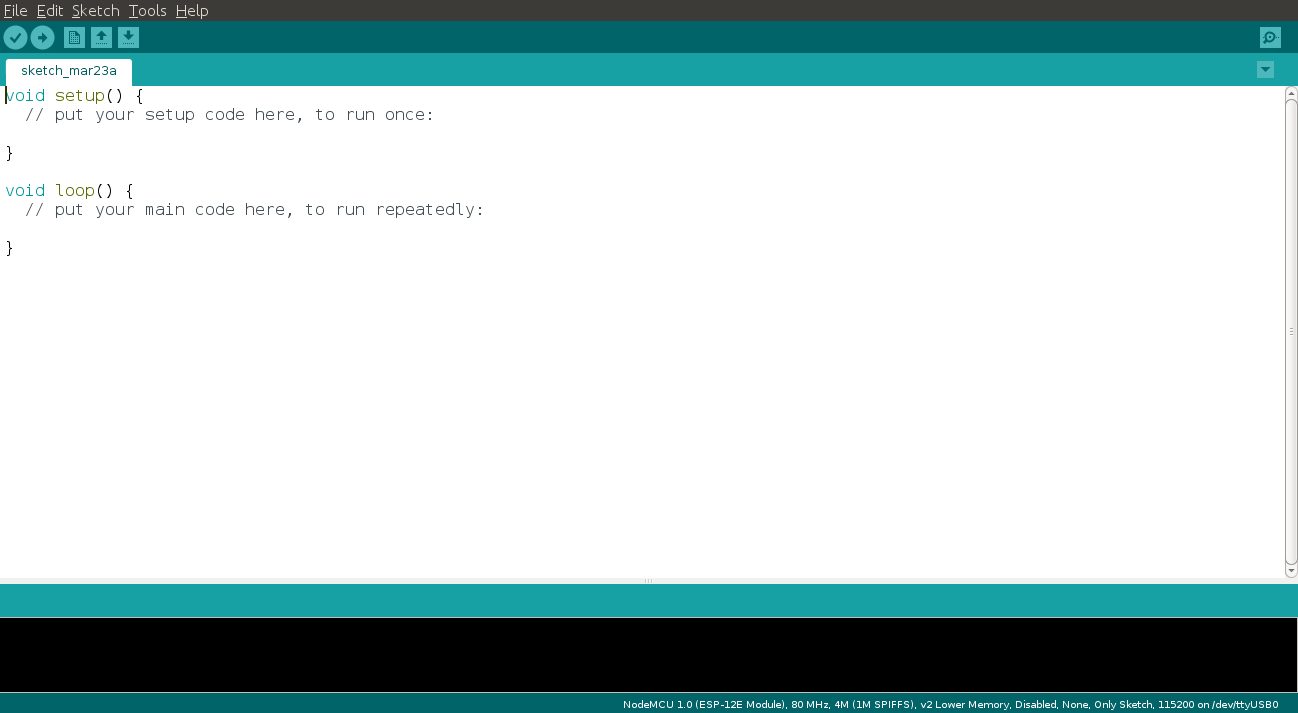
With your IDE setup complete, you'll see the IDE as mine is below:
Hardware Setup
The following steps are best explained with a picture rather than words.
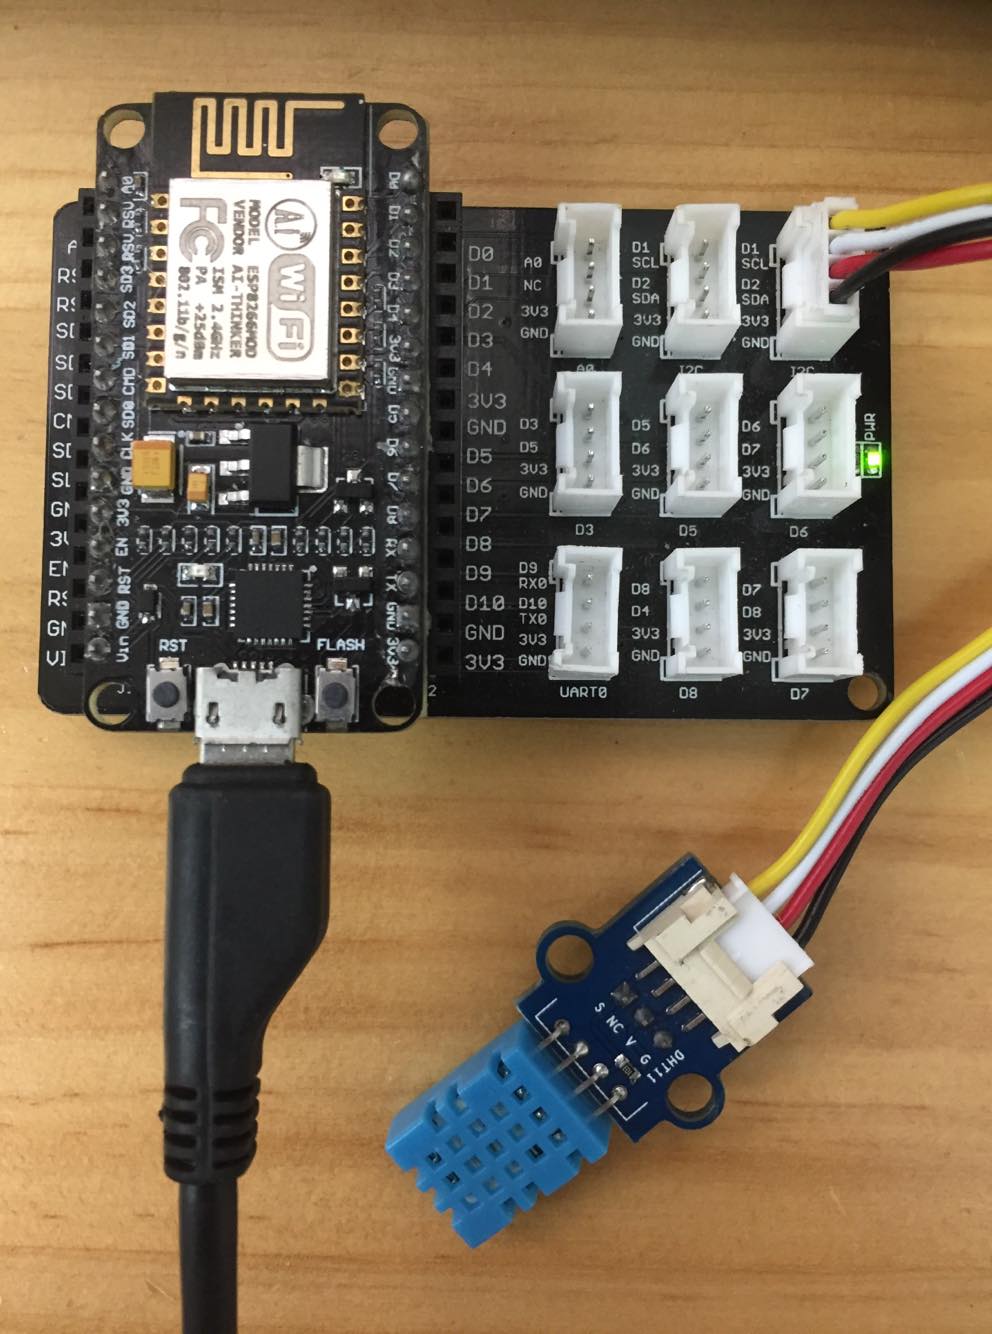
The key thing to note is that the Grove cable plugs into the D1 PIN. This is crucial because the DHT11 passes data over IIC/I^2C bus and pin D1 is designed to receive data from this sort of bus. While the connector will fit into any of the 9 available plugs the others will not work as expected.
This IIC/I^2C pin will change for other devices however it is simply a case of looking at the spec sheet of what ever chip your using and finding the right pin to use. If you use this tutorial as sample code for your own solutions, be sure to change the pin out in your code reflect their actual sensors or pin requirements.
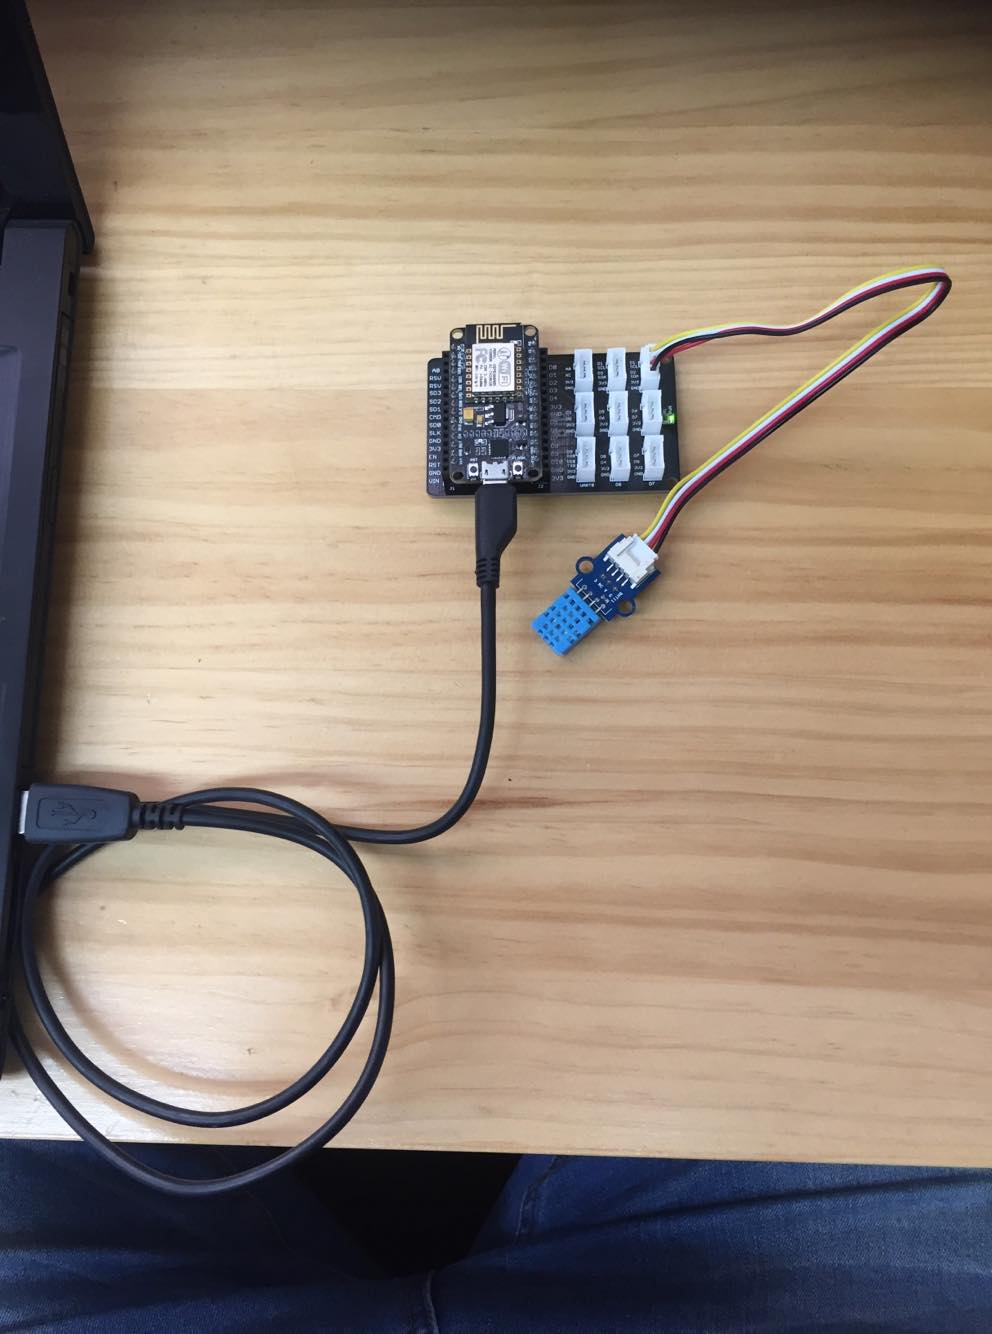
Past this, setup everything as it looks in the picture and we will be ready to code in no time.
Closeup of Micro controller setup with DHT11 Sensor at PIN D1
Overall setup image showing computer attachment
Code
This code employs HTTP protocols in order to send data to the Ubidots cloud. The key difference between this tutorial and the hydroponic tutorial is the use of the HTTP protocols.
Yet again I will break up the code into sections with associated explanations. Then at the end the complete code can be copied and pasted into the IDE.
Note the documentation for this code will be more thorough than the code I showed for MQTT and may in fact answer some questions you had about the other code.
Library:
The following two libraries allow the program to use functions that are otherwise sorcery when viewed from here. For example the .add function adds values to the variable that is named then the .sendAll function sends it all to the cloud.
These libraries also provide structures that are used to hold the information.
Anyway libraries are key otherwise you have to code a million functions yourself.
Its kind of like in Pokemon...you could wait and train you Squirtle to use hydro pump or you could buy the move and give it to him. Buying it saves a lot of hassle
and you can use it straight away. Analogy of the century I know ;p
The following two links will take you to the GitHub repository to download the required libraries in a .zip format:
1. DHT
2. Ubidots Micro ESP8266
Defining Variables:
Here we are defining/creating variables that the program will use. If you change anything then try get the labels to make sense. It will help you a great deal later on.
I had a wonderful math teacher named Phillipa who explained functions to me. She said that you need to look at them as a machine that takes certain inputs and then creates something you want at the other end. So you can pass the machine defined variables for example.
The .wifiConnection function/machine needs the wifi name and password as inputs and as an output it creates a connection to the Internet which is very handy for us.
Note the #define variables never change their value hence they are setup outside of the main code.
Uncomment whatever type of sensor you are using! This is the sort of DHT sensor you are using and its important that you pick the correct one here. Name is usually on the back of the sensor.
Also place the appropriate material in the requested fields leaving the quotation marks where they appear.
#define code setting up the variables that the code will use to run
Structs:
The following two items are a little different to the ones above. These are called structs and are a type that come from the libraries.
Structs create a framework under a name that you can add details to eg. you could have a person struct that records age, height, weight etc. These structs can also have functions/methods associated with them such as .add in this case or .wifiConnection that work with that struct. Theres much more to them but this is a wee overview for now that might start to give you an idea about them. The DHT library here has been used to construct a DHT type structure that we have called dht and we have passed it some information immediately. "client" is the name given to the variable made from the Uidots library struct.
Two struct type variables created for use later in the code. Each is a separate instance from each library
Setup():
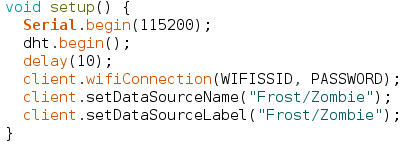
Once the variables have been defined above the IDE then goes onto the setup section which sets up the rest of the program.
The first line sets the Baude rate of the program. A higher value means faster run time for the program and the value of 115200 is recommended for this program.
The second line is crucial in terms of running the DHT code. The delay function is placed here to pause the program for 10 milliseconds while the two .begin() functions start running. Potentially not crucial though we loose nothing in this instance by incorporating it.
The .wifiConnection() establishes the Internet connection in order to send data.
The final two lines dictate what Device will be used to store the data.
If this device does not exist, Ubidots will automatically create a new device in your Ubidots application. In Ubidots every device has a name and a label which are usually the same, but can be adjusted simply with the help of this article.
Setup code which is seen once by the IDE before it goes onto the loop and starts producing the output we desire. Sets up everything for the code to run on.
Loop:
Ok so we have got the program setup to run at this point. The following loop will run continuously until the program is stopped. During this time it will loop through the code and perform the tasks that have been listed continuously. Stopping will occur when you pull the device off its power.
Loop that continuously runs the code and keeps the program running
Reading values:
The following three lines of code are described below.
Read humidity:
Takes the humidity value that the struct has had added to it and then assigns that value to humValue. The humidity value within the struct gets updated continuously as does the temperature value. So every time it loops through the values of humValue, tempCValue and tempFValue get updated for the following functions
Read Temperature (C):
Read temperature as Celsius (the default)
Read Temperature (F):
Read temperature as Fahrenheit (isFahrenheit = true). Note the stuff in the brackets is called the argument and is what is passed to the function (inputs). In this case by utilizing the "true" component of the struct in relation to temperature it returns Farenheit as opposed to Celcius.
Reading the values from the DHT11 sensor
Serial printing:
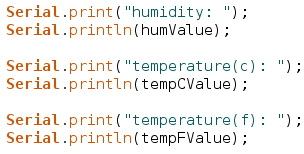
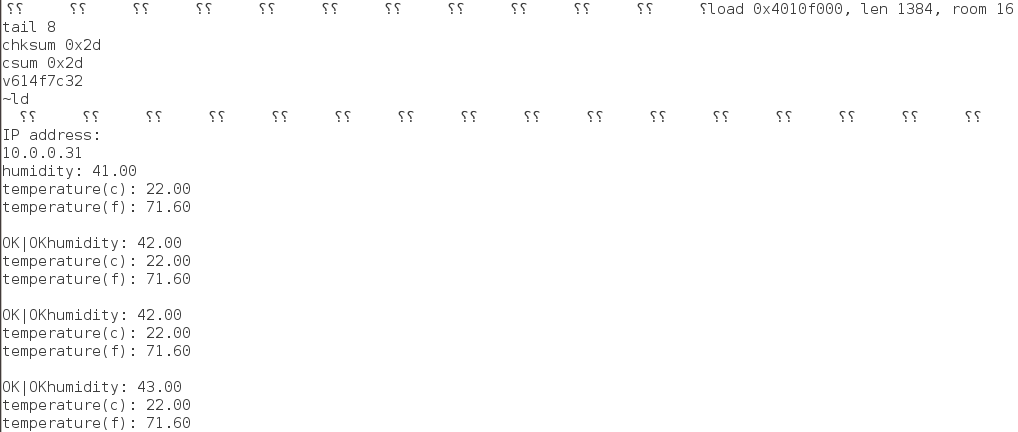
So here we are not using either of the structs that have been talked about. Instead we are generating output that can be seen to ensure that the device is indeed outputting information. This Serial output can be viewed by clicking on the magnifying glass box at the top right of this window. Its just above the arrow that is pointing down. The following function will print out the material in brackets and then print out the values held by the three afore mentioned variables. I have also attached a picture of the serial output you should expect to get. Don't ask me what the OK/OK thing is. However it works.
Data to be printed to the serial output
Add function:
Now we are dealing with our Ubidots struct again. We are using the .add function to add the values in tempCValue and humValue to their associated variables. The struct called client is getting its components updated. One key thing to note that I got wrong is that the .add function only takes floats or doubles. If you try and pass it any other form of value eg. a string value, then the system will tell you to go suck a huge lemon.
You cannot just pass anything to the functions/methods. You may have noticed that every variable has been defined in terms of what kind of value it is. humValue etc. were made floats but if you had a simple value of 2 that you wanted to save as a variable then you would likely allocate it as an Int. Even though an Int is a number and .add wants a number it will not take an Int.
These aspects are crucial to getting any code to run/compile. In the event that these variables to not exist within the Frost/Zombie device then they will be created and the values added to these variables here after. This doesn't happen till .sendAll however.
Adding values to the two chosen variables. Note we have not used the Farenheit variable here but it is in the code
Send function:
Here we are finally posting the values to your Ubidots platform.
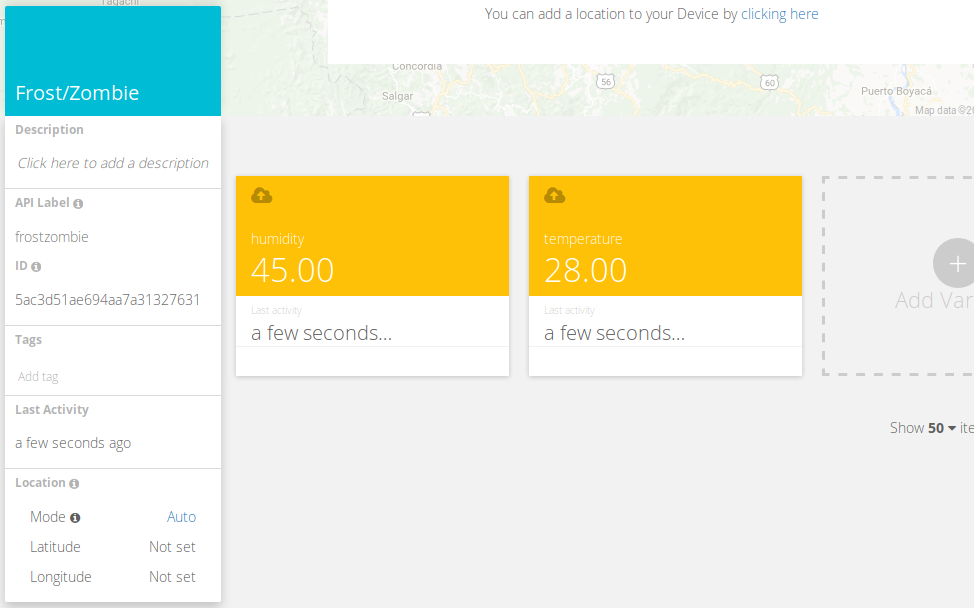
If you now go to your Ubidots Device page you should see the Device Frost/Zombie sitting there with the variables temperature and humidity reporting.
The True component is important here however I have not got my head around it yet. Its not as simple as true = "yes please send the data" which is what I thought it would mean. Just leave it as is and you will be fine. I have also attached a picture of what you should expect to see on your Ubidots account. A great way to see if the sensor is working is to put your hand around it and the temperature and humidity should increase and you should see the values increase in the serial and Ubidots platform.
The serial output and Ubidots page pictures have been attached after the main code section below.
Sending the data to Ubidots
Delay:
Finally before we start to loop through this whole thing again we want to put in a delay.
The delay essentially takes up operating time and is an absolute waste of processing power but its straightforward which is more important right now. It pauses the system for 10 seconds in this case. This is good because otherwise the system will pump out new values at a rate you can't keep up with. I find one new set of values every 10 seconds gives you time to think about what the system is giving you and what it means.
A great deal can be learnt about how a system is performing if you look at the output. If for example the serial is not printing the values then you have done something wrong there. Make sure the label names etc are all correct. Upper case and lower case are different so ensure the names are identical. If not you will loose days trying to figure out the issue like I did.
Delay and the closing of the loop function
General running notes:
The Arduino website is very good for explaining the functions that come with the program though it can be a little simplified sometimes if you want a lot of detail. The libraries can be found on Github and hopefully you can find the explanations for any functions that have peaked your interest.
As I have written out these notes I have realized that there is a huge amount of detail I could go into however you know enough to get it running now. If you want know more I feel like its better to look for that knowledge after having achieved something like this first.
Best thing about all this is that the Internet is a staggeringly huge resource for this sort of information as the people who built the Internet are always on here putting up new articles and code. Its not like trying to find an example of how to fix a toilet as most toilet fixers don't want to then go home and explain how to fix a toilet on the Internet. This means you will find a hundred answers for every question you have about this material. Sift around until you find someone who explains it in a way that you understand.
COMPLETE SAMPLE CODE:
/****************************************
 * Include Libraries
 ****************************************/

#include "DHT.h"
#include "UbidotsMicroESP8266.h"

/****************************************
 * Define Constants
 ****************************************/

#define DHTPIN D1     // pin where the sensor is connected to.
#define DHTTYPE DHT11   // DHT 11
//#define DHTTYPE DHT22   // DHT 22  (AM2302), AM2321
//#define DHTTYPE DHT21   // DHT 21 (AM2301)
#define TOKEN  "Token"  /* Put here your Ubidots TOKEN between the quotation marks. Need them*/
#define WIFISSID "Wifi net work name" /* Put here your Wi-Fi SSID */
#define PASSWORD "wifi network password" /* Put here your Wi-Fi password */

DHT dht(DHTPIN, DHTTYPE);

Ubidots client(TOKEN);

/****************************************
 * Main Functions
 ****************************************/

void setup() {
  Serial.begin(115200);
  dht.begin();
  delay(10);
  client.wifiConnection(WIFISSID, PASSWORD);
  client.setDataSourceName("Frost/Zombie");
  client.setDataSourceLabel("Frost/Zombie");
}

void loop() {

  float humValue = dht.readHumidity();
  float tempCValue = dht.readTemperature();
  float tempFValue = dht.readTemperature(true);

  Serial.print("humidity: ");
  Serial.println(humValue);

  Serial.print("temperature(c): ");
  Serial.println(tempCValue);

  Serial.print("temperature(f): ");
  Serial.println(tempFValue);

  client.add("temperature", tempCValue);
  client.add("humidity", humValue);
  client.sendAll(true);
  delay(1000);
}
Serial output that you should see when running the code with the device attached. Temperature and humidity will reflect your environment not mine
The Frost/Zombie device as well as the two variables as they have appeared on my Ubidots account
Setting up Alert and Events
This section is great for me because this link explained how to set up alerts really well and helped me complete my application's development quickly.
Once you have figured out how to create events you need to decide what humidity and temperature values that you want your system to look out for.
By now you have to be wondering how on earth we can detect zombies with a temperature and humidity sensor!!!!
Well dear reader I am glad you asked...
Frost:
Frost will occur when the temperature drops below a certain value depending on the area you live in. There also has to be a certain humidity content to allow this to happen. So you go into your Ubidots account and set up alerts for when the temperature and humidity go past certain values that are considered danger zones for your fresh produce in the area you are cultivating. Then when you hit the danger zone you will receive an alert telling you that Barney is about to school you in the local competition.
Zombie:
Now this detection system is based on my own theory.
Zombie bodies are constantly decaying. Decaying material sits at a higher temperature and gives off gases that increase the humidity in the immediate area.
So when the horde passes your sensors the temperature and humidity will shoot up.
Given you are only concerned with these problems at night you setup your sensors to only send alerts at night. Given cold night time conditions you choose values that are higher than what you would expect.
I will leave you to sort this out as you know the conditions in the local area and how best you can defend your farm, family, and friends from any intrusion.
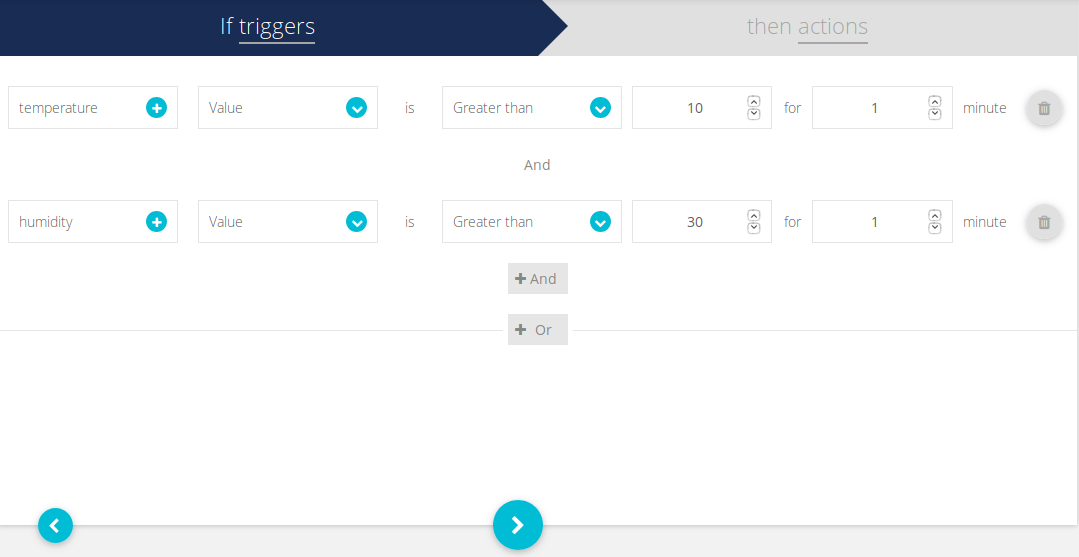
The following is how I setup the zombie alert if you need an example. You can easily do the same for frost alerts in the same alerts as Ubidots' events engine.
The conditional logic meaning "and / or" statements can be included to notify a user when a complex situation has taken place.
Conclusion
So I think its safe to say we can all sleep easy knowing that Barney is going to have to eat some humble pie at the competition as we both know he has not read this tutorial and is likely out there watching for zombies with his pitchfork the dear chap.
Now I have set you up with a warning system for when the zombies and frost come however what you do when you get that alert is up to you. I have plenty of ideas on the topics but unless everyone is desperate to know they will remain in my head.
Essentially what we have created here, tom foolery aside, is a way of measuring temperature and humidity using the DHT11 sensor. With the help of Ubidots we can mange the data and generate alerts that suit us.
HTTP protocols were the back bone of this process and I hope you have gained a little insight to this standard communication protocol. I want you to understand that there is a great deal more that you can do with HTTP and that this tutorial is skimming the surface of its functional potential.
Have fun with this like I did. Imagination and a power source are your only limits.... or zombies.

