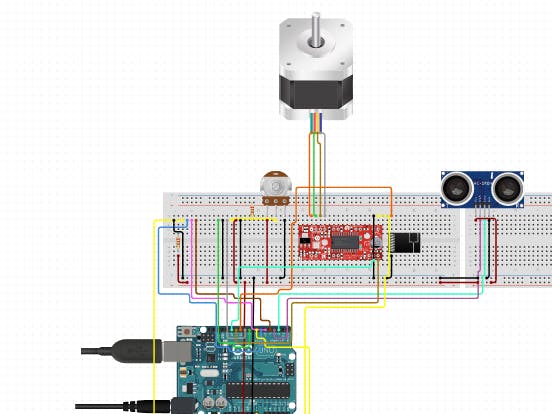
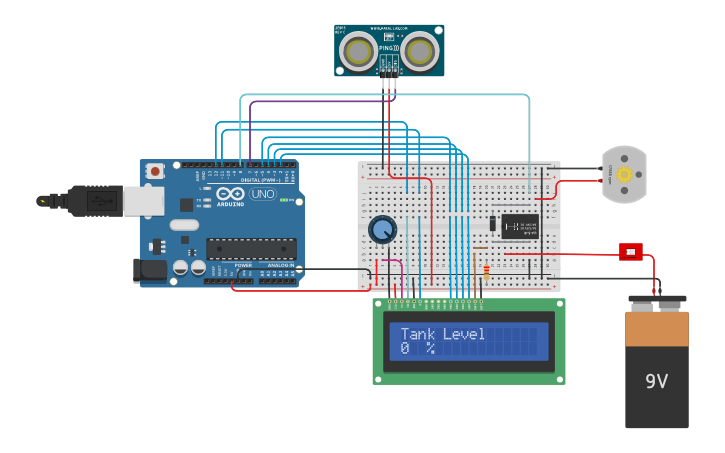
Arduino-based automatic water level indicator and controller project we are going to estimate the water level using ultrasonic sensors.
Summary:
Arduino-based automatic water level indicator and controller project we are going to estimate the water level using ultrasonic sensors
About Project
The concept we have used here in our project where the water motor pump is automatically turned on when the water level in the respective tank becomes low.
Ultrasonic sensor HC-SR04 is utilized to estimate distance in the range of 2cm-400cm with an accuracy of 3mm. The sensor module includes an ultrasonic transmitter, receiver as well as control circuit.
The signals after striking an obstacle it will return back and are captured with the help of the receiver. Thus the distance of the obstacle from the sensor is generally estimated by the formula given as
Distance= (time x speed)/2.
we have utilized an Ultrasonic sensor module that sends the sound waves in the water tank and recognizes the reflection of sound waves that is ECHO. First of all, we require to trigger the ultrasonic sensor module to share the signal by using Arduino and then wait to receive ECHO.
Arduino interprets the time between triggering and received ECHO. We know that the speed of sound is around 340 m/s. so we can measure distance with the help of the formula:
Distance= (travel time/2) * speed of sound
Where the speed of sound is about 340m per second.
With the help of this method, we get the distance from the sensor to the water surface. After it, it is important to measure the water level.
Now we will calculate the total length of the water tank. Then we can measure the water level by subtracting the resulting distance coming from ultrasonic from the total length of the tank. And we will receive the water level distance. Now we can change this water level into the % of water and can display it on LCD.
#include <LiquidCrystal.h>

#define trigger 10
#define echo 11
#define motor 8
#define buzzer 12

LiquidCrystal lcd(7,6,5,4,3,2);

float time=0,distance=0;
int temp=0;
void setup()
{
 lcd.begin(16,2);
 pinMode(trigger,OUTPUT);
 pinMode(echo,INPUT);
 pinMode(motor, OUTPUT);
 pinMode(buzzer, OUTPUT);
 lcd.print("  Water Level ");
 lcd.setCursor(0,1);
 lcd.print("   Indicator  ");
 delay(2000);
}

void loop()
{
 lcd.clear();
 digitalWrite(trigger,LOW);
 delayMicroseconds(2);
 digitalWrite(trigger,HIGH);
 delayMicroseconds(10);
 digitalWrite(trigger,LOW);
 delayMicroseconds(2);
 time=pulseIn(echo,HIGH);
 distance=time*340/20000;
 lcd.clear();
 lcd.print("Water Space In  ");
 lcd.setCursor(0,1);
 lcd.print("Tank is: ");
 lcd.print(distance);
 lcd.print("Cm");
 delay(2000);
 if(distance<12 && temp==0)
 {
     digitalWrite(motor, LOW);
     digitalWrite(buzzer, HIGH);
     lcd.clear();
     lcd.print("Water Tank Full ");
     lcd.setCursor(0,1);
     lcd.print("Motor Turned OFF");
     delay(2000);
     digitalWrite(buzzer, LOW);
     delay(3000);
     temp=1;
 }

  else if(distance<12 && temp==1)
 {
     digitalWrite(motor, LOW);
     lcd.clear();
     lcd.print("Water Tank Full ");
     lcd.setCursor(0,1);
     lcd.print("Motor Turned OFF");
     delay(5000);
 }

 else if(distance>30)
 {
   digitalWrite(motor, HIGH);
   lcd.clear();
   lcd.print("LOW Water Level");
   lcd.setCursor(0,1);
   lcd.print("Motor Turned ON");
   delay(5000);
   temp=0;
 }
}


