Here you have the comprehensive starting guide to the Attiny85 microcontroller compressed into a short but detailed vide
Here you have the comprehensive starting guide to the Attiny85 microcontroller compressed into a short but detailed video that covers everything from configuring you Arduino as ISP to Uploading some working code.
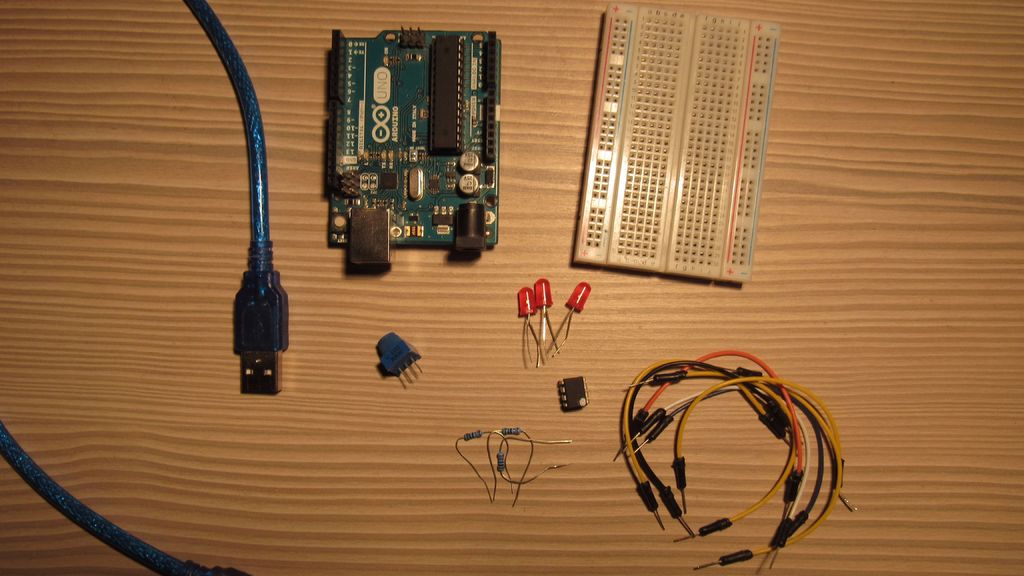
Parts
Arduino Uno
USB printer Cable
ATtiny85
Jumper cables
3 Red LED's
3 220 Ohm resistors
10 KOhm Potentiometer
Breadboard
Optional : 10 µF Capacitor
Install the ATtiny85 Drivers
Go to the Arduino IDE, and under File/Preferences fill in the field "Additional Boards URLs" with this command:
https://raw.githubusercontent.com/damellis/attiny/ide-1.6.x-boards-manager/package_damellis_attiny_index.json
Then click close.
Now go to Tools/Boards/Boards Manager, and in there search attiny in the search box. Then click the attiny box and press install - close when finished.
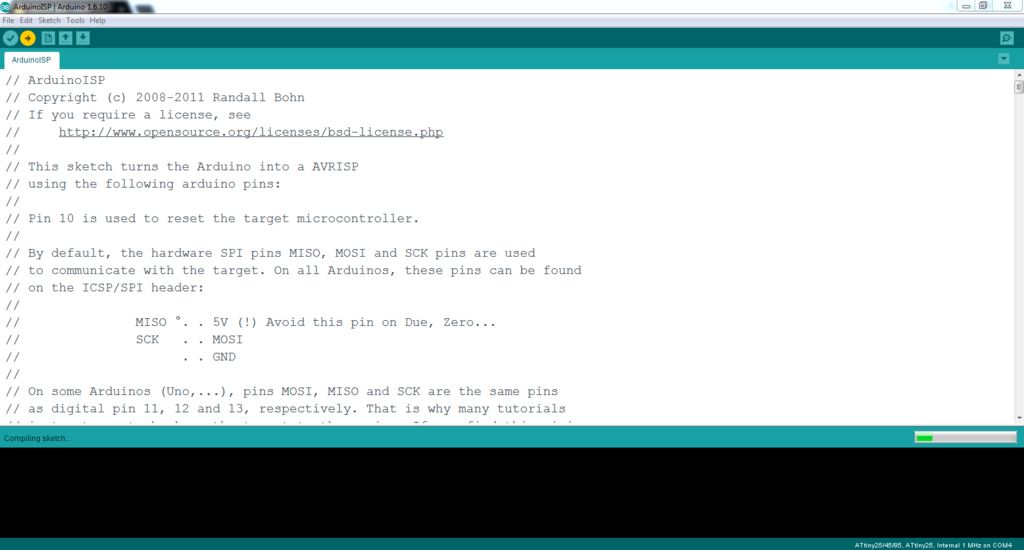
Setting Up Arduino UNO As ISP
Start of by configuring your Arduino Uno as a programmer for the ATtiny85. Plug your Arduino using a USB cable into your Computer, and in the Arduino IDE load up the example sketch "Arduino as ISP" under File/Examples/Arduino as ISP. Then just click upload as with any other code. No connections to the Arduino Uno are needed so far.
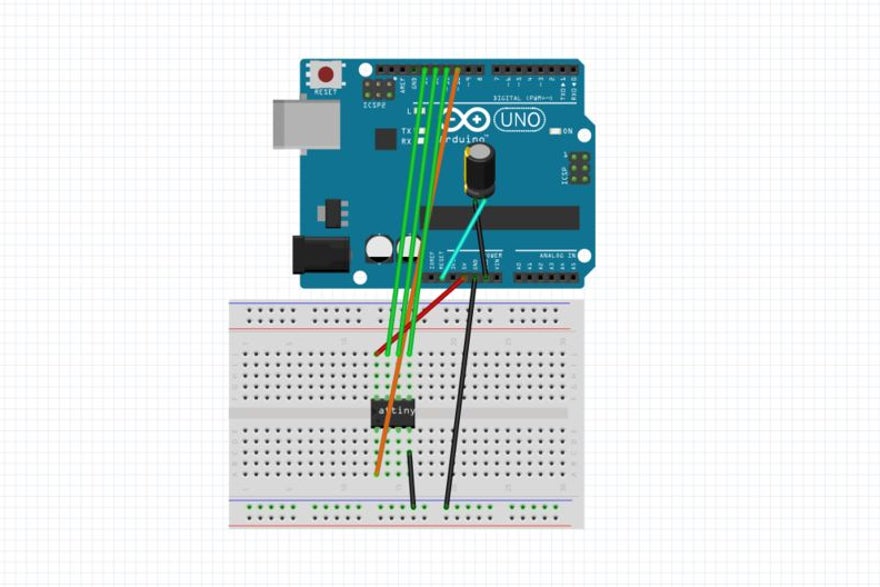
Programming the ATtiny85
Now to program the ATtiny85 itself, place it into a breadboard and connect jumper cables according to the sketch:
GND - Arduino Ground
VCC - Arduino 5V
Reset - Arduino Pin 10
Pin 0 - Arduino Pin 11
Pin 1 - Arduino Pin 12
Pin 2 - Arduino Pin 13
Optional : You can add a 10 uF Capacitor between Reset and Ground
It is up to you now what you want to upload to the ATtiny85, but before that, select the correct settings by:
Selecting the ATtiny85 board option under Tools/Boards/ATtiny25/45/58
Processor as "ATtiny85" with "1 MHz" clock
and the correct programmer : "Arduino as ISP"
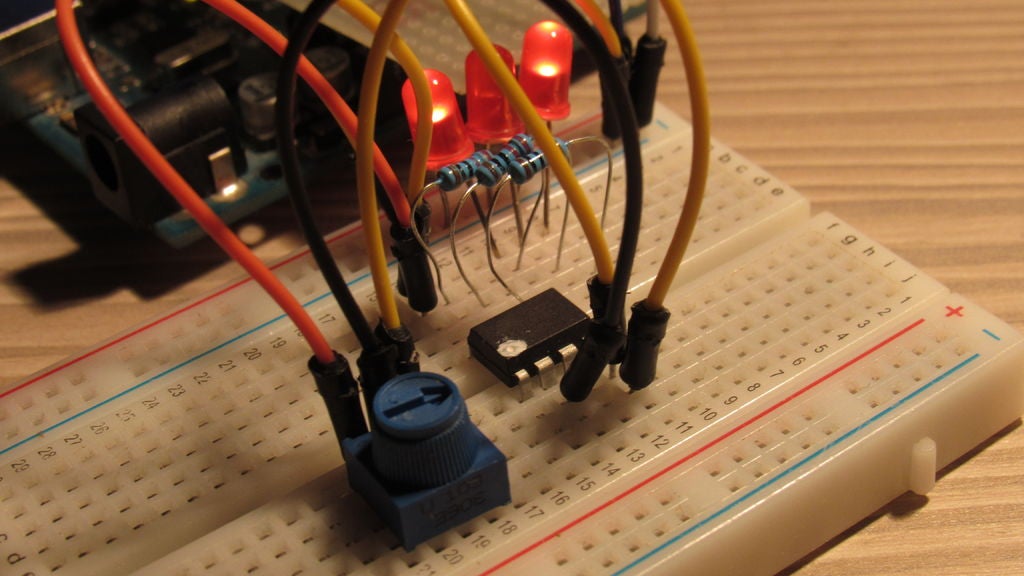
LED Blinker
First download the attached .ino program from this page. Then upload it with the same configuration as in the previous step. This is just an extension to see if you ATtiny85 works. Basically it is a blinking LED toy where the speed is controlled with the potentiometer.
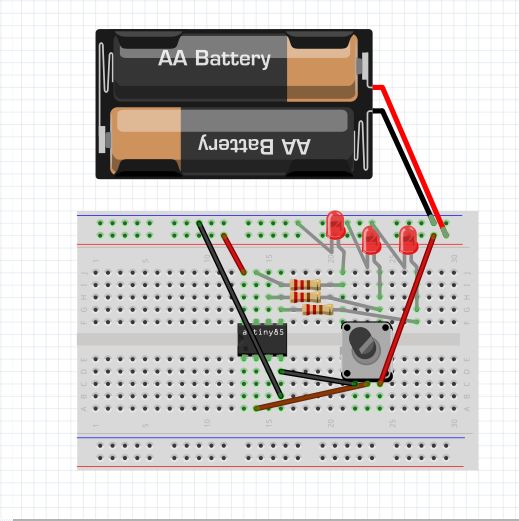
Disconnect your ATtiny85 from your Uno, and hook it up to any power source, like some batteries.
Take the three 220 Ohm resistors, and connect each of them separately to pin 0,1 and 2
Connect each LED anode to separate resistors
Connect all LED cathodes to GND
Connect the VCC of the ATtiny to your power source positive terminal, and the GND pin to ground
Last connect the middle potentiometer pin to Pin 3 of the ATtiny85, and the opposing pins to Ground and power respectively
And we are done.
Finished Circuit
It can also be seen working in the video. Enjoy!
// Written by Martin Vrana, 2017, you are free to modify this code
// Because the Attiny85 has only some statements that are guaraneed to work in every configuration,I wrote this code to utilize as many pins and make it interesting. Try other commands and modify this one if you want, but be wary that some code might not work.

//This integer variable will serve as a way to store the analog value aquired from the potentiometer
int val = 0;
void setup() {

//The pins set up to serve as Digital output pins for LED's
pinMode(0, OUTPUT);
pinMode(1, OUTPUT);
pinMode(2, OUTPUT);
}

void loop() {
//First the analog value on analog pin 3 is read and stored into val
val = analogRead(3);
//Then the first LED is turned on for the delay set by the potentiometer reading val
digitalWrite(0, HIGH);
delay(val);
digitalWrite(0, LOW);
//After that the LED is turned off, and the process repeats
digitalWrite(1, HIGH);
delay(val);
digitalWrite(1, LOW);

digitalWrite(2, HIGH);
delay(val);
digitalWrite(2, LOW);
}