Learn how to play audio through your Arduino microcontroller with the use of Li-Fi, or light fidelity, communication.
In this article, we are building a simple Li-Fi system that can send audio from an Arduino to an aux speaker. You can use this setup to stream audio files wirelessly using light without using conventional Bluetooth or Wi-Fi technologies.
What is Li-Fi?
Li-Fi, or light fidelity, is a wireless data transmitting technology that uses LED light to transmit data. It is a relatively new concept in IT. It aims to replace radio frequency signals with those that come from light sources. Although this technology is still in development, it may have the potential to introduce vastly-improved wireless services.
Li-Fi vs. Wi-Fi
Wi-Fi was invented in 1992 by Australian Radio astronomer, John O'Sullivan. He was trying to learn more about the signals that were being transmitted from black holes at the time. That experiment eventually failed, but this "failure" has in fact revolutionized data transfer for all of us.
Li-Fi is a form of visible light communication.
Advantages of Li-Fi Over Wi-Fi
There are a few advantages to consider when it comes to Li-Fi.
We all know that light is the fastest medium of transmission, making Li-Fi much faster at data transmission than conventional Wi-Fi. Also, because it only requires LEDs to recognize and transmit data, it could be cheaper than Wi-Fi. For more security-sensitive data, Li-Fi could be seen as more secure than Wi-Fi because light transmission can be limited to a smaller area. Li-Fi uses common LED lights to provide data transfer which claims speeds of up to 224 gigabits per second, which is equivalent to downloading around 9 movies of file size 3GB per second.
Some of these advantages can also be seen as disadvantages. For example, if the goal is to cover a large area with data access (beyond a room), Wi-Fi would probably be better. Implementing the infrastructure to allow Li-Fi to replace Wi-Fi on a large scale could get very costly. Light interference from sunlight and artificial light sources could ruin the signal.
While new technology is exciting, the pros and cons must be weighed.
Using Li-Fi for an Audio Player
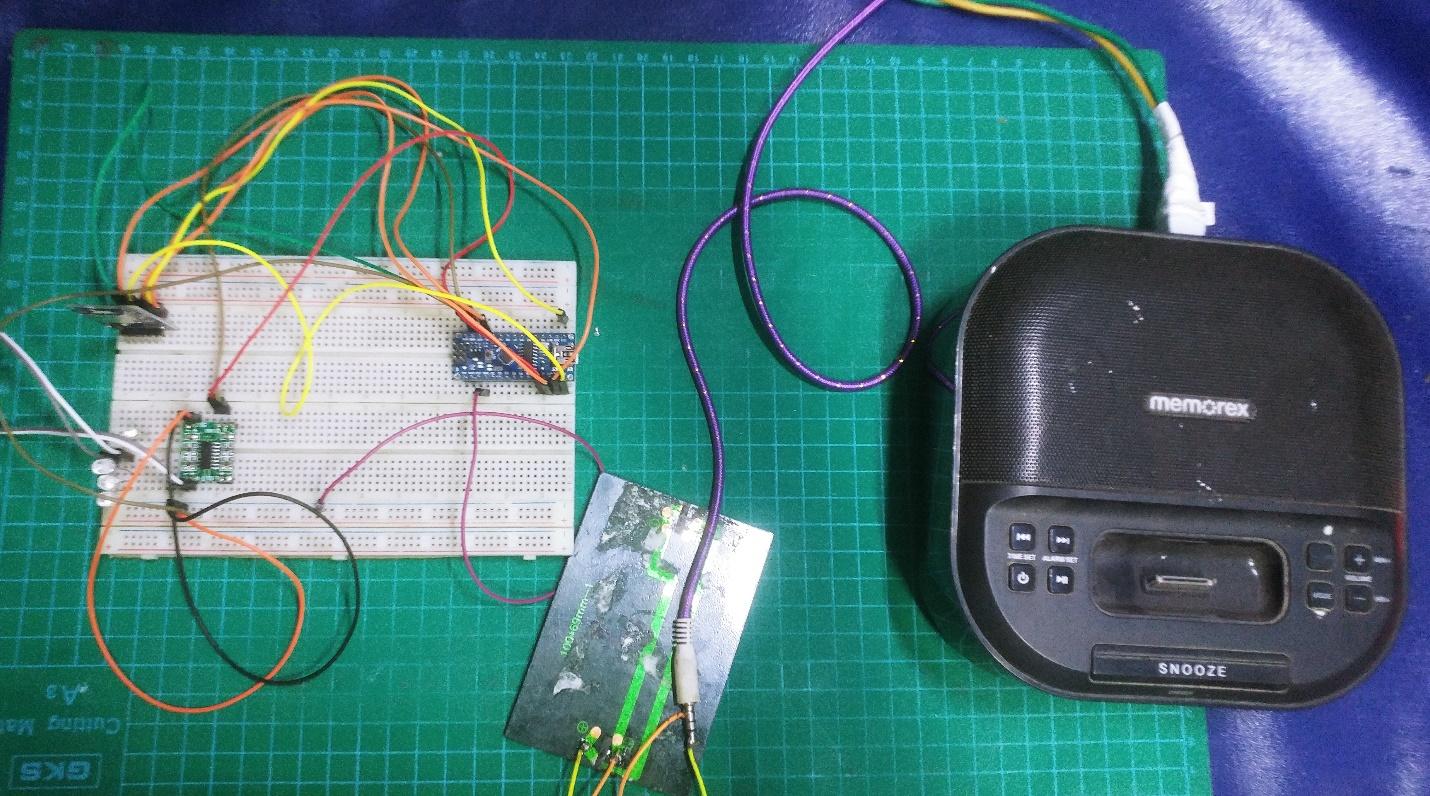
In this Li-Fi setup, we will be using an Arduino to read an audio file through the SD card module which will then be fed to the PAM8403 audio amplifier. One output channel from the PAM8403 will then be connected to a few LEDs. The frequency of the light from the LEDs will then be able to stream audio through the solar panel. So let’s get started.
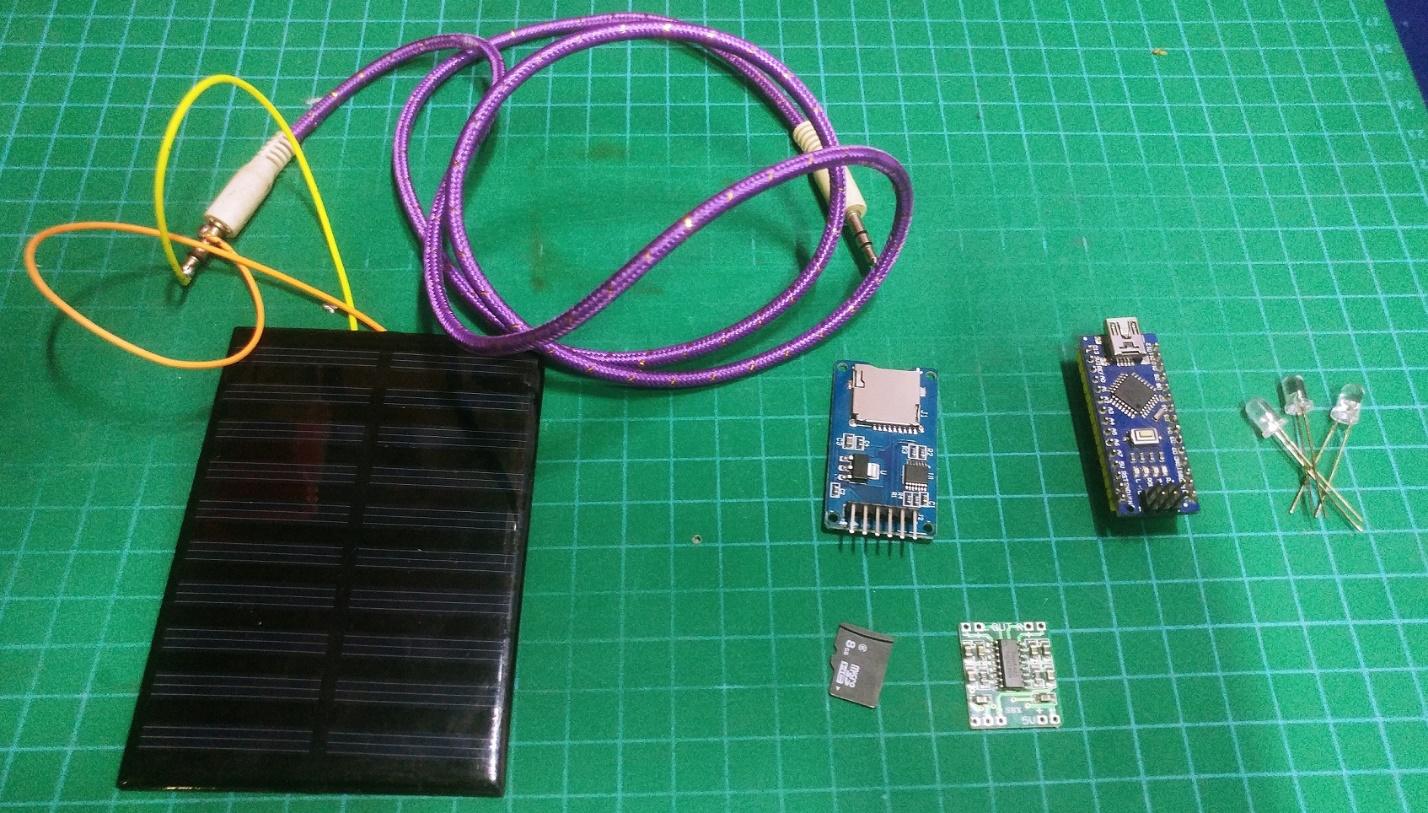
Required Hardware
- Arduino Nano
- PAM8403
- Solar Panel
- 2 LEDs
- MicroSD Card
- SPI SD Card Module
- Breadboard
- Jumper Wires
- AUX Cable
- AUX Speaker
Required Software
Wiring the Audio Player Receiver
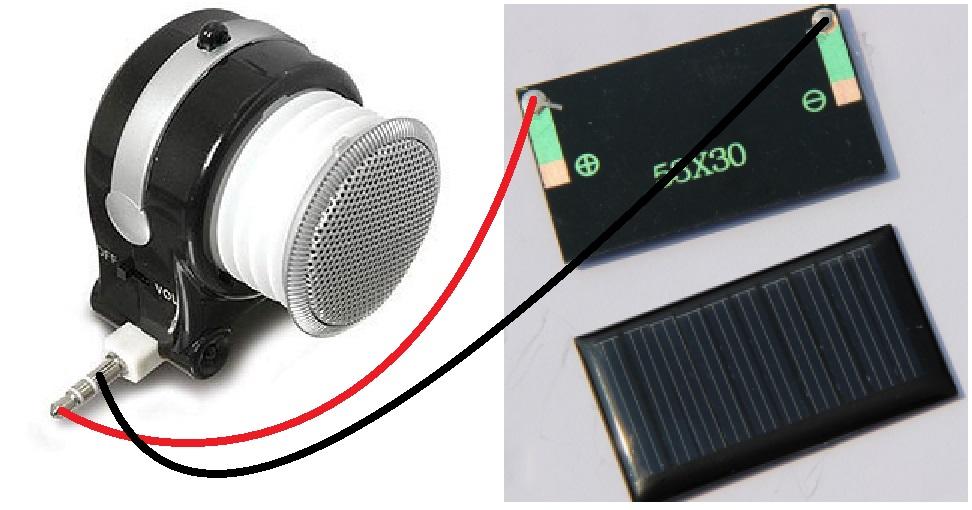
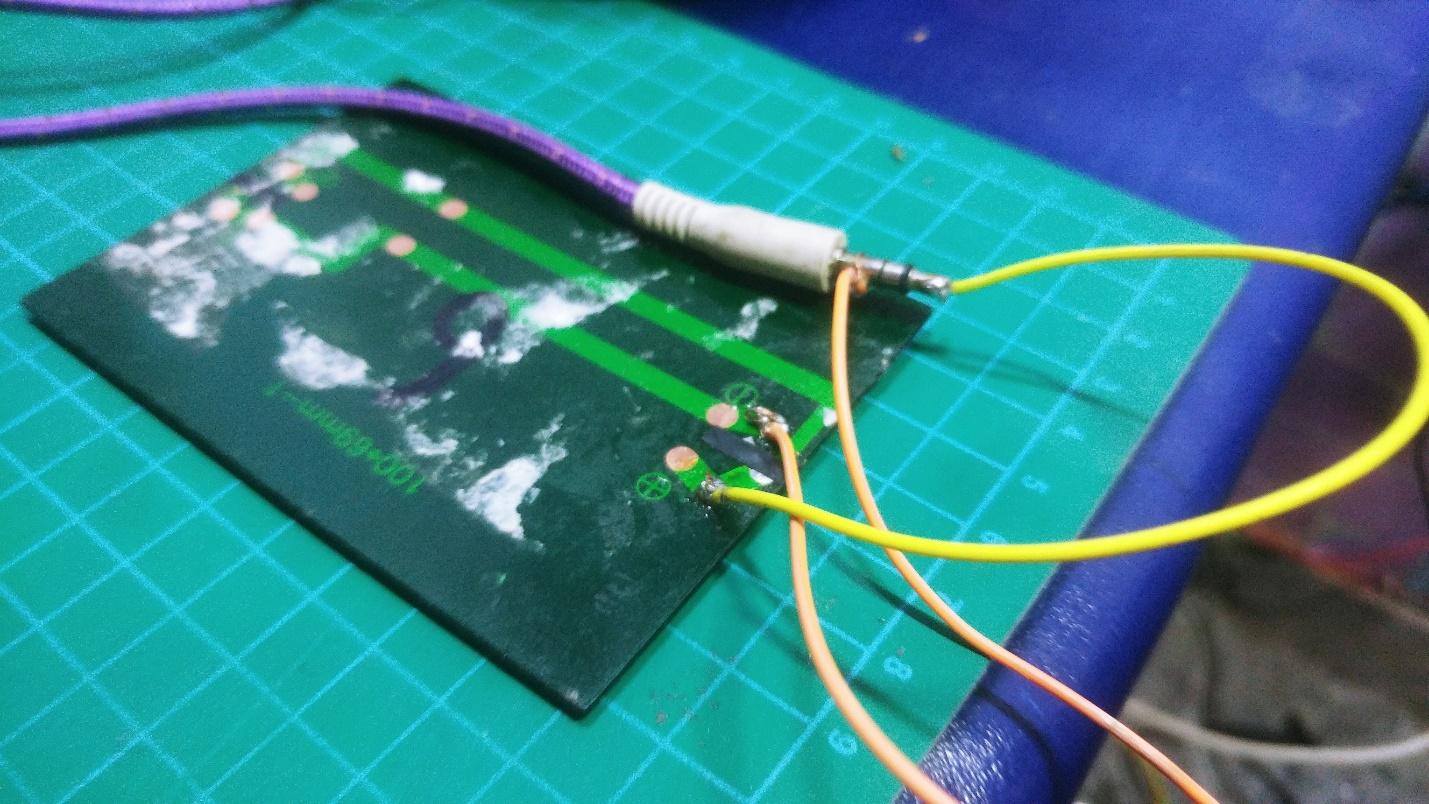
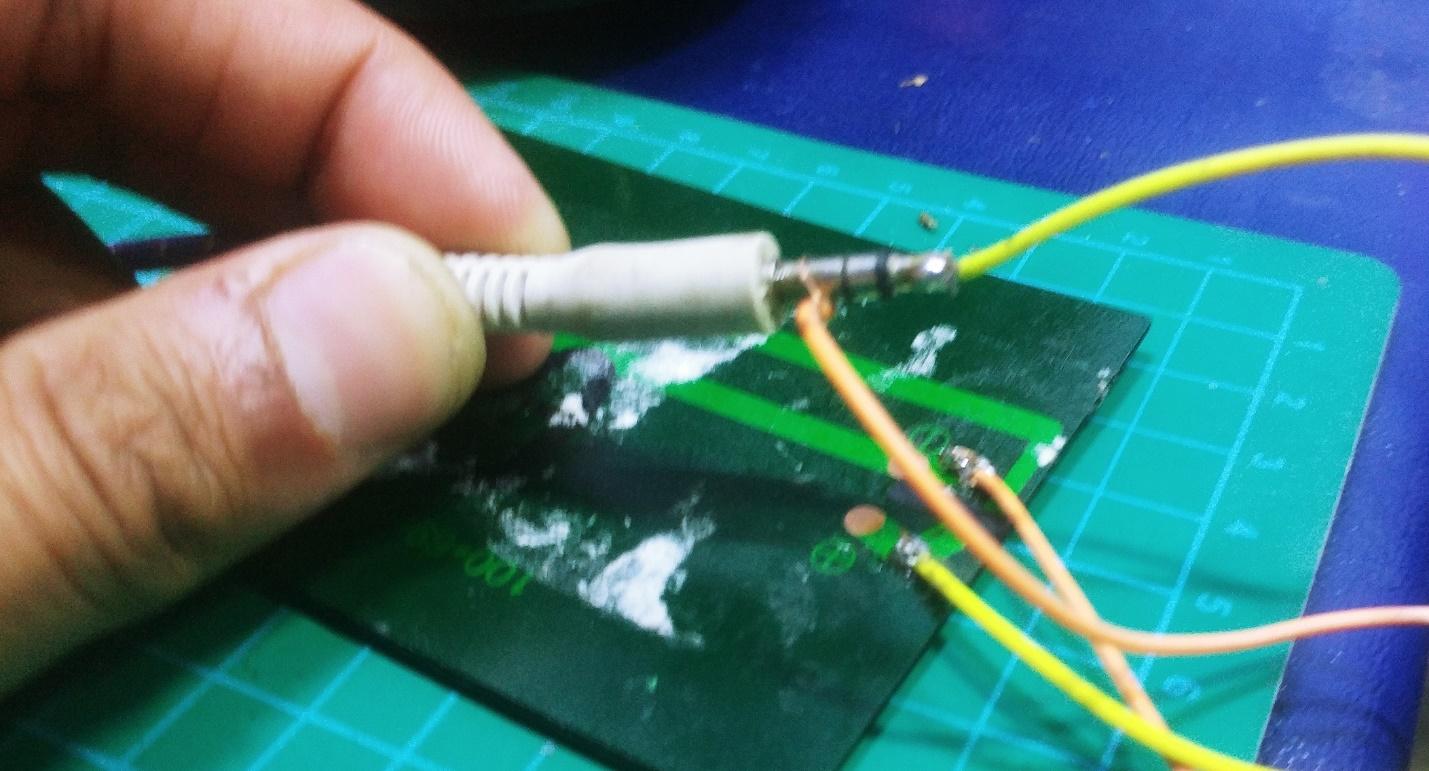
We are using an aux cable and a solar plate at the receiving side. The positive and negative terminals of the solar plate will be connected to the aux pin as shown below. You can also get a female aux connector and have the plate connected to it instead.
Connections between the solar plate and aux cable.
Wiring the Audio Player Transmitter
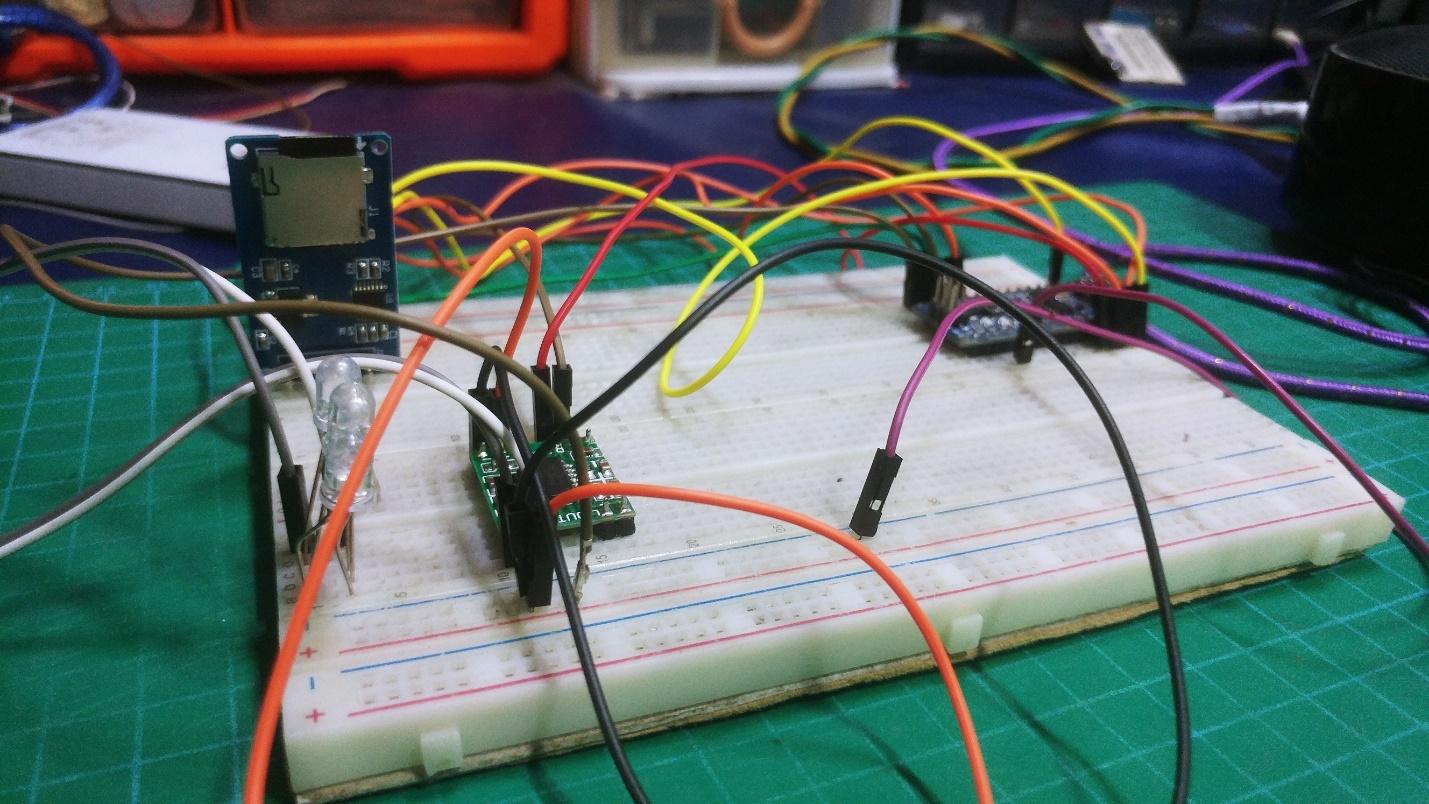
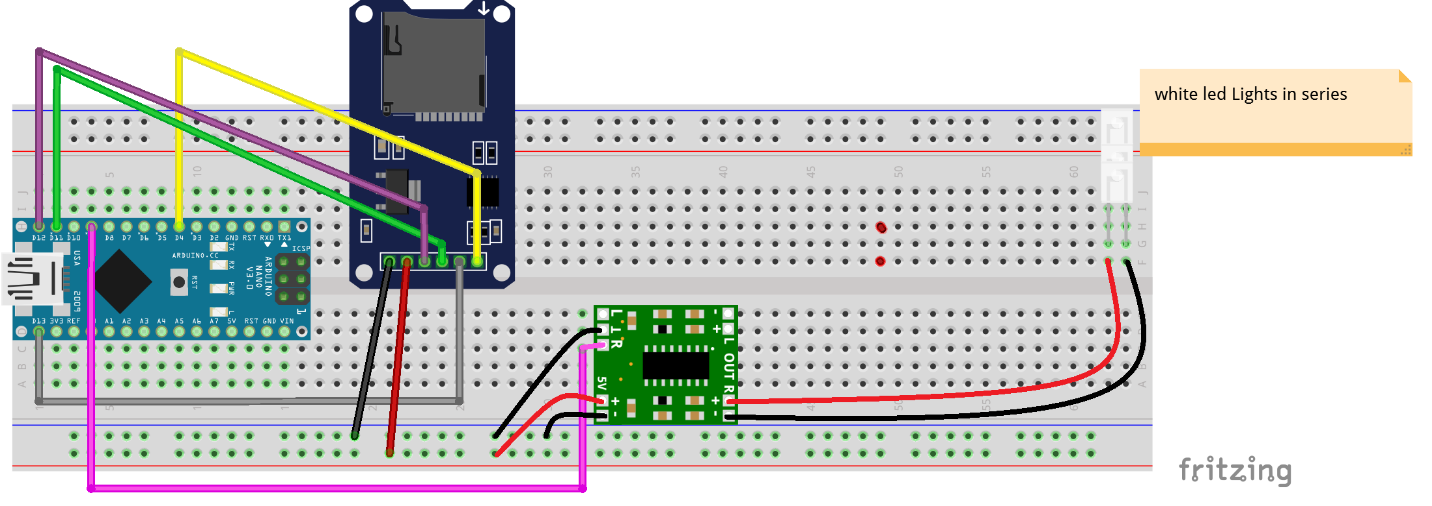
Next, connect the Arduino to the SD card module and PAM8403 as shown below:
| Pin Number |
|---|
Audio In | pin 9 |
MOSI | pin 11 |
MISO | pin 12 |
CLK | pin 13 |
CS | pin 4 |
Preparing the SD Card for Audio Files
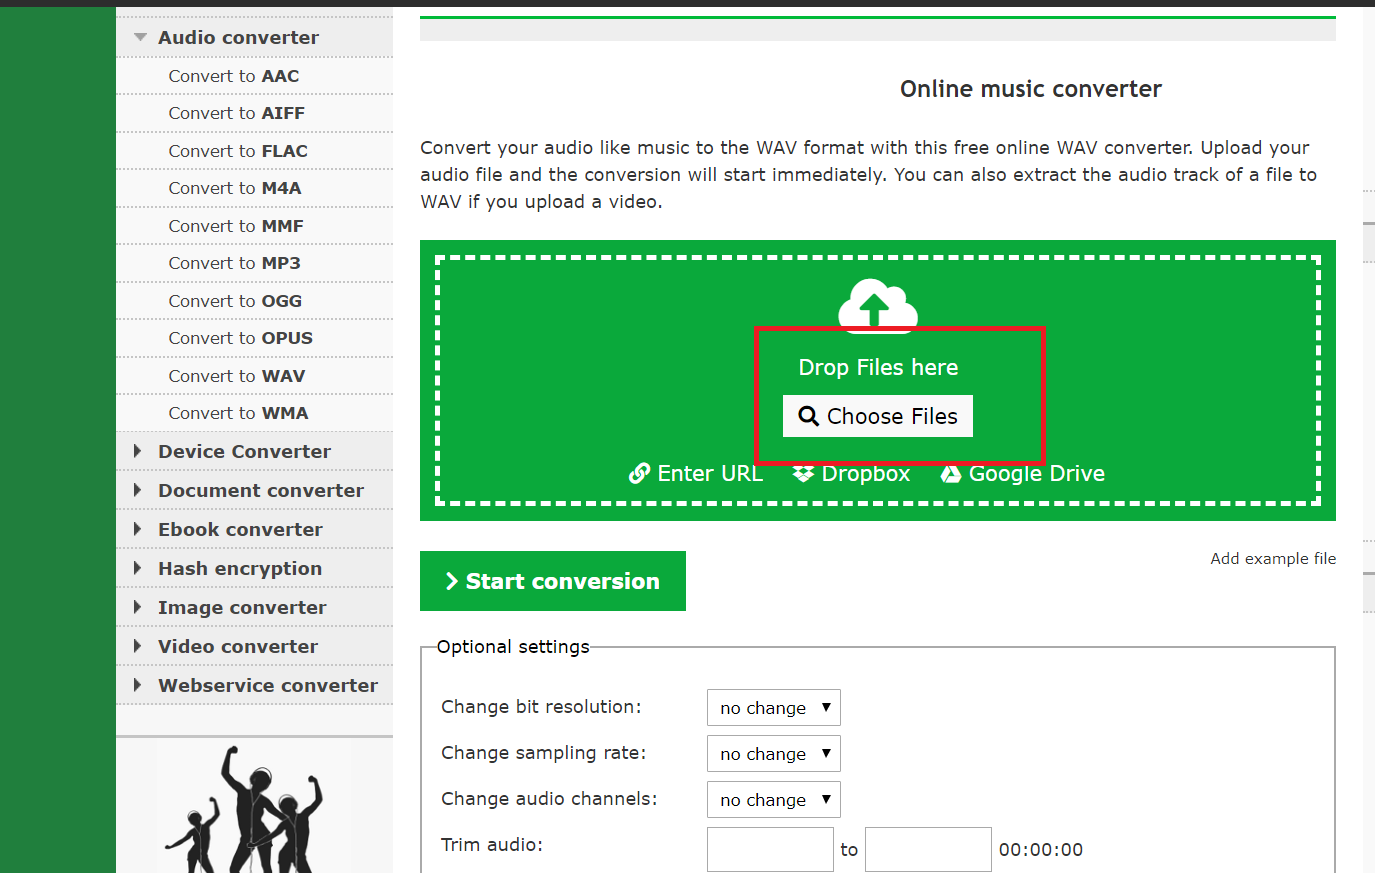
Copy the wav format sounds onto your microSD card. Use the Online Wav Converter to convert mp3 songs into Arduino .wav file format.
Choose the file you’d like to upload.
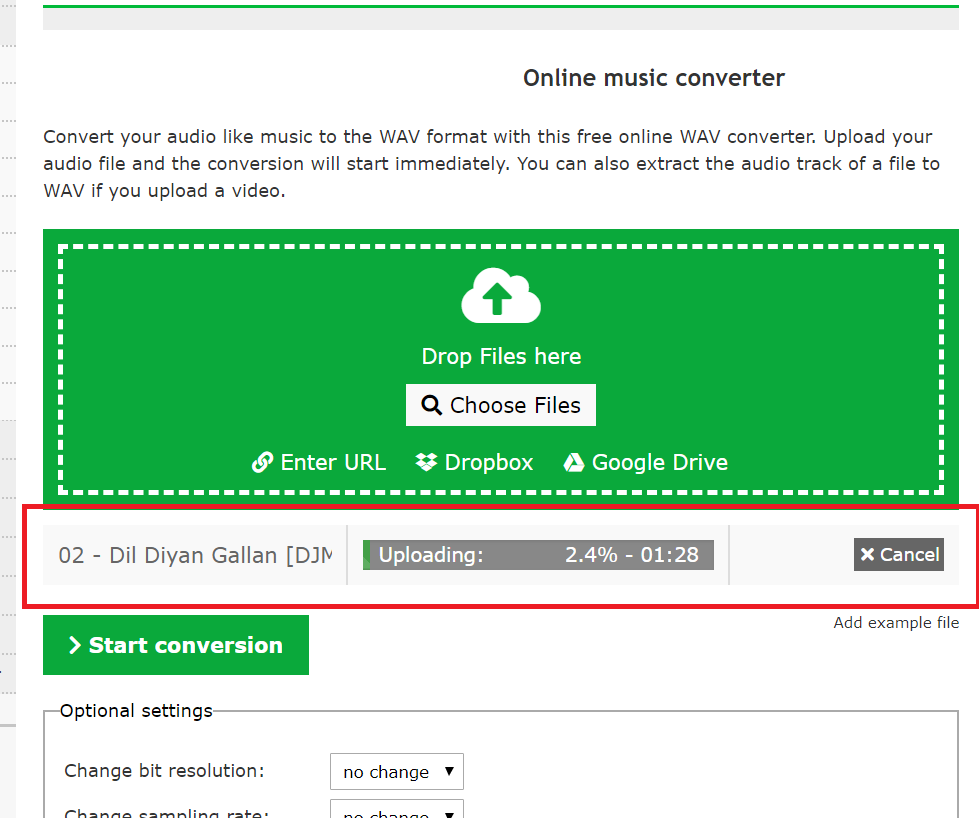
After uploading the file apply the following settings:
Click on Start Conversion. Save the file on your microSD card with the file name makerpro.wav, and insert it into the SD card module.
/*
Upload the Source Code
*/

/*
   TMRpcm library is needed
 * Audio Out - pin 9
 * Follow the SD Card wiring
 ** MOSI - pin 11
 ** MISO - pin 12
 ** CLK - pin 13
 ** CS - pin 4
*/


#include "SD.h"
#define SD_ChipSelectPin 10
#include "TMRpcm.h"
#include "SPI.h"

TMRpcm tmrpcm;

void setup()
{
tmrpcm.speakerPin=9;
Serial.begin(9600);
if(!SD.begin(SD_ChipSelectPin))
{
  Serial.println("SD fail");
  return;
}
tmrpcm.setVolume(6);
tmrpcm.play("makerpro.wav");
}

void loop() {
  // put your main code here, to run repeatedly:
}
Finalizing the Li-Fi Audio Player
Here, we are using the Arduino to play the file from the SD card but you can also use any other audio player with an aux out and connect it to the PAM8403 . You should be able to see the LEDs connected to the PAM8403 fluctuating when the audio file starts playing, if it doesn’t, then it means that the file isn’t playing.
Move the solar panel near the LEDs and listen to the speaker. The solar panel is really sensitive. It can perceive small changes in the light intensity and respectively output varying voltages, so whenever the intensity of the LEDs changes, voltages will fluctuate according to the strength of light. These voltages are then fed into the speaker’s amplifier which amplifies the signal and plays the audio through the speaker.
In this project, Li-Fi communication works at a max distance of 15-20cm from the solar panel for clear audio playback. You can increase the Li-Fi’s range with a bigger solar panel and higher-powered LEDs.