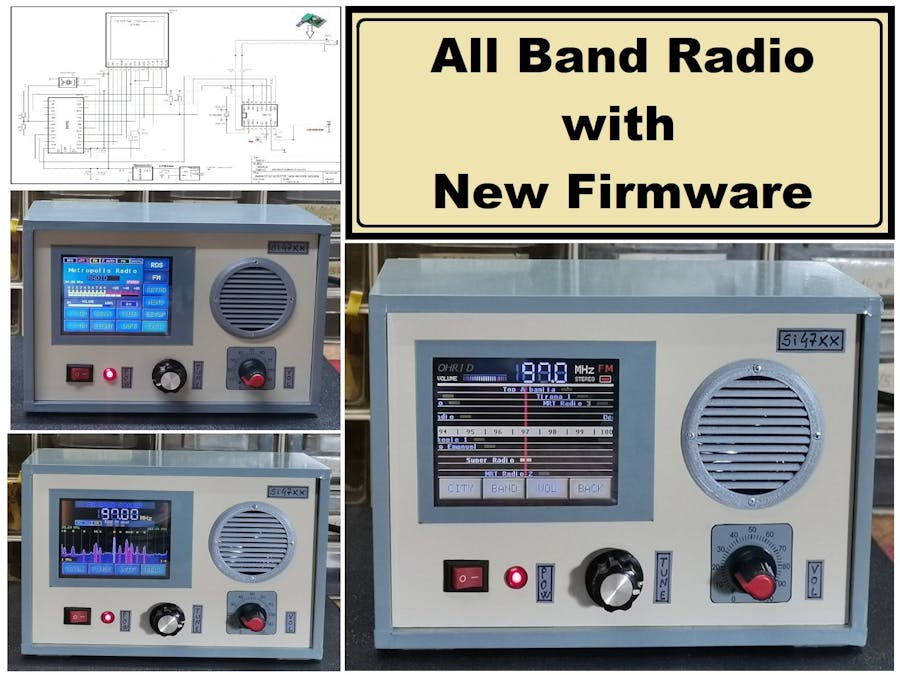
How to make a relatively simple All band DSP Radio Receiver with color touch display which is based on the Si47xx series chip
This time I will return to one of my previous projects published a few months ago with the title: "DIY Si47xx All Band DSP Radio with 2.8 inch touch TFT display" (https://www.youtube.com/watch?v=q-D9nuZUE-Y&t=15s), which can also be obtained as a finished product under the name ATS-25 All Band Radio.
And first of all, let me mention that the most deserving people for the development of this wonderful radio are:
- Ricardo Caratti - PU2CLR
- Gert Baak - PE0MGB
- and Thiago - BD7JPY
The reason for this post is a short presentation of the new firmware with which this small radio gets new improvements and functions, as well as option for a beautiful Retro look in the form of a mechanical scale for selecting stations. The new software was developed by "Harduino", and you can download Arduino Ide compatible version 4.0 on their forum (forum.harduino.ru). Mainly the improvements consist in Generally more stable operation, Touch screen sensitivity improved, Vertical screen operation, and other functions.
- The entire menu has been made more functional and easier to operate.
- The first thing that can be noticed on the start screen is more information about the current mode of operation.
- Another very important possibility is that we can change the volume by pushing in the tuning knob once. Now there is no need for an additional potentiometer.
- The most important novelty, in my opinion, is the beautiful Retro-Look mod, which is perfectly done in the style of the radios of the sixties and seventies. The scale can be localized very easily by editing the Preset.h file and simply writing the frequencies and names of the local radio stations of the region in which we live.
- Another new very useful function is is spectrum display.
- Next, CW mode is added, with 100 and 10 hz tuning steps with display digits.
- It is also a practical option to display the name of the station on the screen instead of the frequency, as well as the RDS window if there is such an option. Now in this case by turning the rotary encoder we select the stations that we previously set in Preset.h.
- The Settings button is also new, in which we can set many new functions and also reset the software to factory settings.
- There are still many small additions and changes that we will find if we walk through the entire menu, but also my general impression is that the entire menu is more readable and easier to use.
As far as I have been able to find out, from the next version 4.1 the software will have to be Activated, which means that it will not be free, but it certainly deserves to be paid a reasonable amount for such a well-made piece of software.
And finally, let me inform you that you can find more details about the construction method, previous codes, schematic diagram and other details in my two previous videos related to this project.


