Variometer is instrument that indicates the changes in the altitude variations
A variometer – also known as a rate of climb and descent indicator (RCDI), or vertical speed indicator (VSI), is one of the basic flight instruments.
For human, flying is not natural and we don’t have a dedicated sense to 3D motion. Once the visual landmark to the ground is lost, it’s very difficult to figure out if we climb or sink. Within the scope of a variometer for paragliding, the absolute altitude is not that interesting, this is the altitude variation that matters. This particular example is a variometer that indicates these changes through an audible signal, which in this case is an advantage, because all the senses are free to perform safe flight.
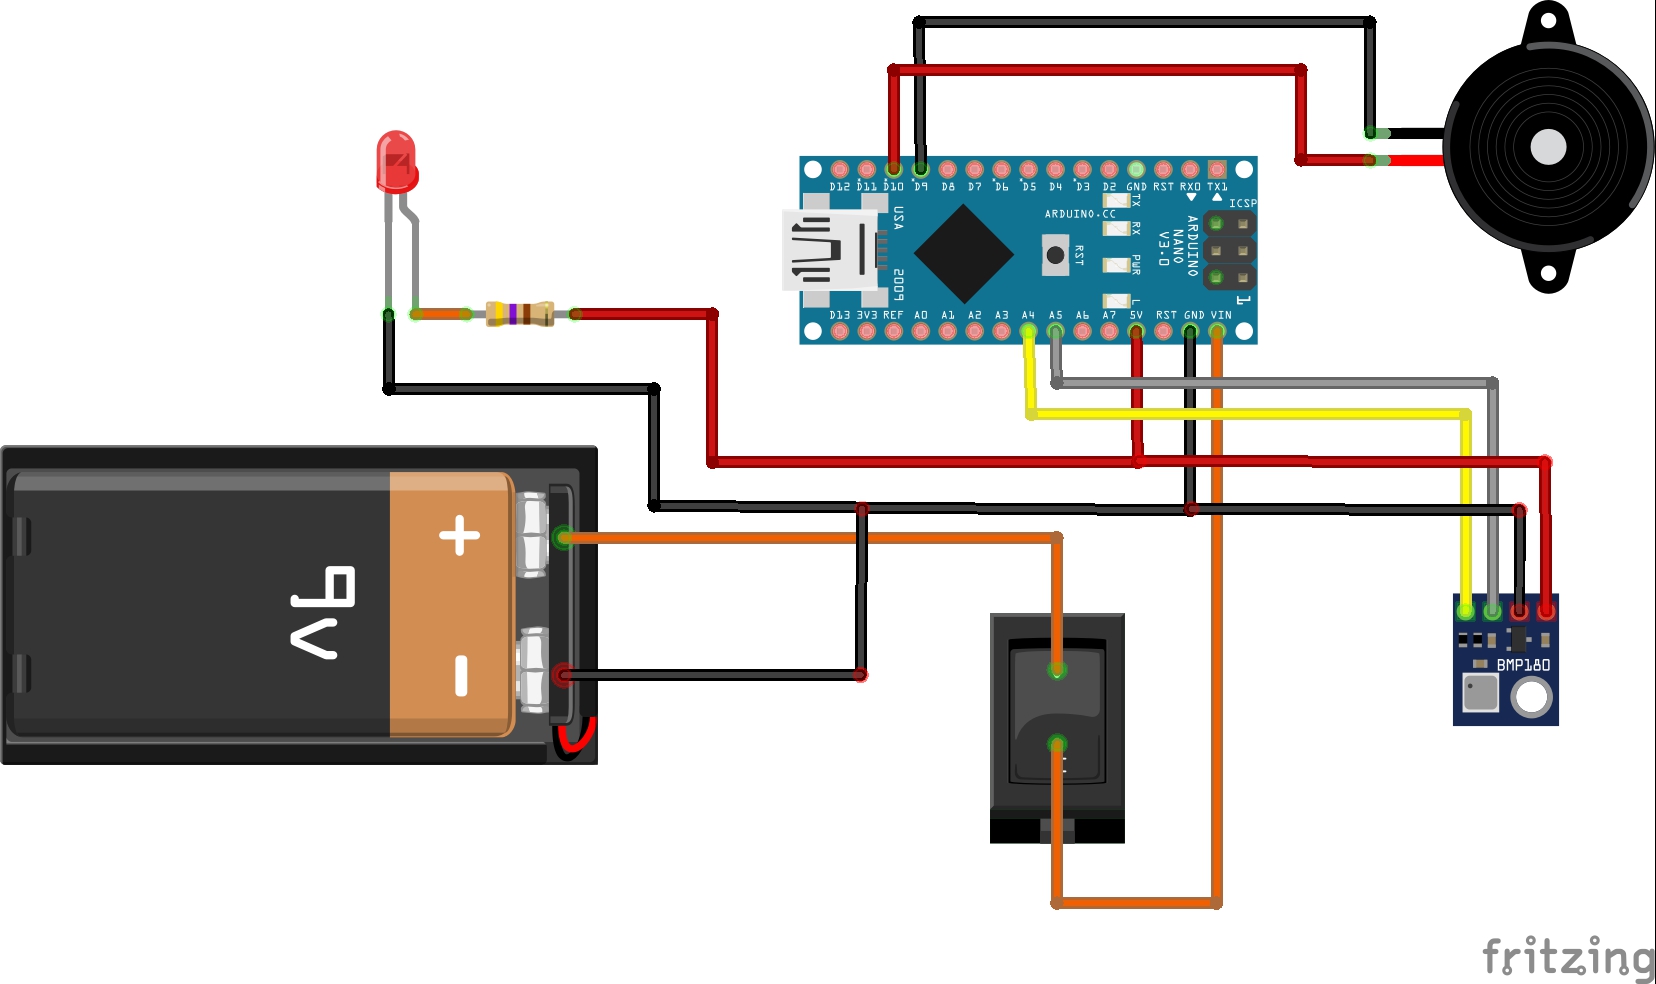
The device is extremely simple to make and contains only a few components:
- Arduino Nano microcontroller
- BMP180 pressure sensor board
- Of course, there is also a Battery and a small switch.
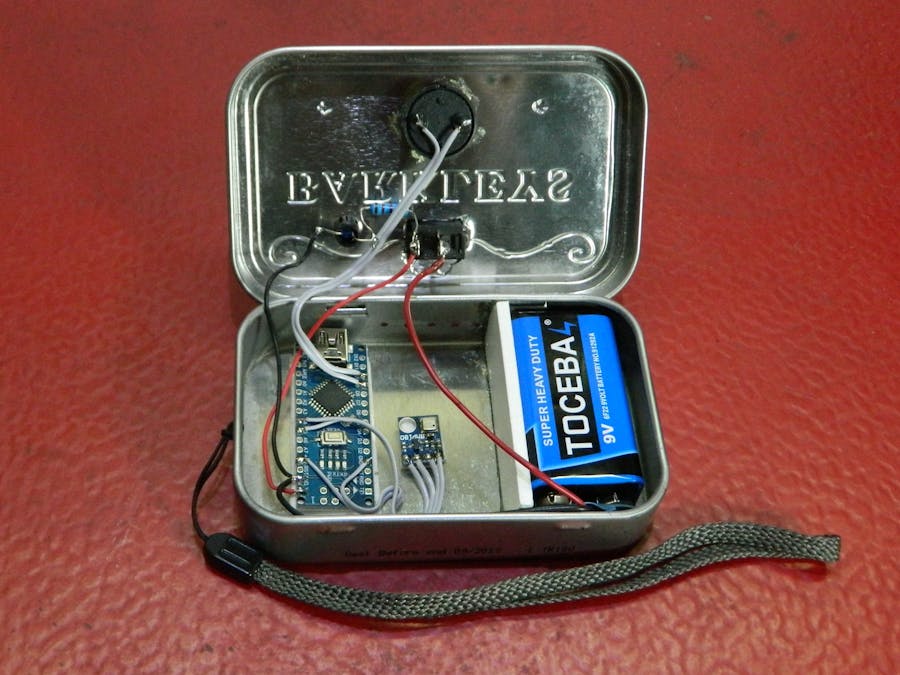
It is very important that the device is mounted in a small compact box and is mechanically resistant.
I use a metal box from Barkley's mints which is ideal for this particular device in terms of mechanical resistance and space for the battery and other components. To avoid sudden local pressure changes during wind gusts, the flow equalization is done through small holes in the box.
When you turn on the device, it plays the initial sound. Then, according to the relative change in pitch, the sound changes from deep to high-pitched sound and vice versa. The code uses the ToneAC library, which provides twice the buzzer sound.
#include <toneAC.h>
#include <Wire.h>
#include <Adafruit_BMP085.h>
Adafruit_BMP085 mySensor;  // create sensor object called mySensor

/*
Hardware connections:

- (GND) to GND
+ (VDD) to 3.3V
SCL to A5
SDA to A4

D9 and D10 to the Piezo Buzzer ( see toneAC.h )

*/

#define NUM_PRESSURES 64
#define NUM_TOTALS 16
uint32_t pressure[NUM_PRESSURES];
uint32_t old_total[NUM_TOTALS];
int pressure_index = 0;
int total_index = 0;
uint32_t total;
int current_tone = 0;
int beep_time = 0;

void setup() {
// play start sound
  toneAC(388, 4);
  delay(70);
  toneAC(0);
  delay(30);
  toneAC(590, 4);
  delay(70);
  mySensor.begin();
  uint32_t p = mySensor.readPressure();
  total = p*NUM_PRESSURES;
  for(int i = 0; i<NUM_PRESSURES; i++)
  {
    pressure[i] = p;
  }
  for(int i = 0; i<NUM_TOTALS; i++)
  {
    old_total[i] = total;
  }
  toneAC(0);
}

void loop(){
    total -= pressure[pressure_index];
    pressure[pressure_index] = mySensor.readPressure();
    total += pressure[pressure_index];
    int32_t rate = total - old_total[total_index];
    float frate = (float)rate;
    frate = 0.0;
    old_total[total_index] = total;
    pressure_index++;
    total_index++;
    if(pressure_index >= NUM_PRESSURES)pressure_index = 0;
    if(total_index >= NUM_TOTALS)total_index = 0;
    if(rate < -200){
      if(beep_time <5)
        toneAC(500 - rate);
      else
        toneAC(0);
    }
    else if(rate > 200)
    {
      float f = 100.0 + 40000.0 * 1.0/((float)rate);
      toneAC((int)f);
    }
    else
    {
      toneAC(0);
    }
    beep_time++;
    if(beep_time >= 10)beep_time = 0;
}