Learn how to make a simple musical bell using the UM66T melody generator IC.
The Musical Doorbell will play Beethoven's Für Elise when triggered
Learn how to make a simple musical bell using the UM66T melody generator IC.
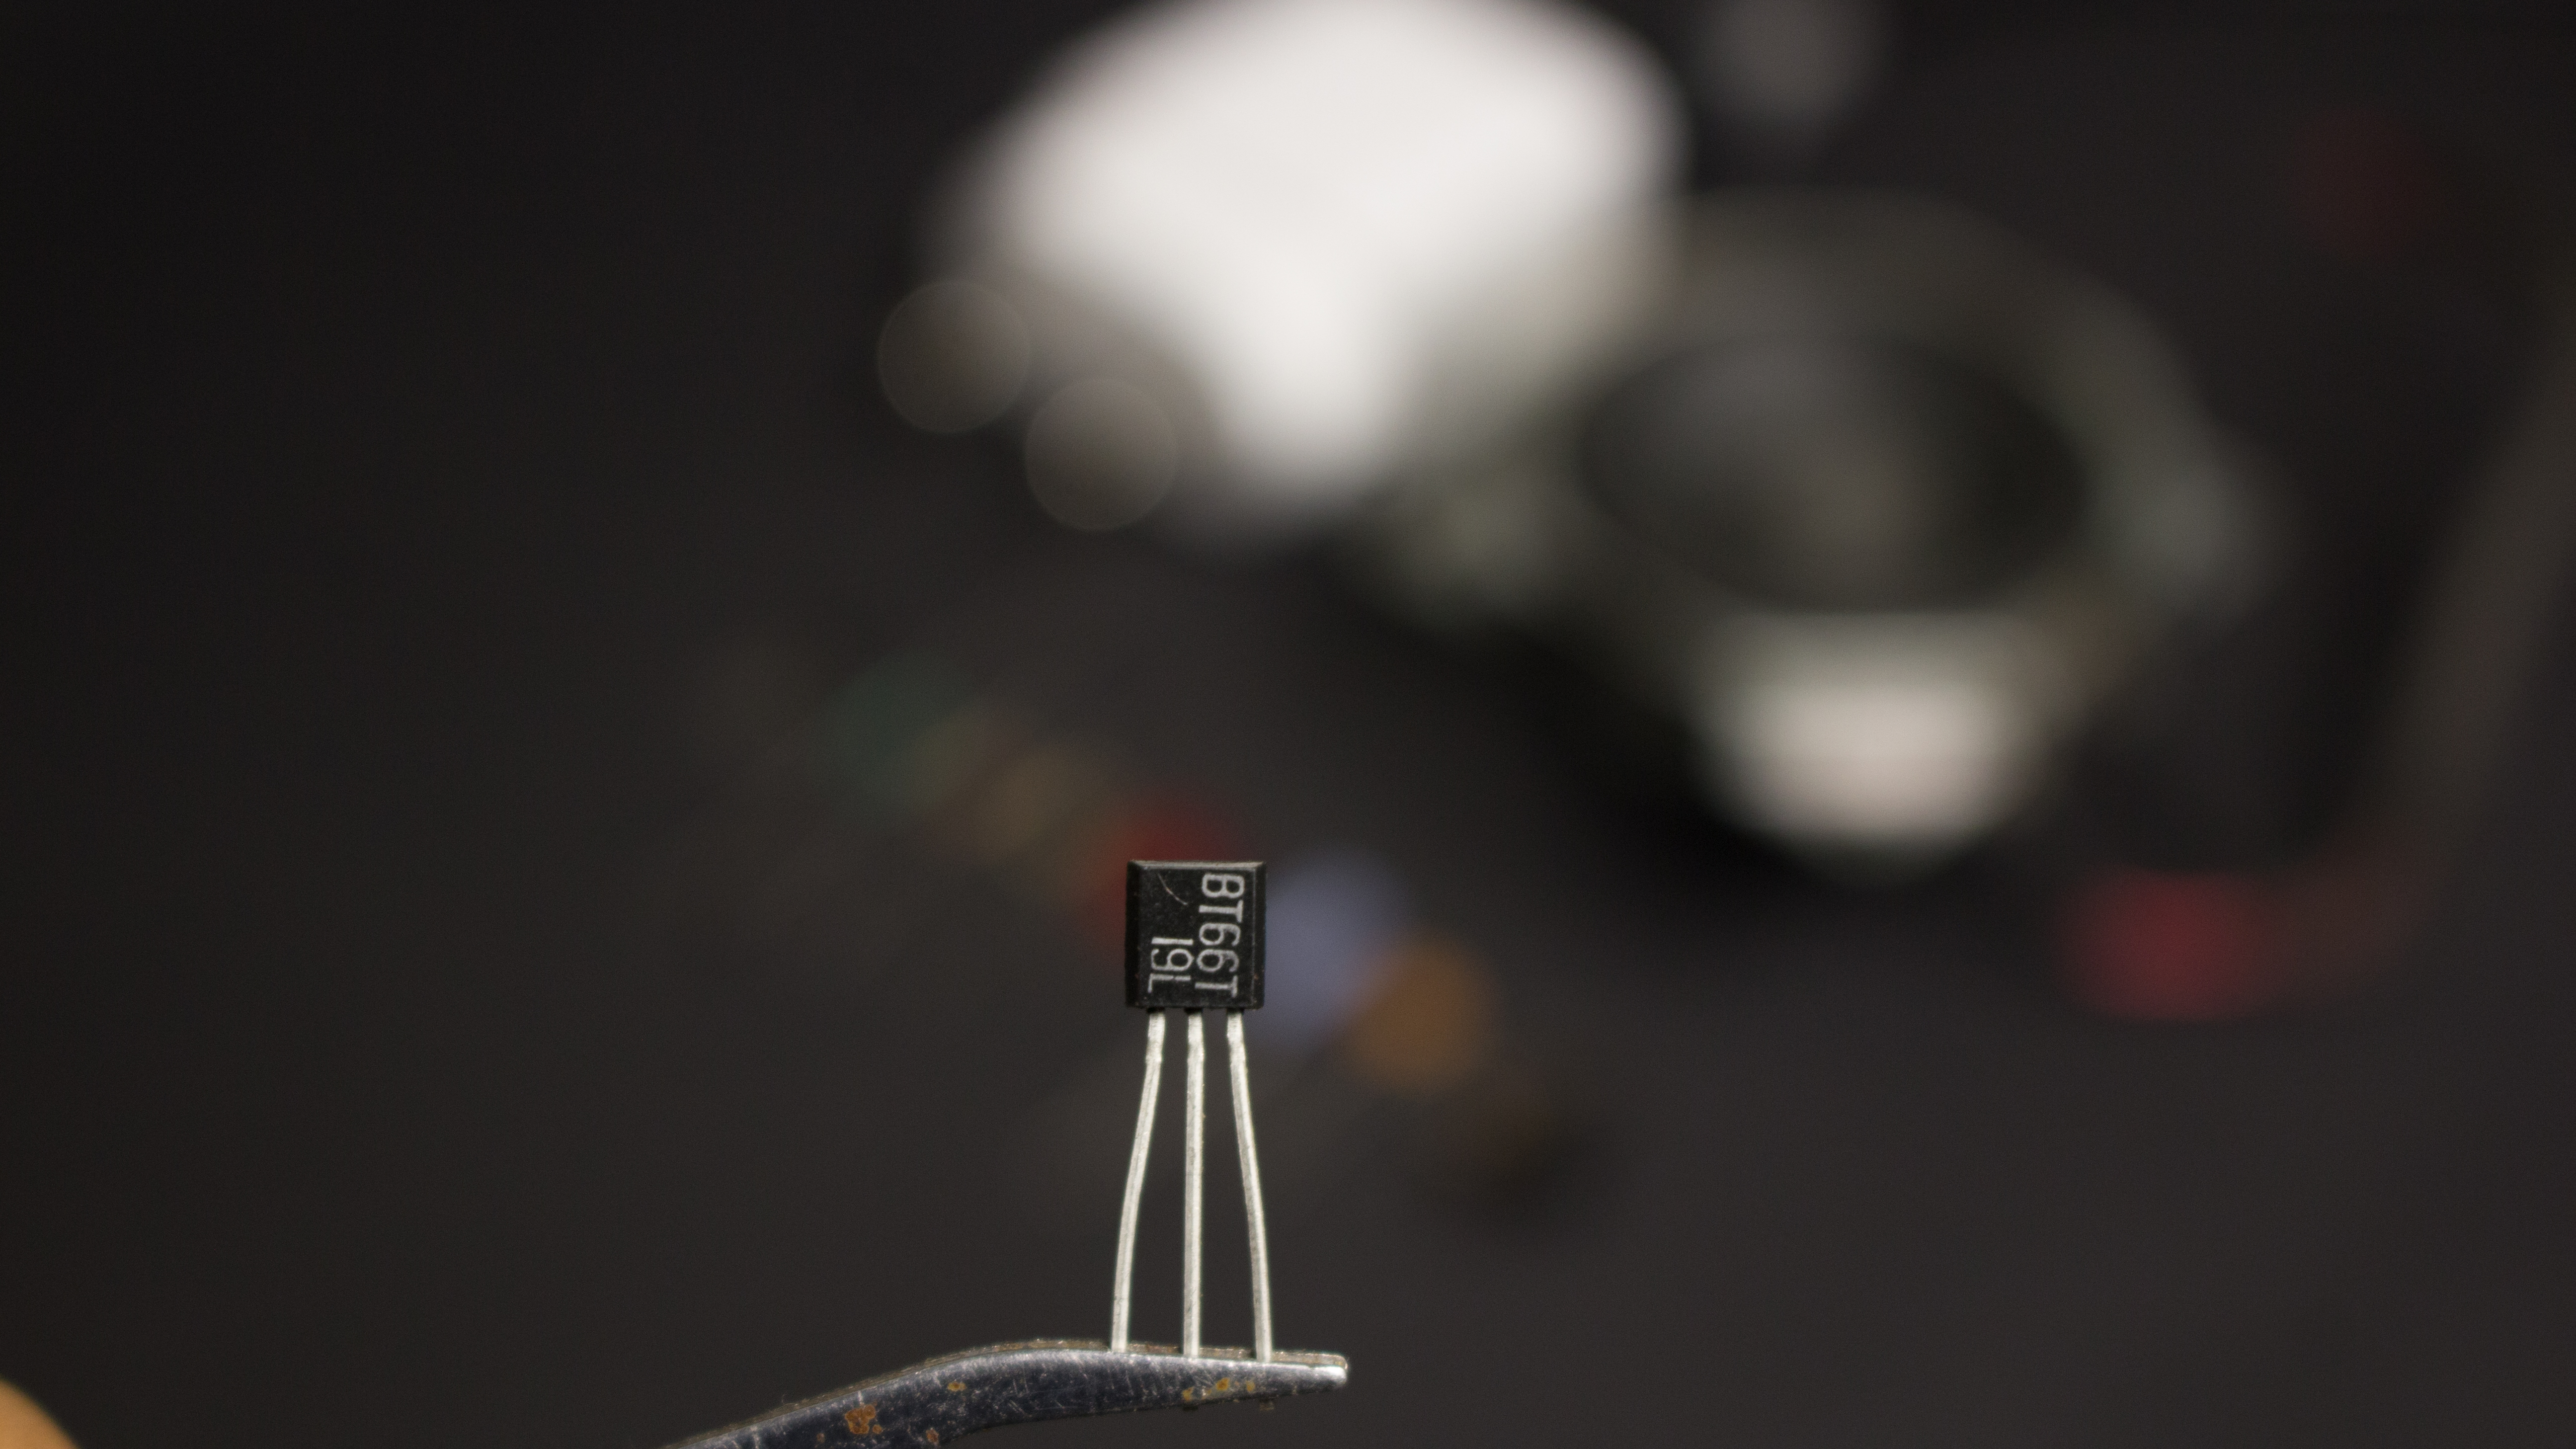
The Melody Generator will play Beethoven's Für Elise when triggered since it uses the UM66T-19L. There are different versions of this IC, each configured to play a different tune.
Don't forget to Subscribe for more projects: YouTube
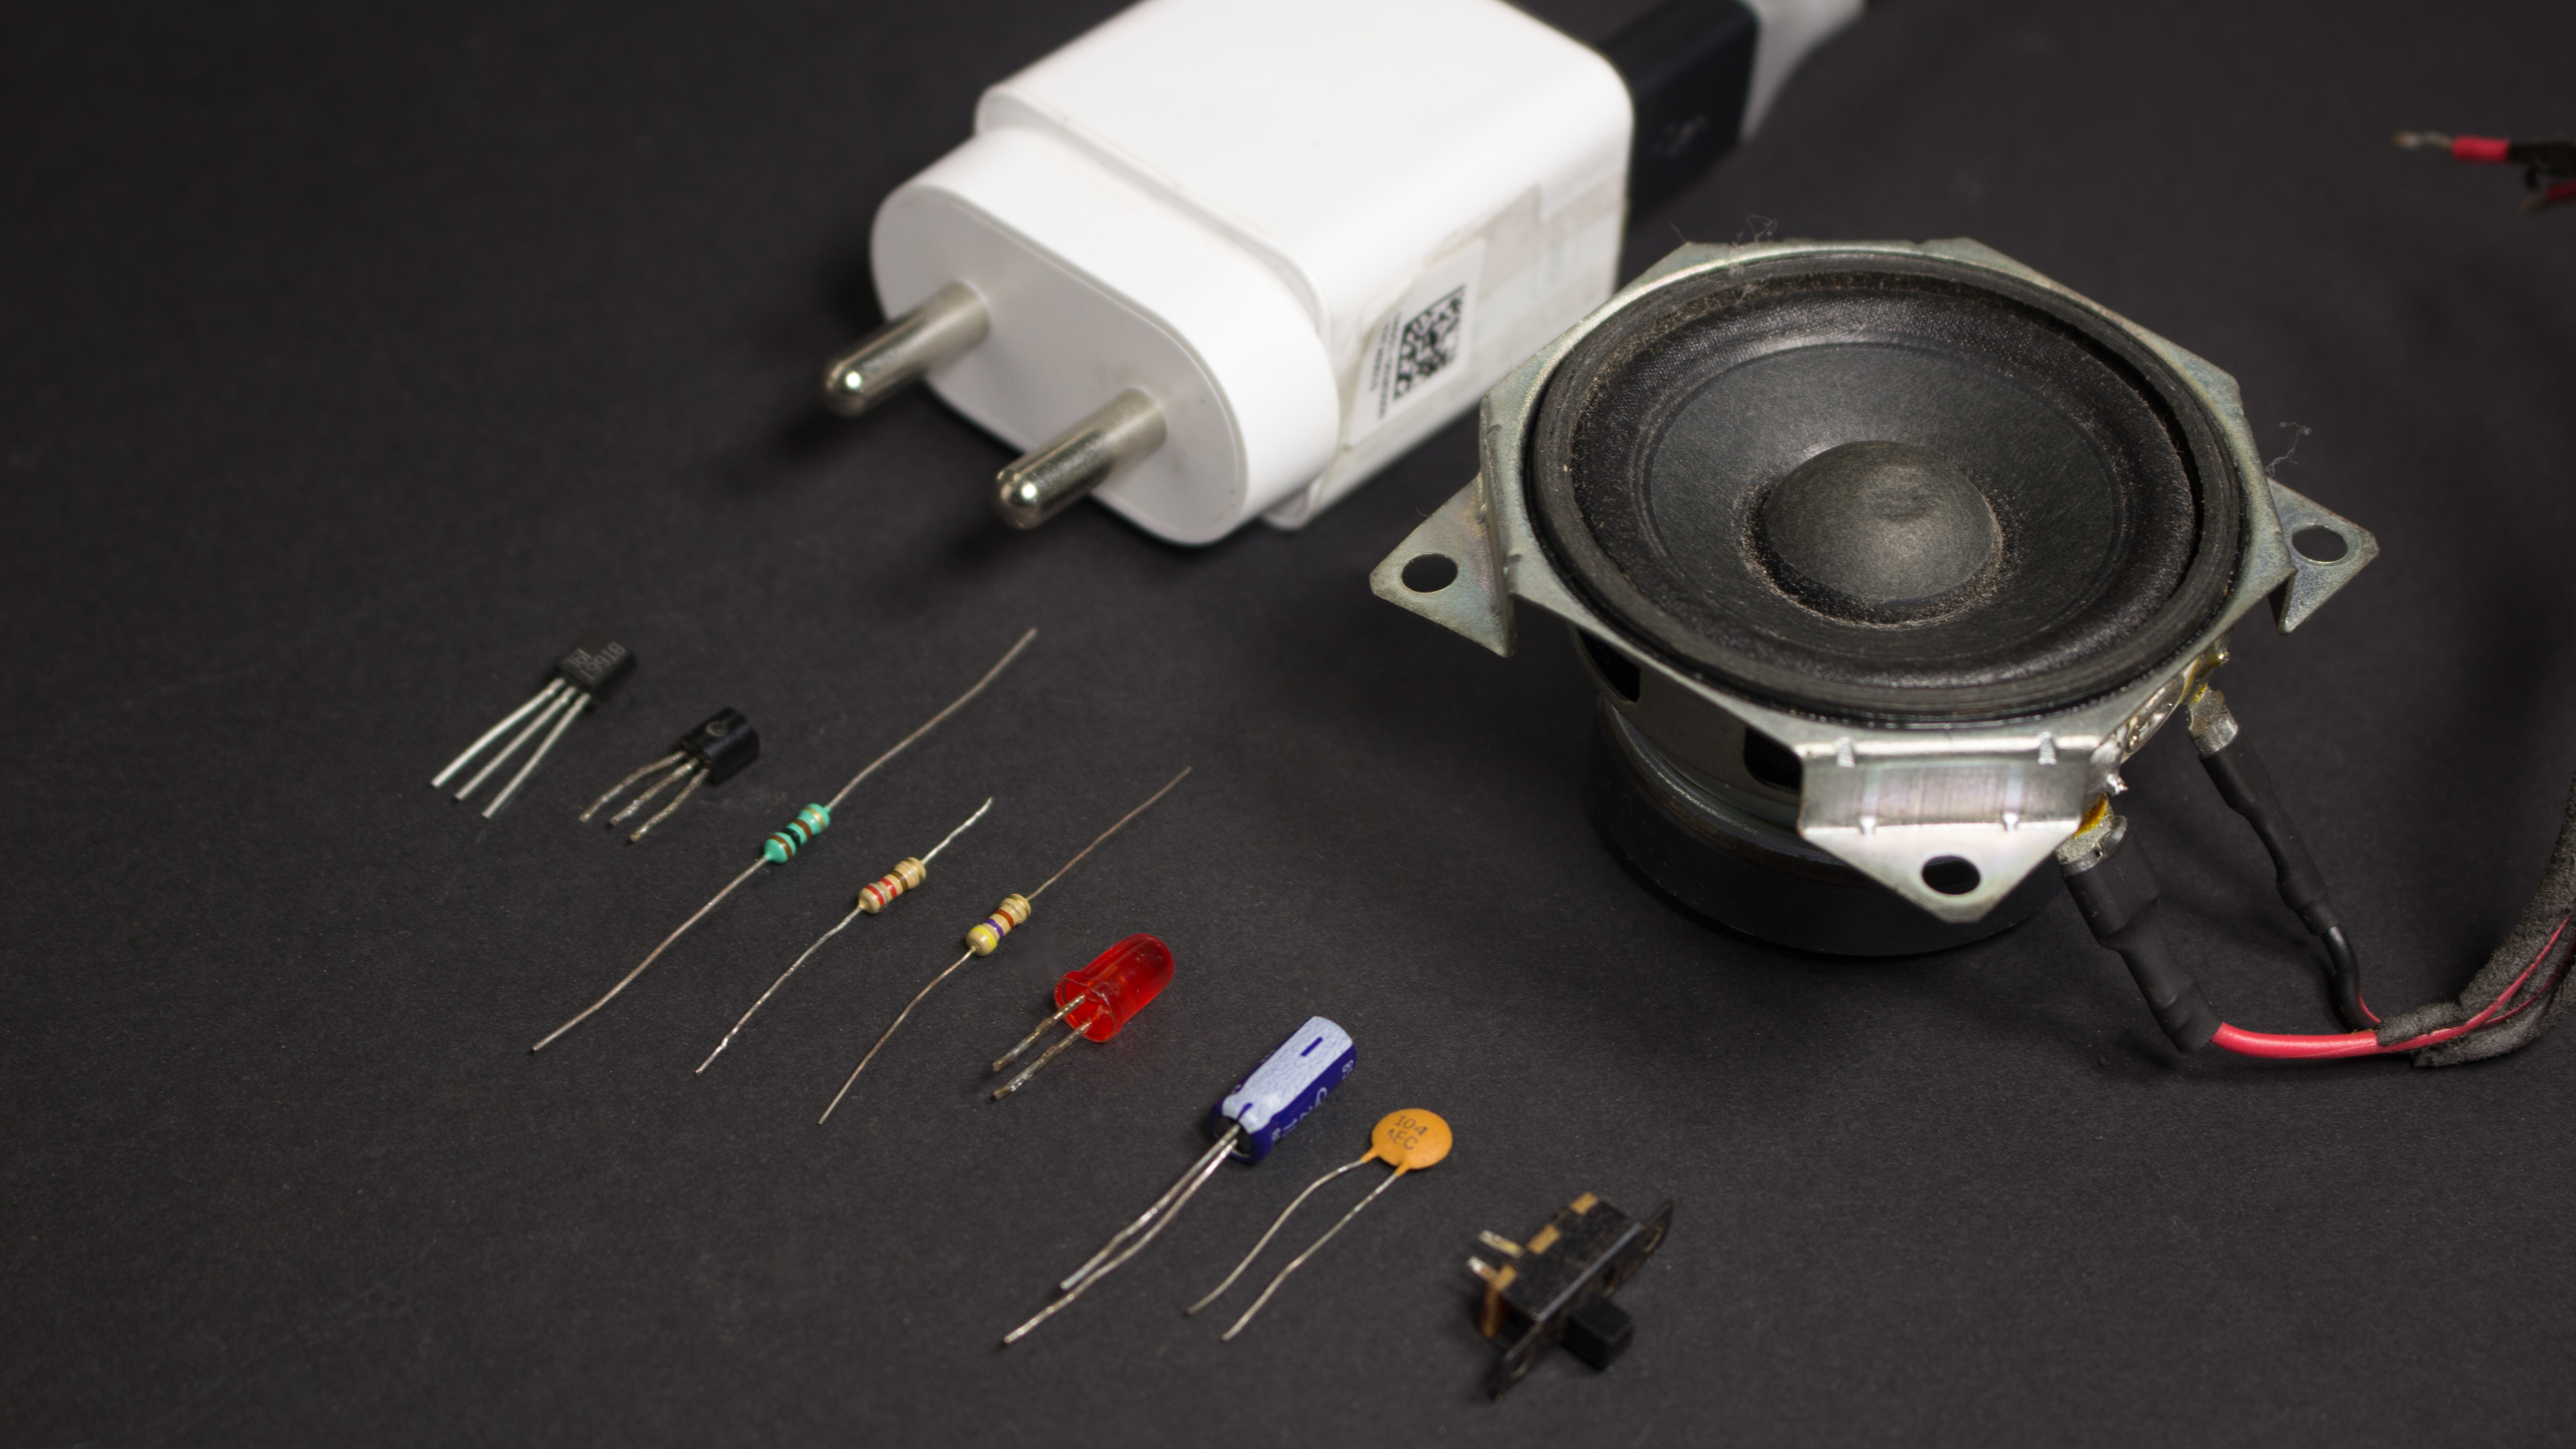
Electronic Components:
Tools:
You can also Buy the PCB: PCBWay
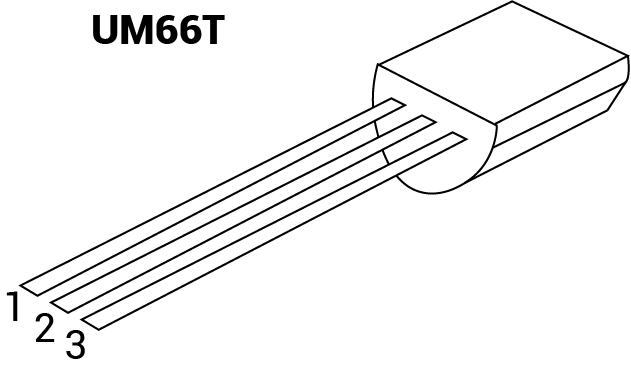
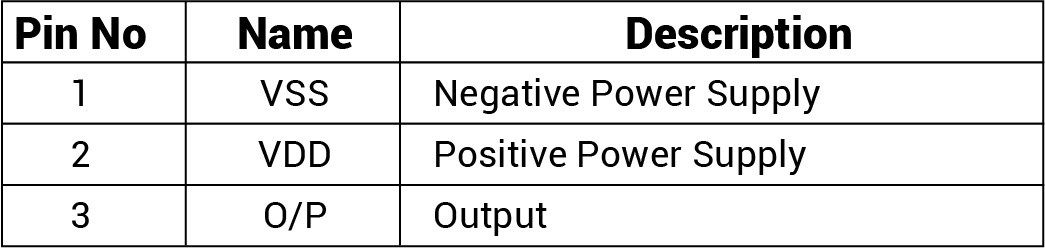
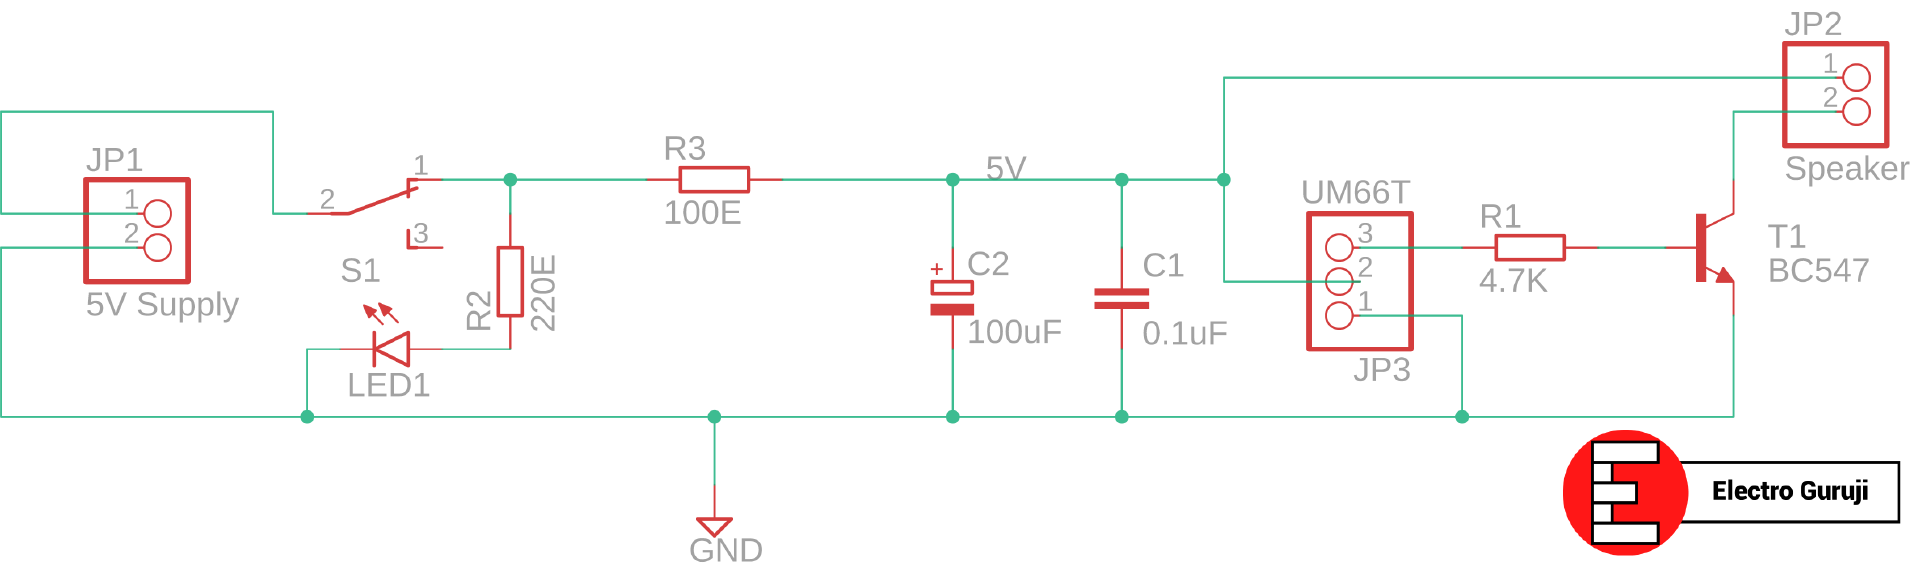
The UM66T otherwise known as the BT66T a CMOS LSI designed for musical applications and has an on-chip ROM containing a musical tune. The device has very low power consumption (around 180mW) since it is fabricated using the CMOS process. The IC includes an inbuilt oscillation circuit. Hence a compact melody module can be constructed with only a few additional components.
An input trigger enables the tone generator unit which in turn drives an external speaker unit. The tone generator unit consists of the Oscillator, Rhythm generator, Tempo generator and ROM. The oscillator frequency is used as a time for tone and beat generators. Its accuracy affects the quality of the music.
Step 4: Circuit Schematic
A 5VDC power adapter is used as the power supply. Since the UM66T has a maximum supply voltage of 4.5V, a 100Ω resistor is used to reduce the supply voltage to a suitable 3.3V.
When the SPDT slide switch is turned ON, the UM66T is triggered and produces a melody signal that begins from the first note due to the power on reset feature.
An external transistor amplifies the signal and its output is connected to a speaker.
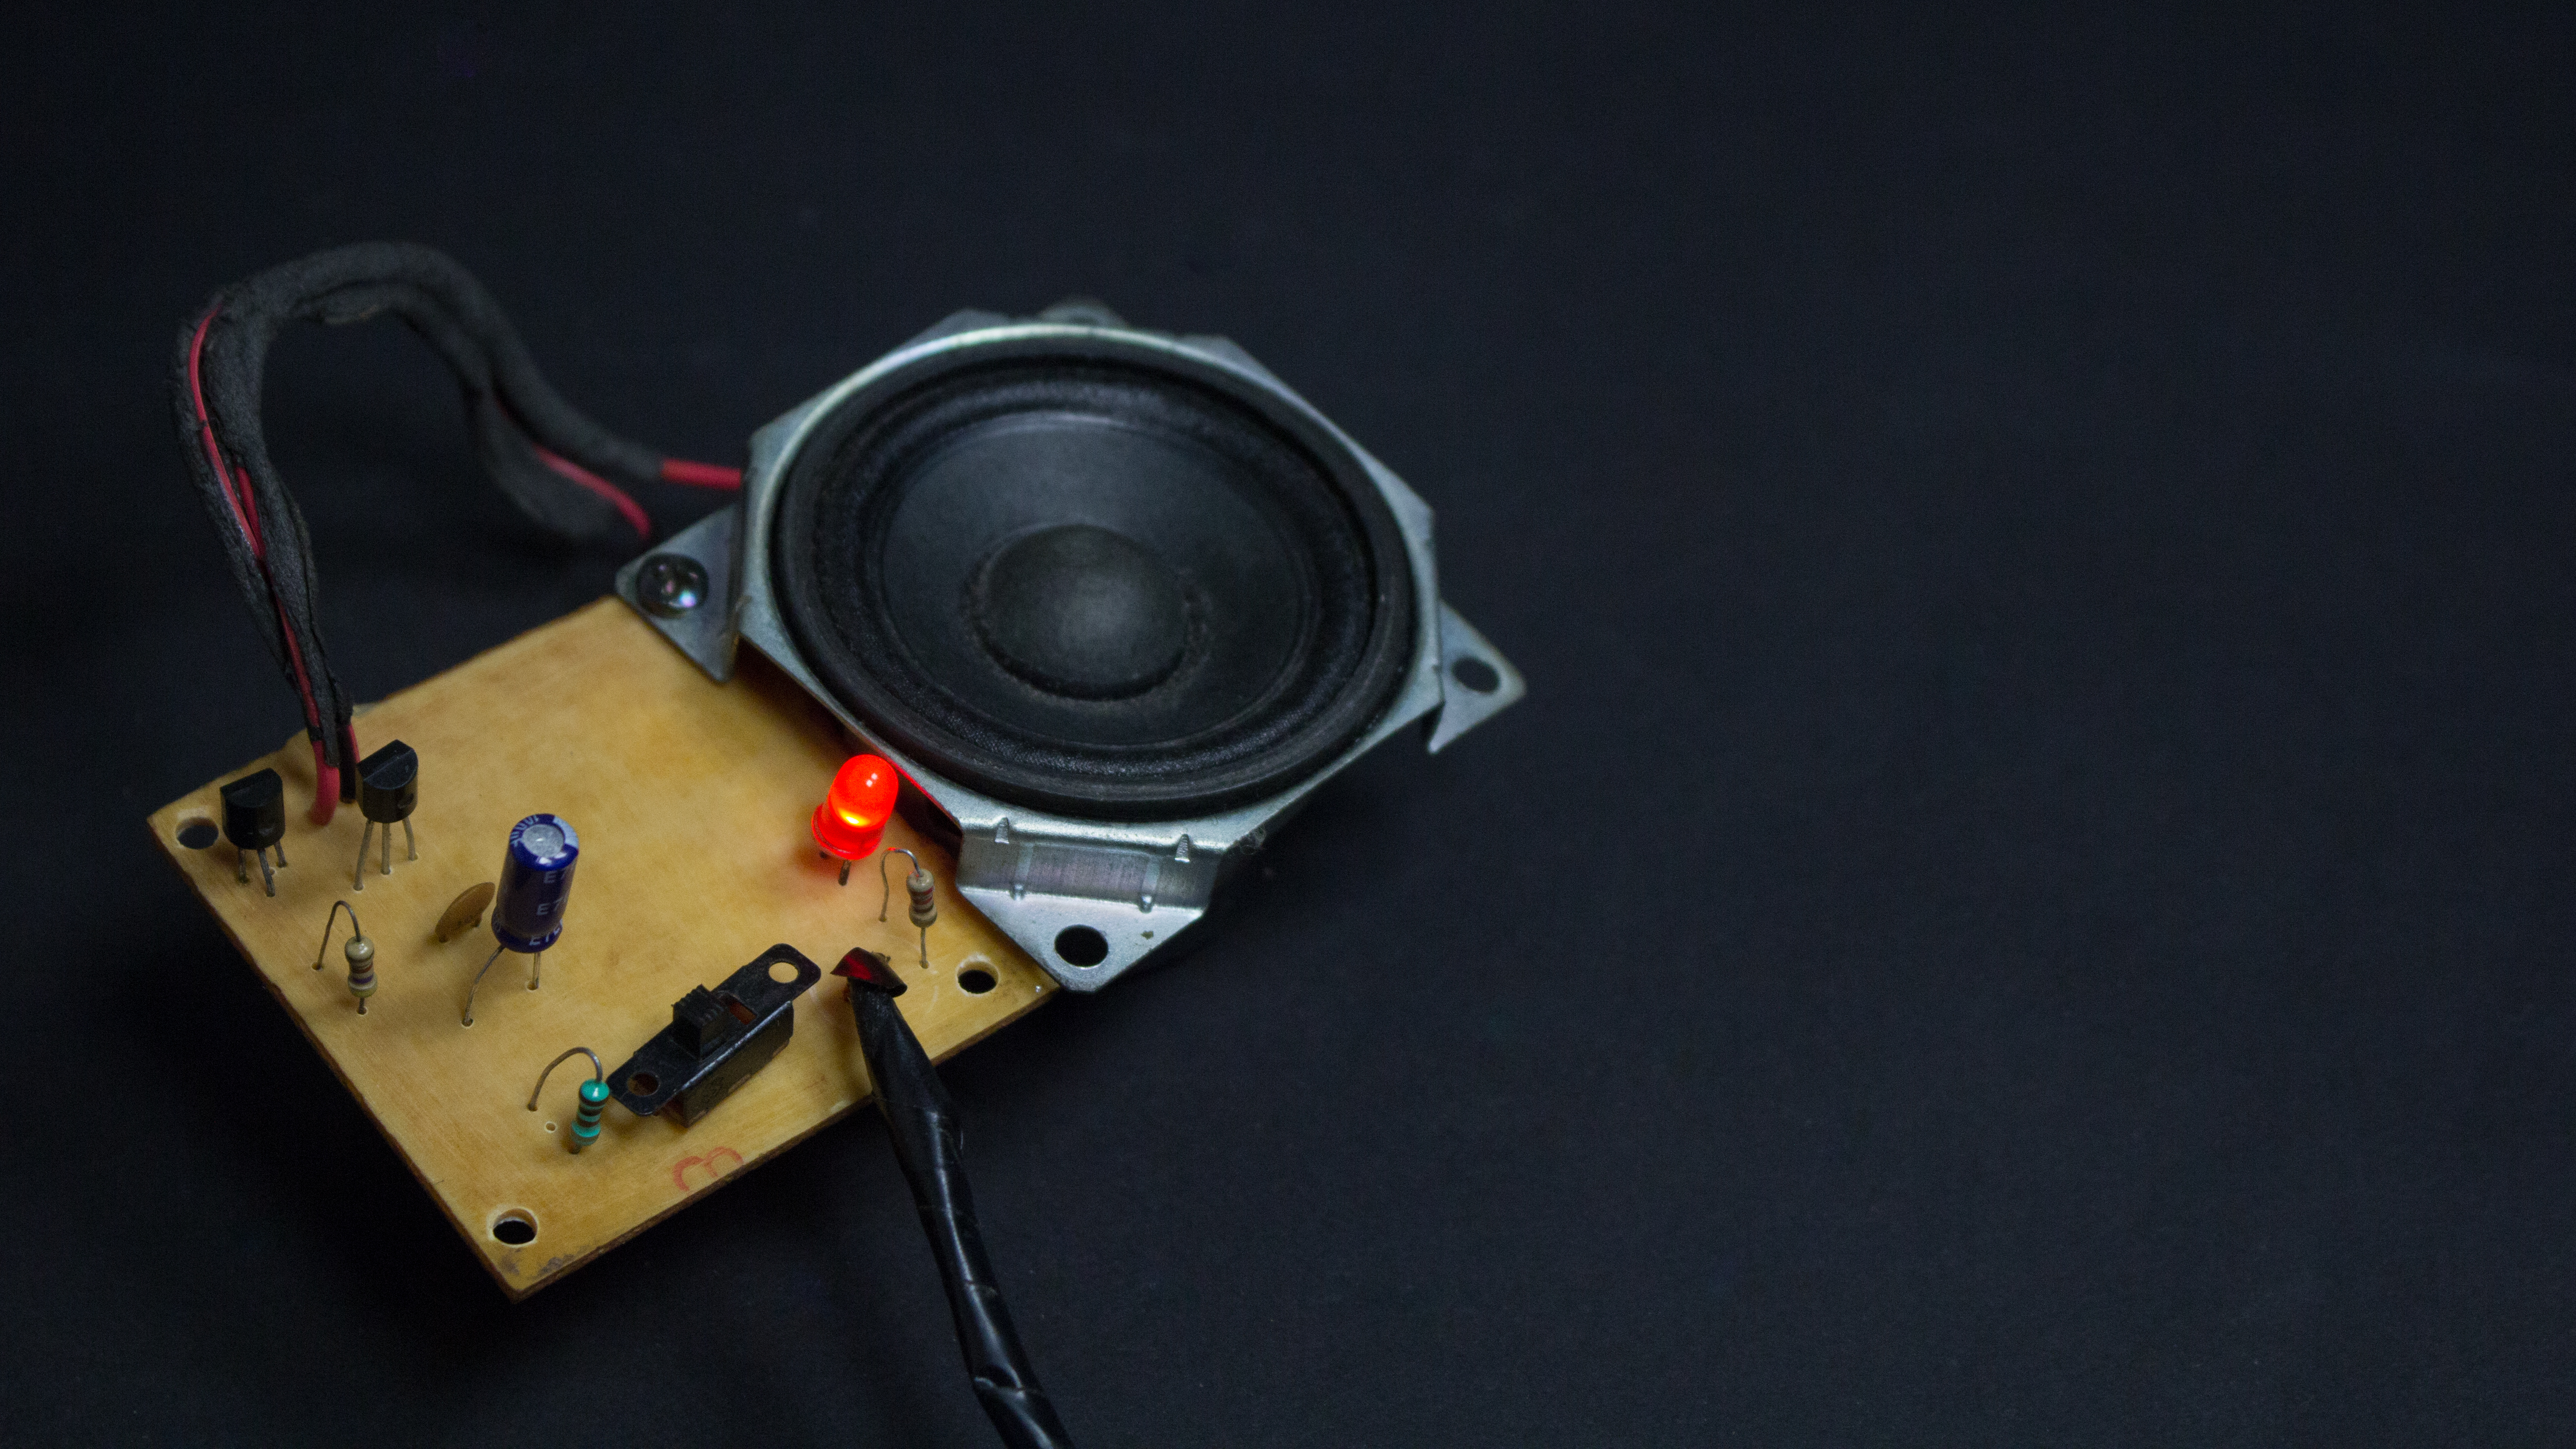
An LED turns on whenever the circuit is triggered
Eagle Schematic: GitHub
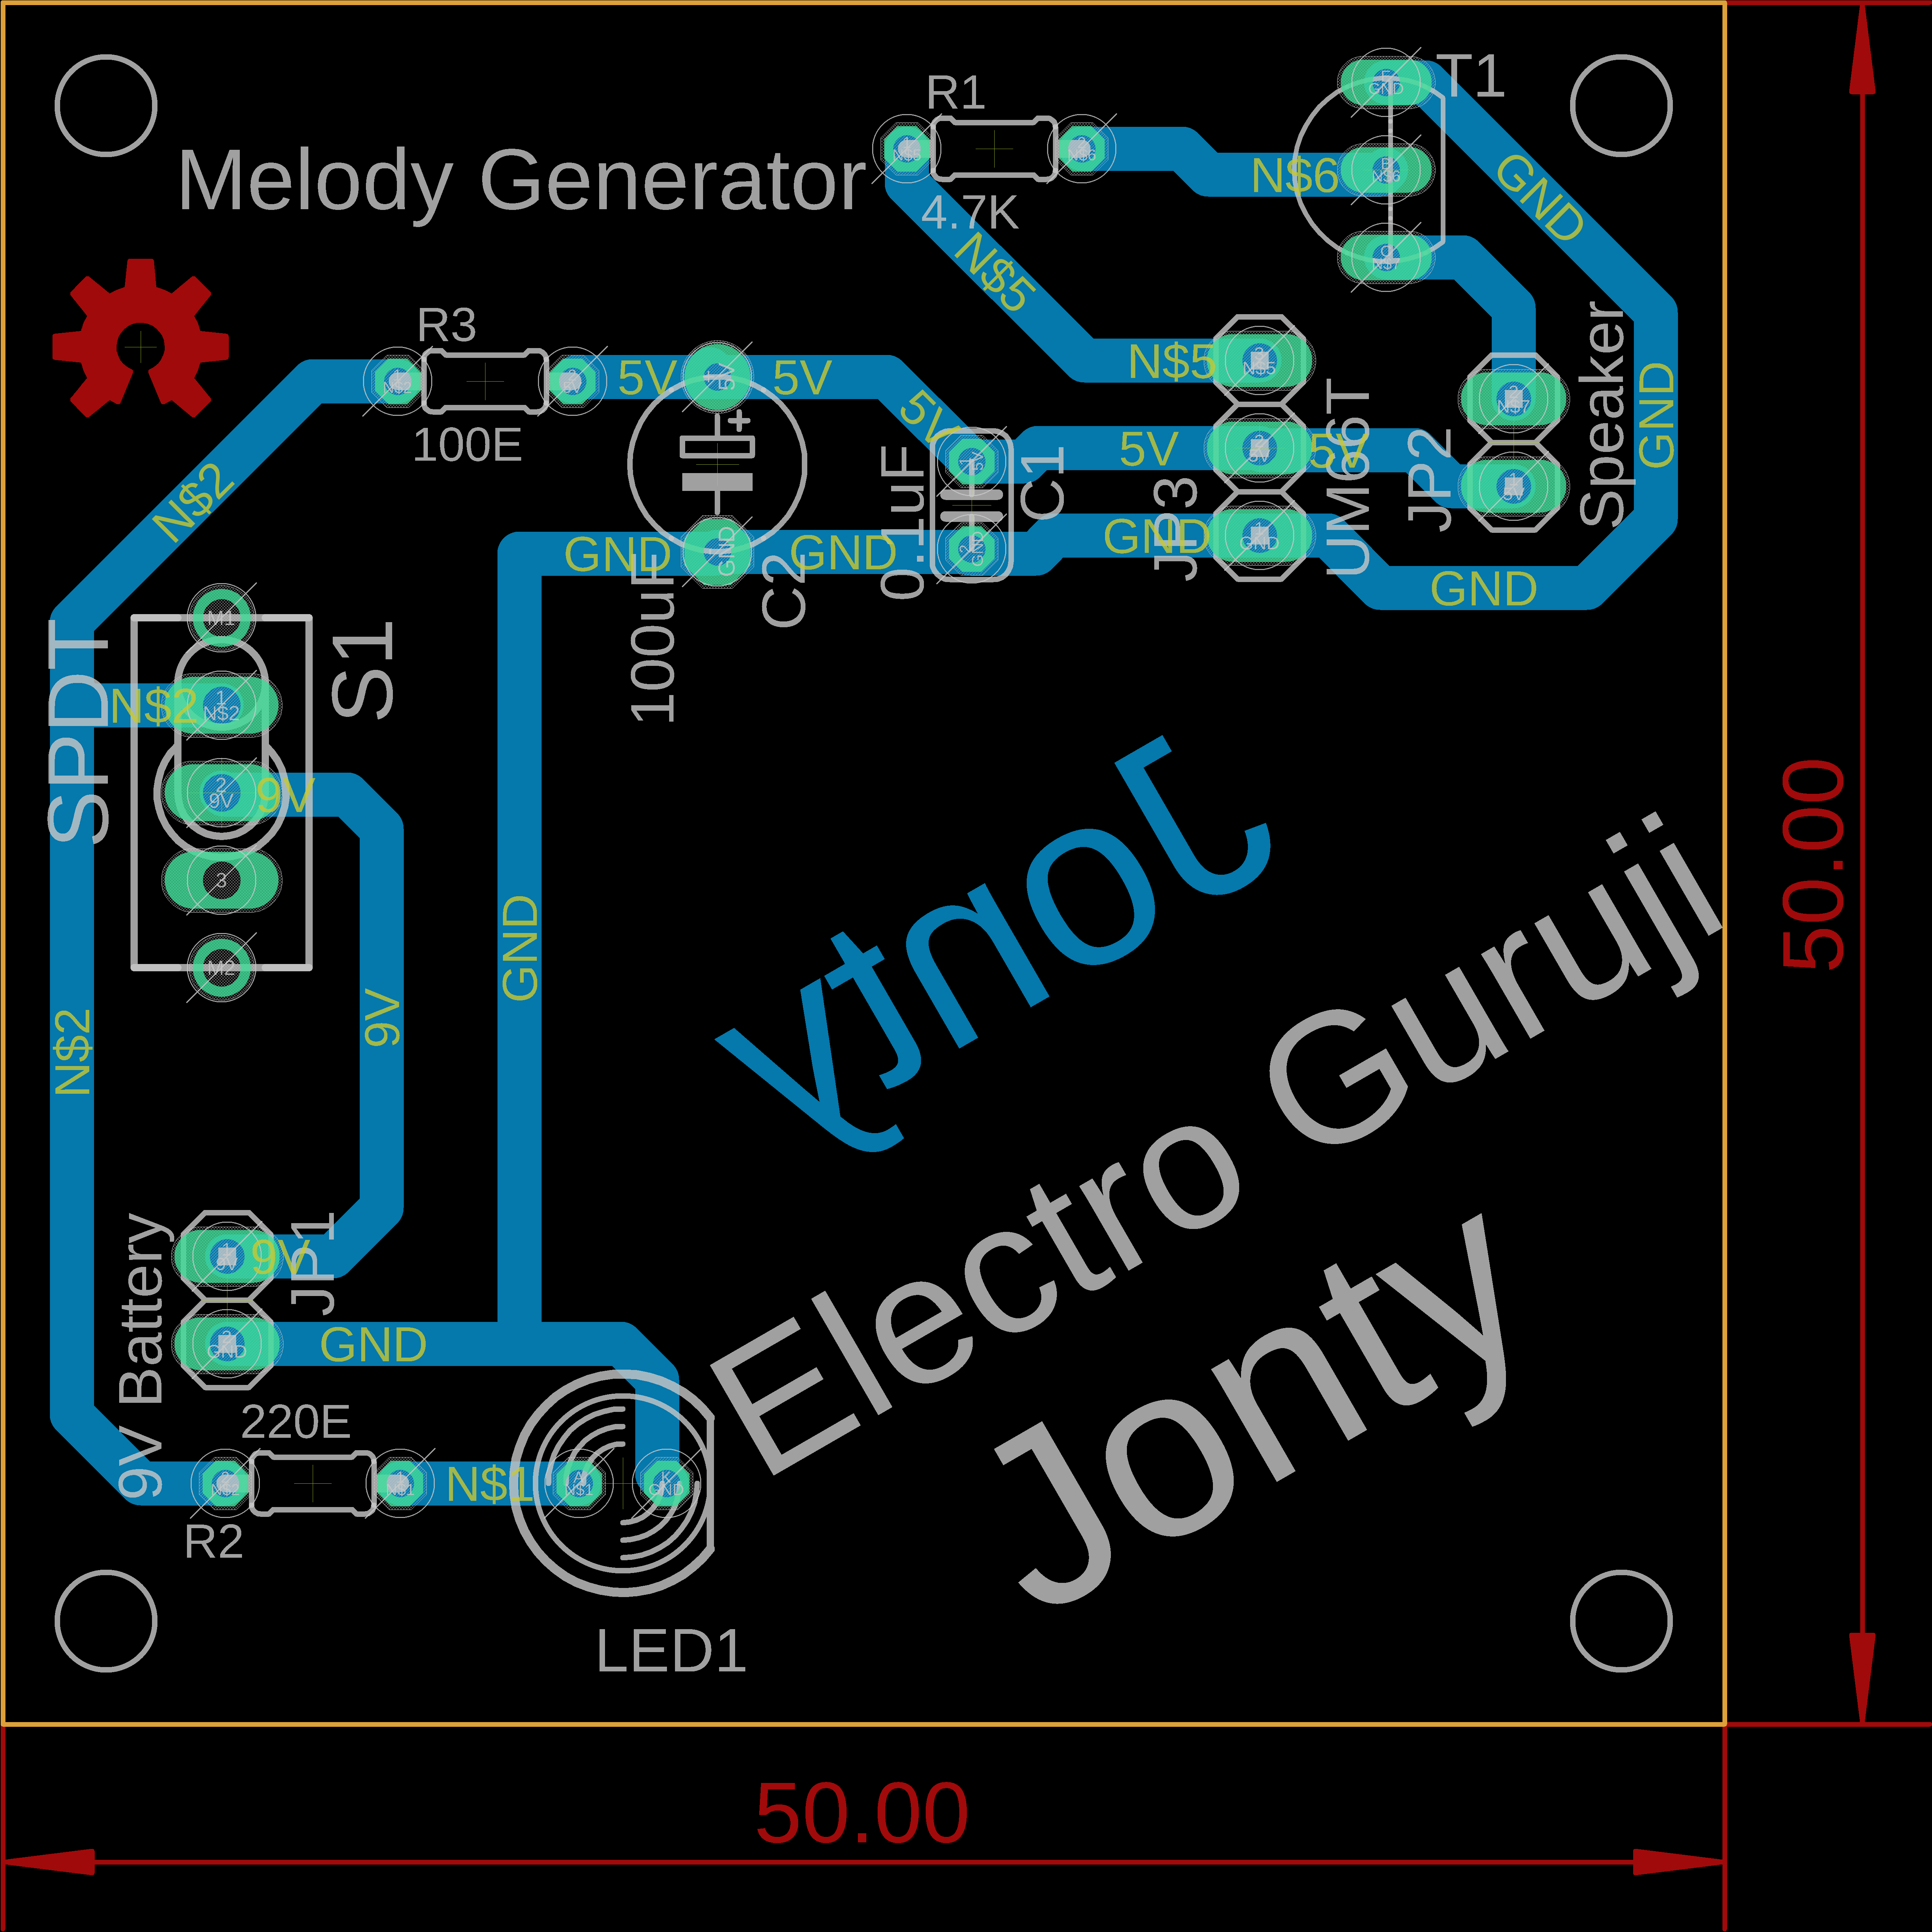
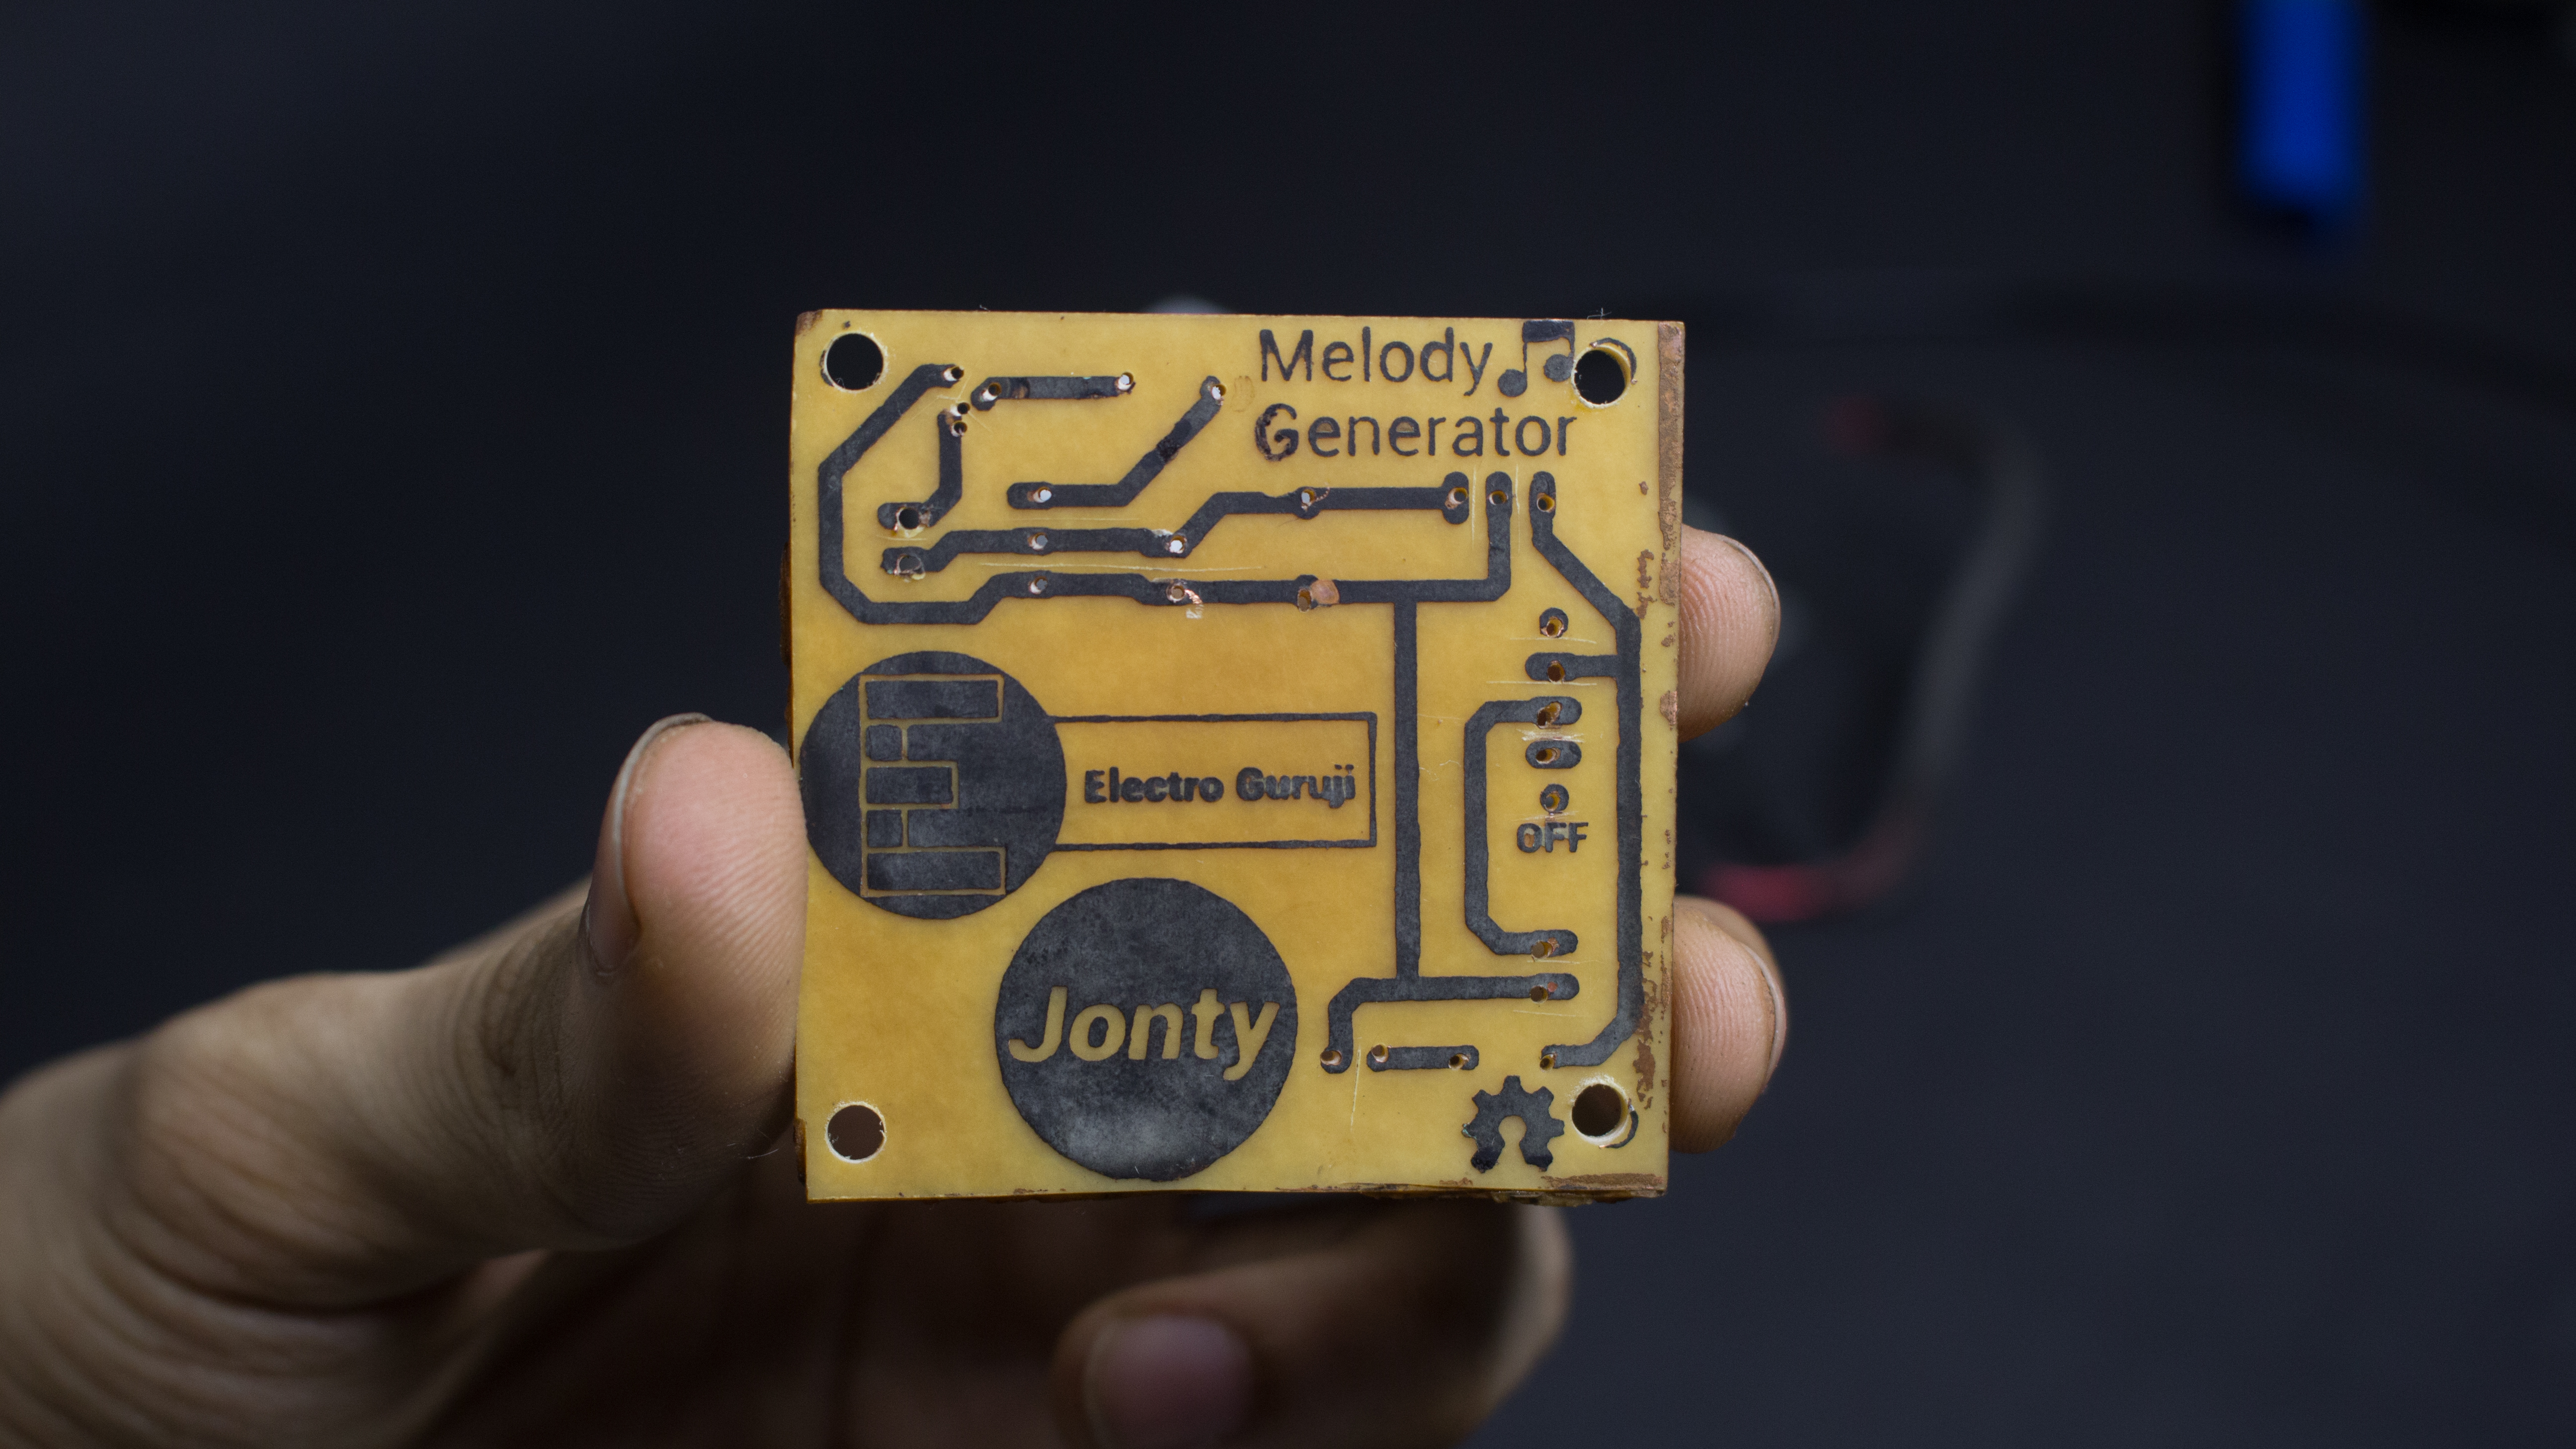
I fabricated the board using the Iron Method.
I drilled four mounting holes in each corner with a diameter of 3mm.
The PCB size is 5cm X 5cm .
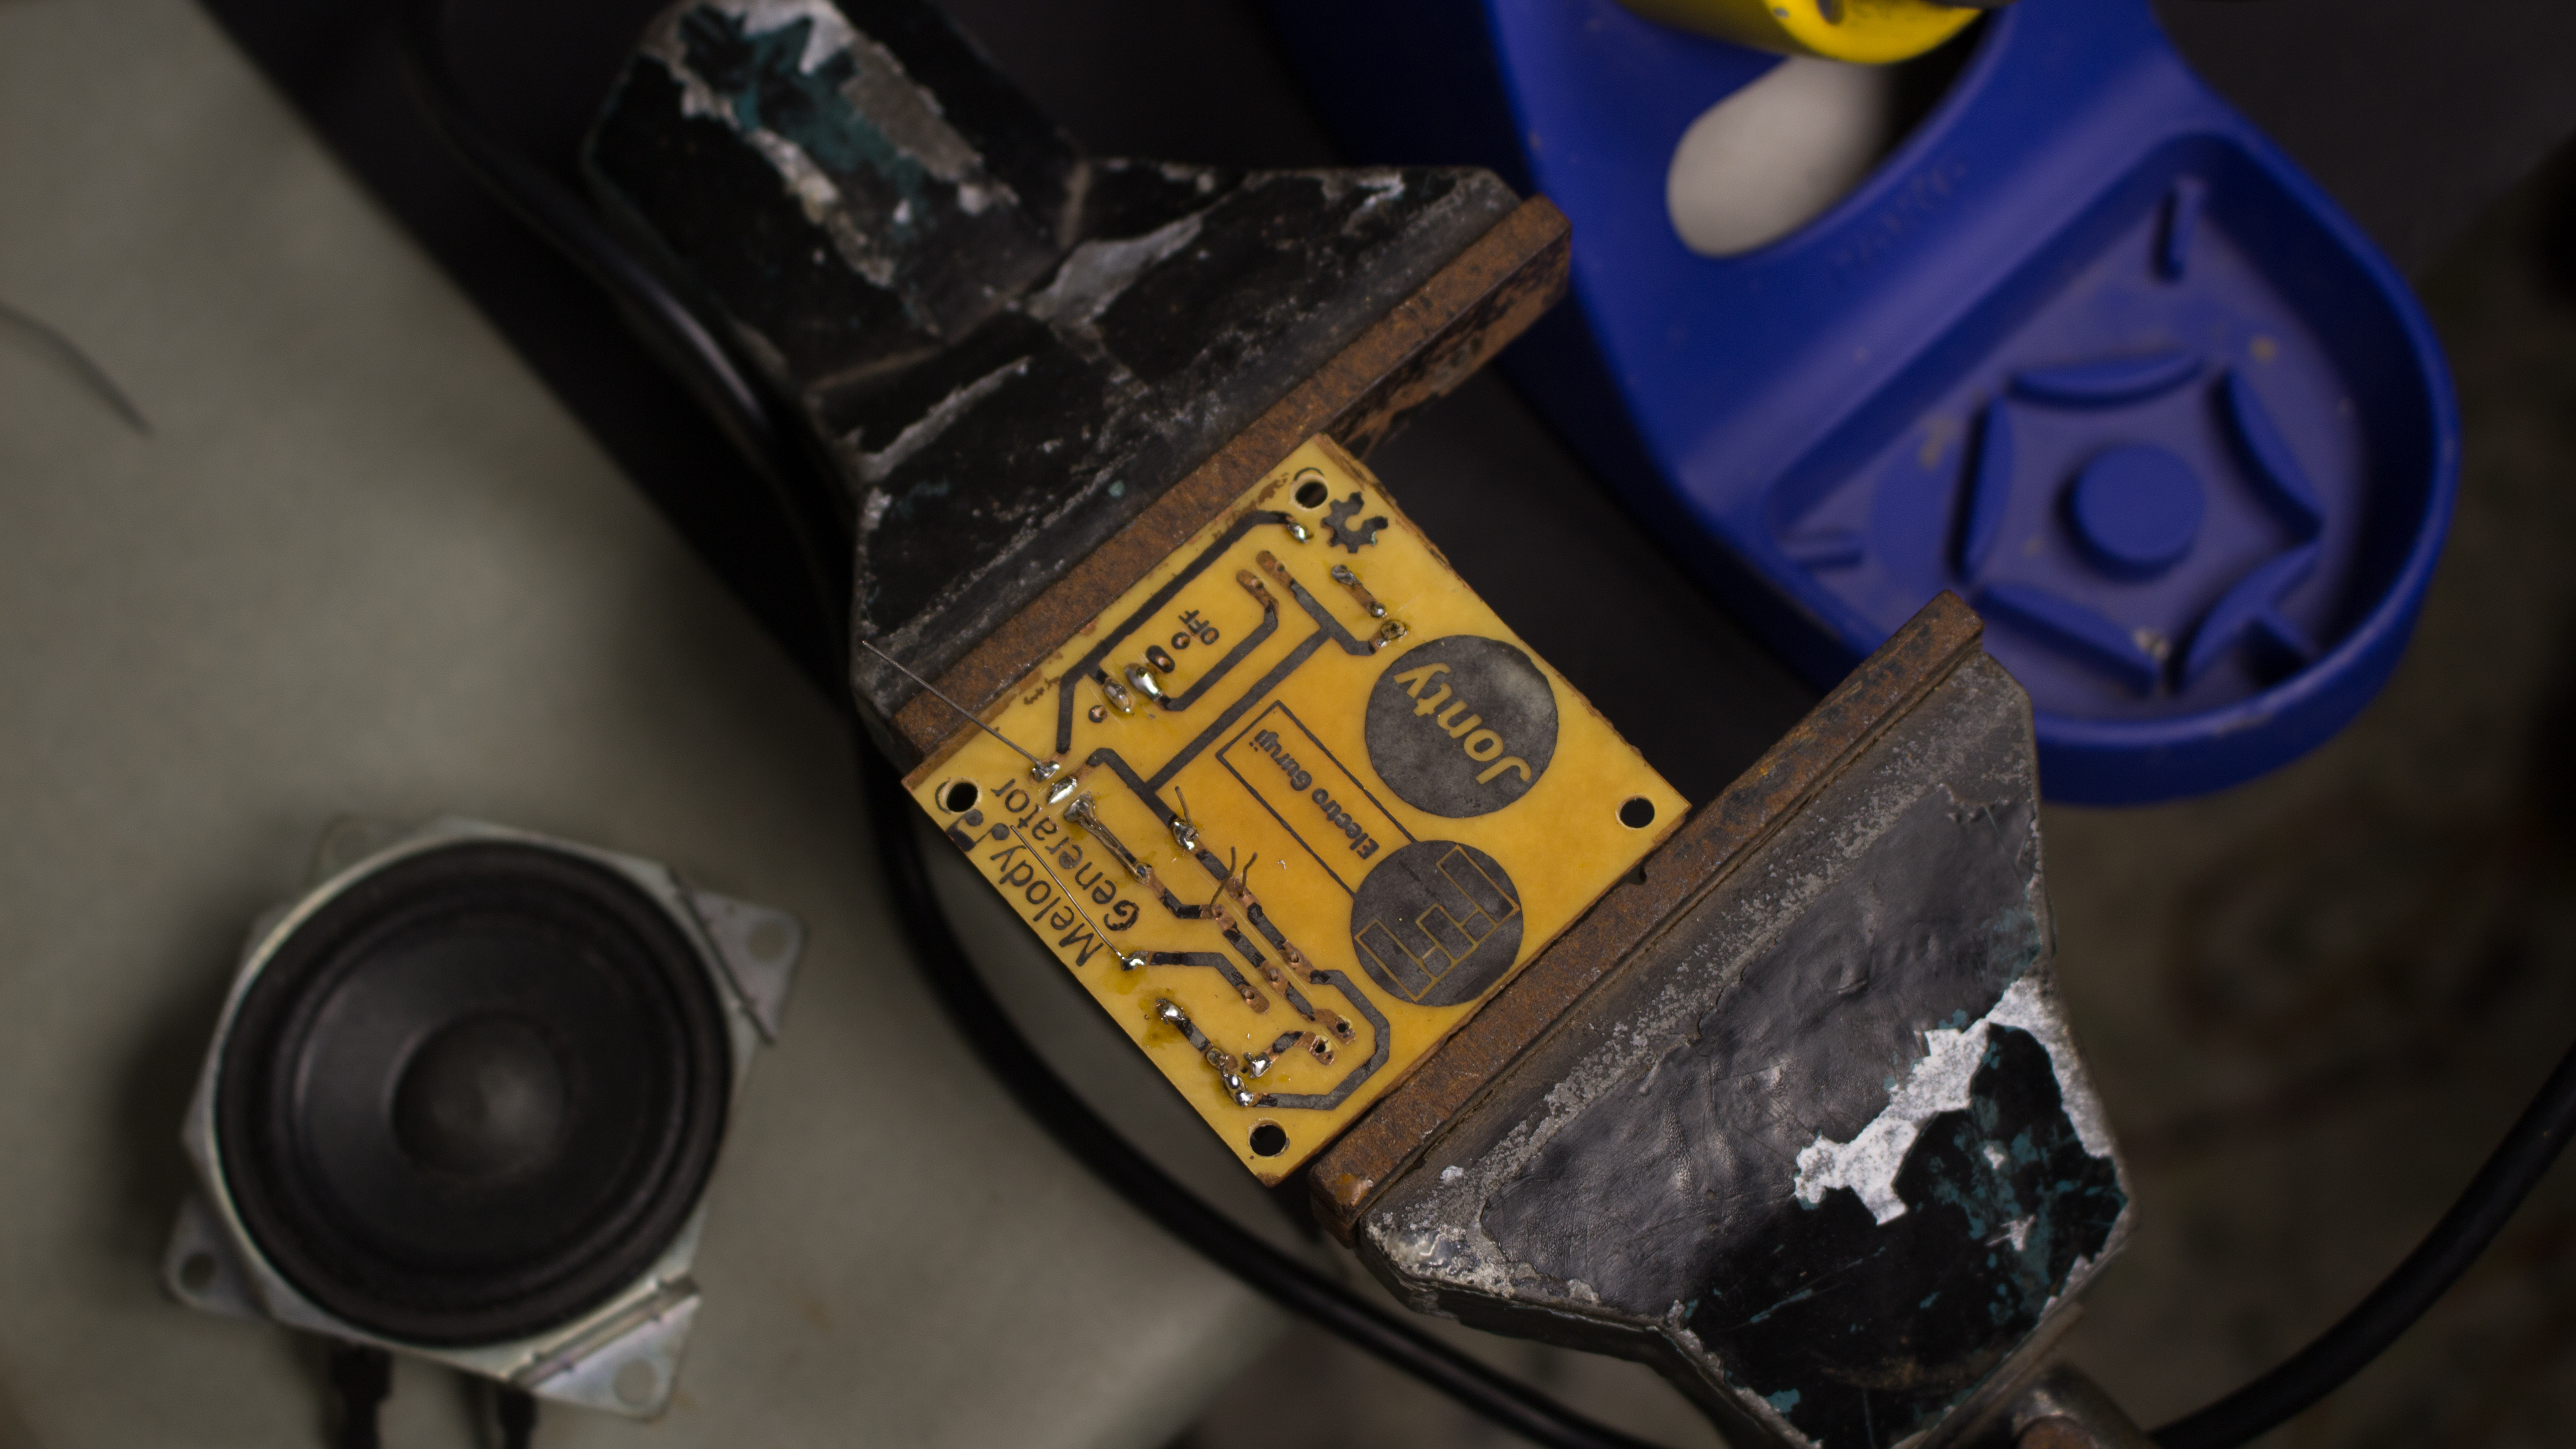
Place and solder all the components onto the PCB.
Double check components with polarities.
Lastly, solder the Power adapter and speaker to the PCB.
Step 7: Support These Projects
Are you an engineer or hobbyist who has a great idea for a new feature in this project? Maybe you have a good idea for a bug fix? Feel free to grab the schematics from GitHub and tinker with it.
If you have any questions/doubts related to this project, leave them in the comments section and I will try my best to answer them.