We teardown a mobile phone with 3x optical zoomtoday.
Today we are going to teardown the ASUS ZenFone Zoom that uses optical zoom, a mobile phone with 3x optical zoom that uses the principle of periscope.
Nowadays, manufacturers have different tricks to make lossless zoom. They are roughly divided into two schools. One is pixel cropping. Like the earliest Nokia Lumia 1020, it uses a 41 million pixel sensor and performs cropping on software to achieve the so-called lossless zoom. One is true optical zoom, like Apple uses two cameras with different focal lengths, switching cameras with different focal lengths to achieve double optical zoom.
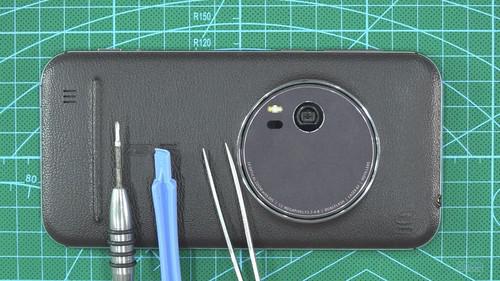
1.There are 3 tools needed this time: plastic crowbar, tweezers, and Phillips screwdriver.
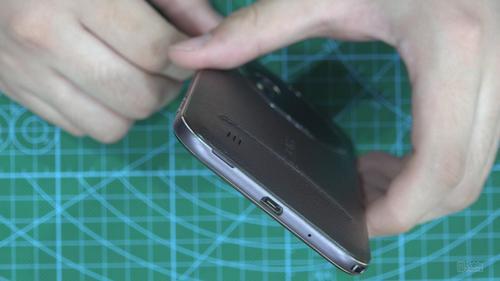
2. First of all, we shut down and then pry open from the bottom end to remove the back cover.
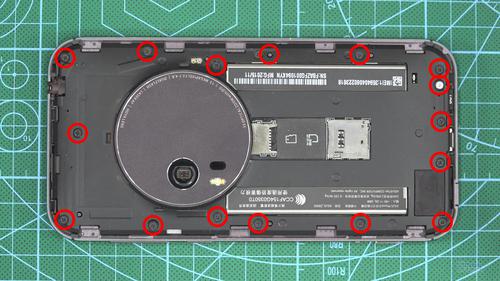
3. After removing the back cover, we can see that the inside of the phone is fixed by 16 ten screws, which can be completely removed with a small Phillips screwdriver, and then the plastic fixing bracket can be removed.
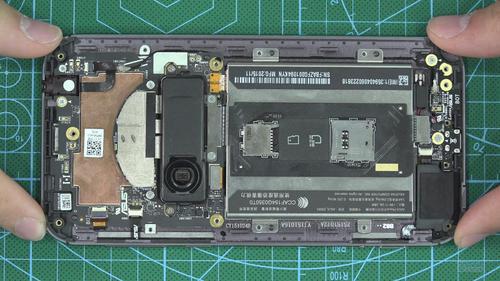
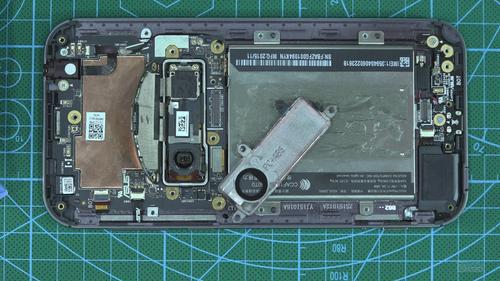
4. There is no buckle fixed here, you can take it off directly, and then we can clearly see the inside of the phone.
5.The inside of the phone adopts a three-stage structure, with the main board at the top, the battery area in the middle, and the sub-board at the bottom. We first power off the phone, find the BTB of the battery, use a plastic pry to power off it, and then we can continue to disassemble.
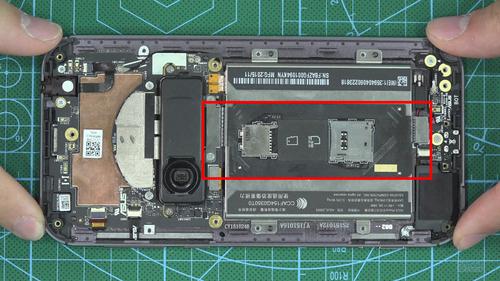
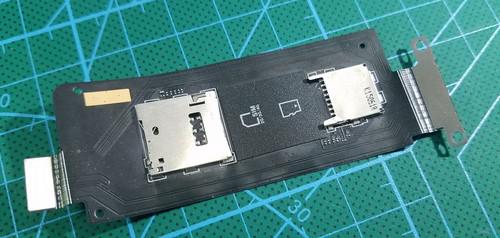
6. There is a main FPC connected to the main and sub-boards directly above the mobile phone. This main FPC carries the design of the SIM card and expansion card of the mobile phone at the same time. The design here is similar to the design of ASUS ZenFone2.
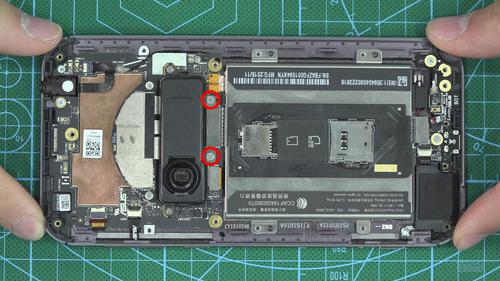
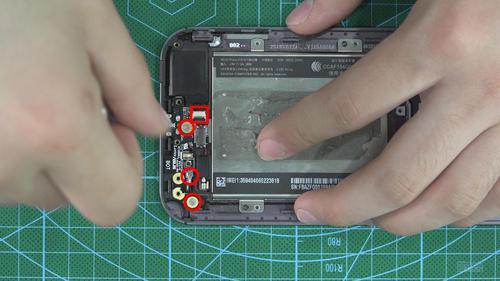
7. We first unscrew the two Phillips screws here, and then use a spudger to remove the BTB at the end of the secondary board. This BTB is glued to the top of the battery. We can easily remove it by heating it a little.
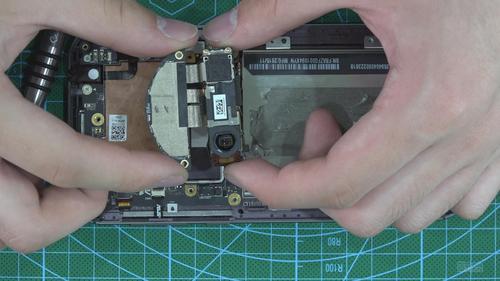
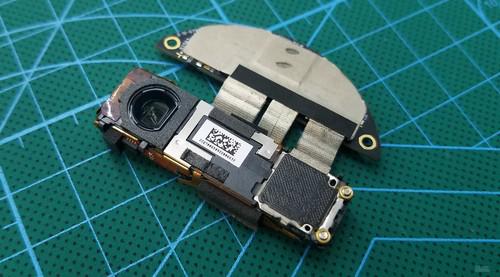
9. Next, we can disassemble the rear camera of the mobile phone, first touch the bright side of the lens and the fixing screws of the sub-class above the lens, a total of 4.
10. Next, use a spudger to disconnect the main board from the BTB of the camera sub-board by using a spudger on the sub-board above the camera.
11. Carefully remove the camera from this position (a lot of rubber blocks are used here to fill in to prevent the lens from shifting position)
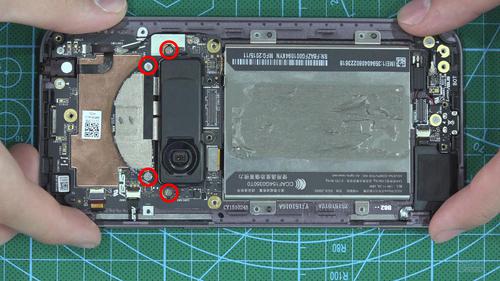
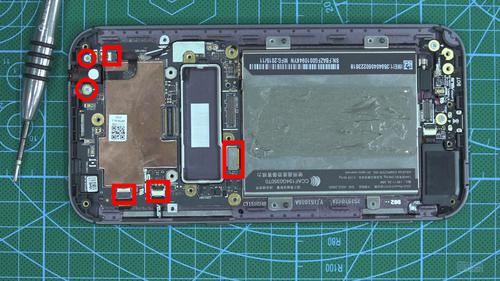
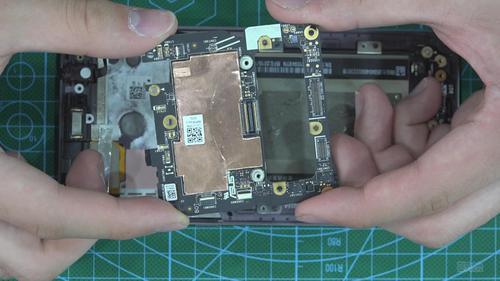
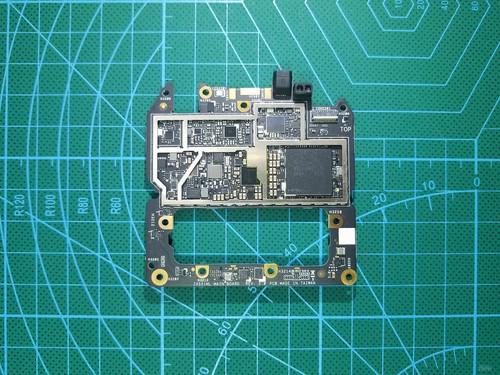
12. Continue to remove the two fixing screws, three ZIF, one BTB, and one RF connector on the motherboard to remove the motherboard of the phone.
13. Motherboard close-up:
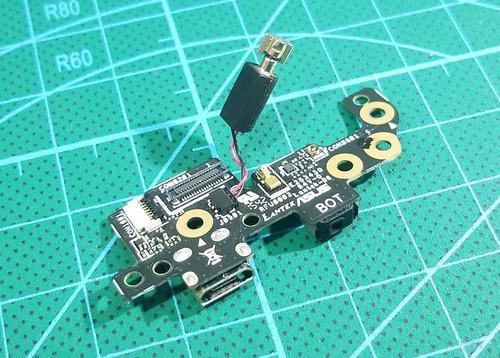
14. We continue to disassemble the sub-board. There are two Phillips screws, a speaker ZIP, and an RF connector on the sub-board. At the same time, there is a vibration motor tucked aside. You can take out the sub-board by just tilting it up.
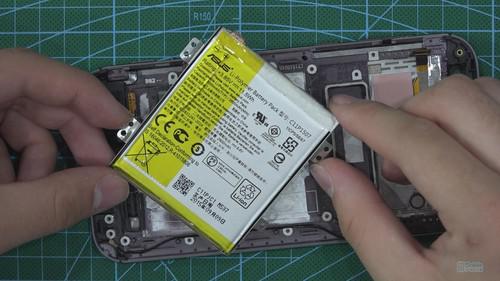
15. Finally, the battery is disassembled. There is a strip of easy-pull glue on the top of the battery. Pull it out slowly and the battery can be taken out.
Finally, let's look at the details of the camera:
Summary: ASUS ZenFoneZoom, as an earlier manufacturer that used periscopes to achieve multiple optical zoom, did not compromise on the hardware specifications of the camera. Optical image stabilization, HDR, long exposure, etc., are also very rich in taking pictures. As ASUS’s first camera phone, I think ASUS has done a good job in the overall experience. The internal structure of the phone shows that ASUS is a manufacturer with strong design capabilities. All PCBs use ASUS customized black PCBs. It's pretty good. A large area of copper sheet is used for heat conduction on the main components, and the materials used can be said to be scary.