How to Create 3D Models in Unreal Engine 4 With UProceduralMeshComponent
Hi everyone! It's been a while since I wrote a tutorial. In this one, we will be working on Unreal Engine 4. You can learn more about Unreal and how to install Unreal Engine 4 here. I really like the graphics quality of Unreal. Its graphics quality is unmatched, and it's free to use! So, let's get started!
You will also need to install VisualStudio (Windows) or XCode (Mac) along with it. These programs likely come with Unreal when you install it, but if not, make sure you install it.
Once you have Unreal Engine and VisualStudio or XCode installed, you can launch the latest version of Unreal and start a C++ project. For now, we don't need to worry about the difference between Blueprint & C++ project. Select a basic template.
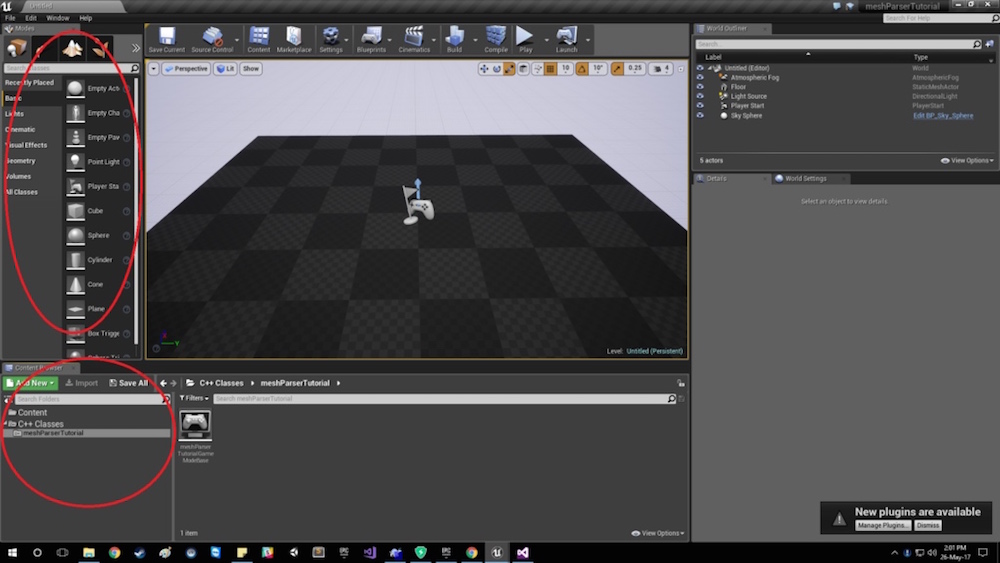
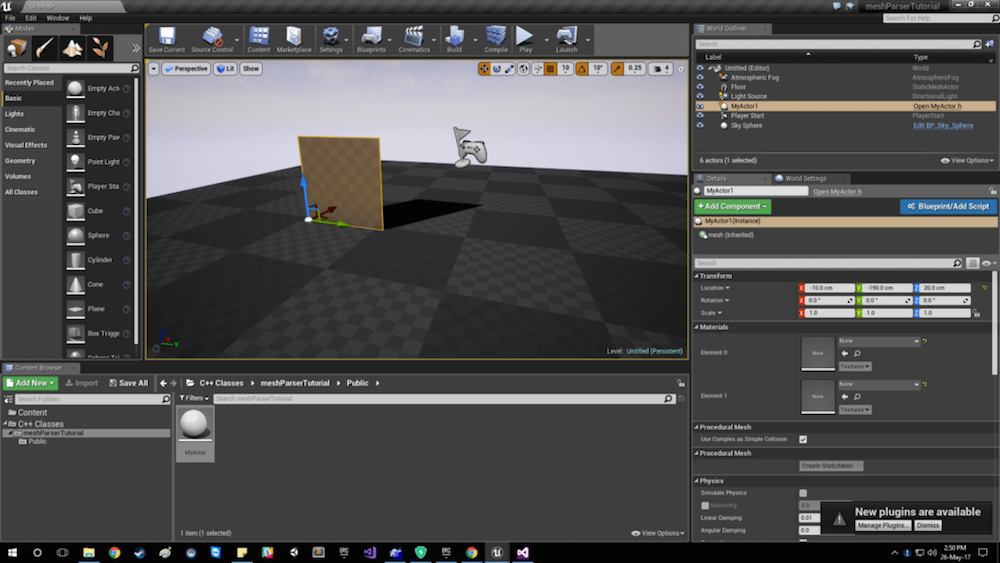
It will take some time in the process. After completion, it will look like this. If you have selected C++ project, you can see a folder named C++ classes in the content browser in bottom left corner. On the left side, you have the mode window, from which you can select different default 3D models and other components. Play with it. Your VisualStudio or XCode must have also been opened at the same time.
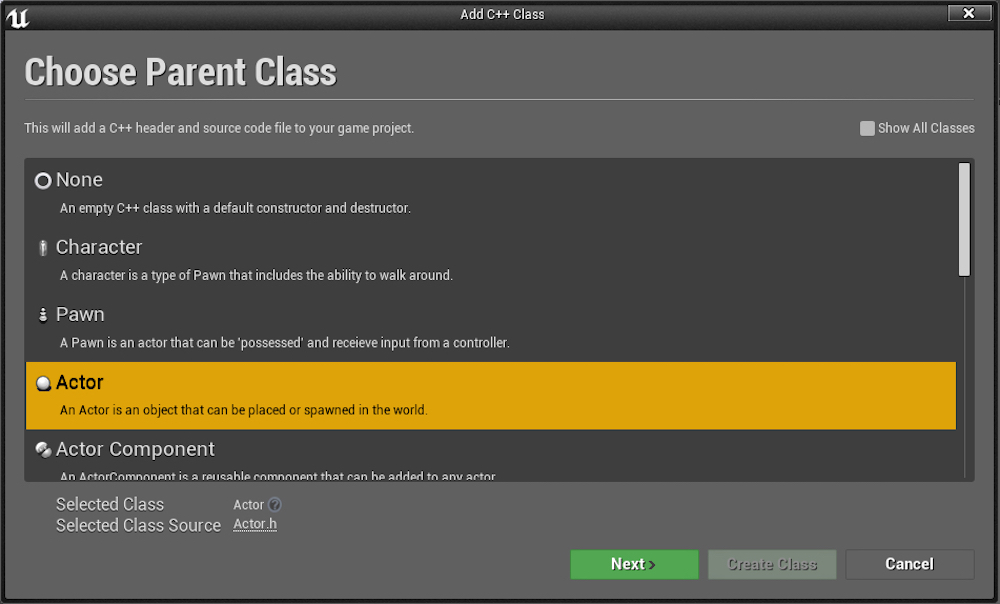
In Unreal, all the objects are considered as Actors, inputs as Pawn and so on. Since we are making our own 3D model, we need to have an actor class.
Right click on the content window, and select a new C++ class. Extend it to be an actor class.
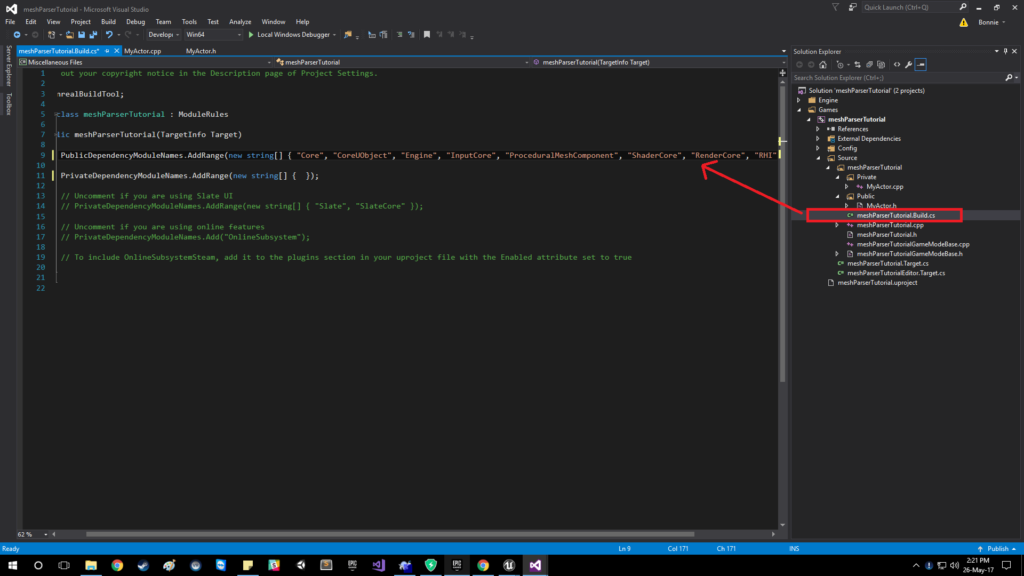
Navigate to Visual Studio. (If you are making the actor in Blueprint class, it will open Visual Studio automatically.) You can browse your classes in Solution Explorer window.
We will be using UProceduralMeshComponent for building our mesh. A Mesh is a structure for making an actor or object. Navigate to Build.cs file and add the following line.
PublicDependencyModuleNames.AddRange(new string[] { "Core", "CoreUObject", "Engine", "InputCore", "ProceduralMeshComponent", "ShaderCore", "RenderCore" , "RHI"});
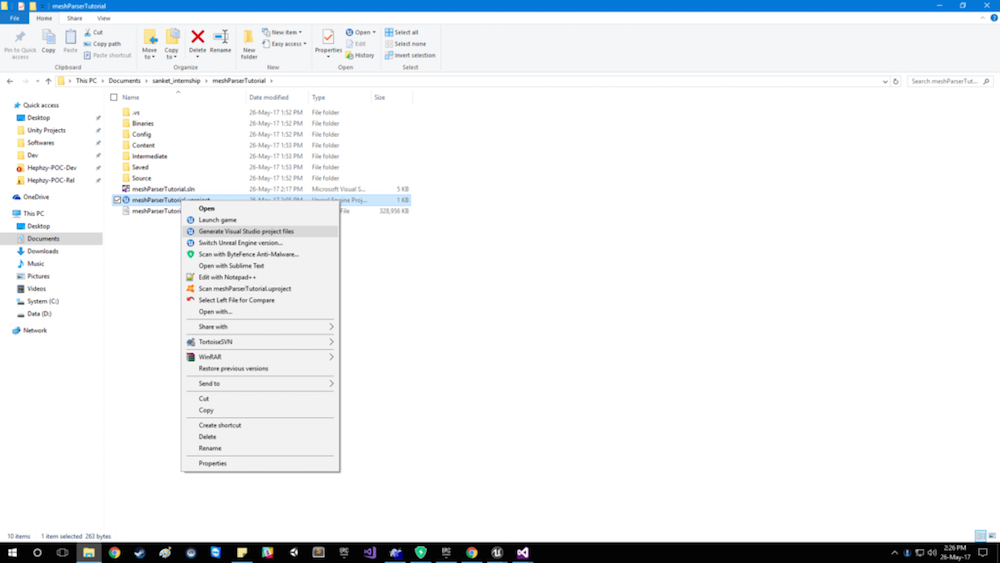
Note: If in between an error is shown anytime, you can always close VisualStudio and go to your project folder in File Explorer. Right click on .uproject and select generate project files. We need to do this if the compiler gives an error. (But this does not help if the error is because of a ';' ).
Now, open your VisualStudio again. Navigate your header file( .h) of your actor class. Add the following code at the bottom but under the braces.
private:
UPROPERTY(VisibleAnywhere, Category = Materials)
class UProceduralMeshComponent* mesh;
It is possible that an error might be showing - you know the solution.
Now in the .cpp class of your actor. Include the UProcedural header class.
#include "ProceduralMeshComponent.h"
Now, a mesh is generated using either triangles or faces. You can take any object. You will notice it is made up of many triangles or faces in other cases.
To create a mesh, we need vertices, triangles(or faces), normals, textures, colors, and tangents. You can read all about them in the docs.
Now, you can imagine the number of triangles in an object depends on the number of vertices. If 3 there are vertices, you will have 1 triangle. If there are 4 vertices, then you will have 2 triangles. We will need to keep these in mind as well.
We are making a square this time. You can add this code to your .cpp file in your A<className>() function.
mesh = CreateDefaultSubobject<UProceduralMeshComponent>(TEXT("mesh"));
RootComponent = mesh;

TArray<FVector> vertices;
vertices.Add(FVector(0, 0, 0));                                // 0th vertice
vertices.Add(FVector(0, 100, 0));                           //   1th vertice
vertices.Add(FVector(0, 0, 100));                           //   2nd vertice
vertices.Add(FVector(0, 100, 100));                      //    3rd vertice

TArray<int32> Traingle;

//I have created 4 triangle because we need to make sure it is rendered from behind as well. Otherwise, the object will be seen from front only and not from behind.
Traingle.Add(0);
Traingle.Add(1);       // for front face - clockwise direction
Triangle.Add(2);

Triangle.Add(1);
Triangle.Add(2);      // for front face - clockwise direction
Triangle.Add(3);

Triangle.Add(2);
Triangle.Add(1);      // for back face - anti-clockwise direction
Triangle.Add(0);

Triangle.Add(3);
Triangle.Add(2);      // for back face - anti-clockwise direction
Triangle.Add(1);

TArray<FVector> normals;
normals.Add(FVector(1, 0, 0));
normals.Add(FVector(1, 0, 0));
normals.Add(FVector(1, 0, 0));                    // you need to calculate the direction of normals, using 3d vectors.
normals.Add(FVector(1, 0, 0));

TArray<FVector2D> UV0;
UV0.Add(FVector2D(1, 1));
UV0.Add(FVector2D(0, 1));
UV0.Add(FVector2D(1, 0));
UV0.Add(FVector2D(0, 0));

TArray<FLinearColor> vertexColors;
vertexColors.Add(FLinearColor(0.75, 0.00, 0.00, 1.0));
vertexColors.Add(FLinearColor(0.75, 0.00, 0.00, 1.0));
vertexColors.Add(FLinearColor(0.75, 0.00, 0.75, 1.0));                              // the 4th argument determines alpha value (0,1)
vertexColors.Add(FLinearColor(0.75, 0.00, 0.75, 1.0));

TArray<FProcMeshTangent> tangents;
tangents.Add(FProcMeshTangent(0, 1, 0));
tangents.Add(FProcMeshTangent(0, 1, 0));
tangents.Add(FProcMeshTangent(0, 1, 0));
tangents.Add(FProcMeshTangent(0, 1, 0));

mesh->CreateMeshSection_LinearColor(1, vertices, Square, normals, UV0, vertexColors, tangents, false);
That concludes our mesh creation! You can save it and compile it. Now, if you drag your actor in the scene, it will compile a square!
You can try commenting the other 2 triangles and compile it. A square will still come up, but try to see it from behind. You won't be able to.
Now, if you add any material (or image) to it, if it gets rendered upside down or another way or the light is low. You will need to adjust the vertices positions in Triangle TArray and Normals.
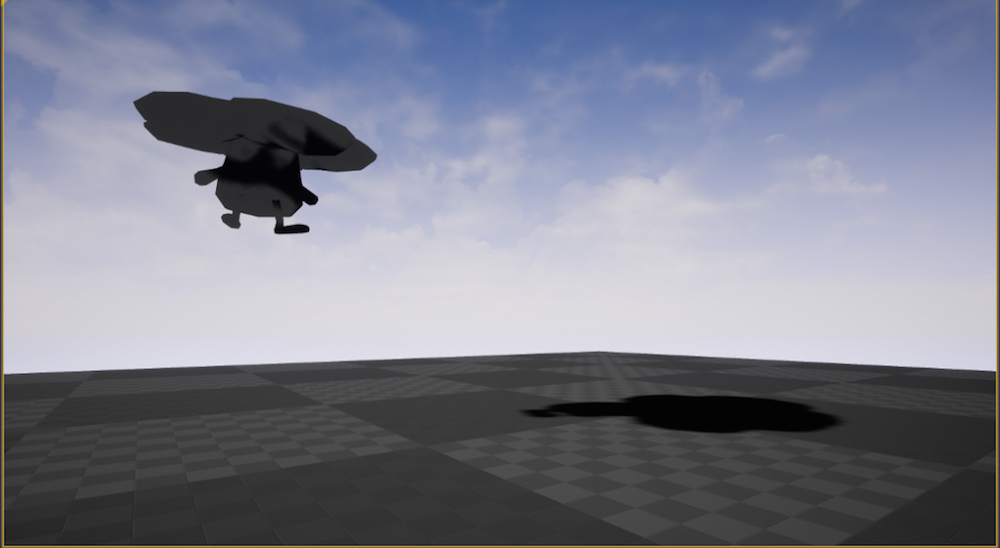
You can try making more complex models or using obj files. You need to make a parser for obj models to get the vertices, normals, etc. You need to know one thing, that Texures = UV. Using that parser, you can populate the values and get a model like this.
This is some Pokemon. I still need to add color and some other details though.
That's it for this tutorial. Enjoy!


